How to Migrate Squarespace to WordPress: A Step-by-Step Tutorial
Having a solid online presence is important for individuals and businesses. A website shows credibility and trustworthiness. It also serves as a great way to promote your brand to a broader audience.
Platforms like Squarespace make website building quick and easy. From portfolio websites to online stores, there are multiple ready-to-go templates to build Squarespace sites. However, many users soon find the limited customization options this platform offers.
For those looking for a scalable solution, using WordPress might be the best option. As one of the most prominent content management systems (CMS), WordPress offers highly flexible features to build any type of website.
If you’re planning to migrate your old Squarespace website to WordPress, this article will walk you through the process with ease.
Important! This tutorial will show how to migrate to the self-hosted WordPress platform. So, the steps provided below may not work if you’re planning to host your site on WordPress.com.
Steps to Take Before Migrating a Website to WordPress
The first step you need to do is get a web hosting plan. Since there are numerous hosting providers available, be sure to do your research and choose wisely.
When choosing a web hosting provider, pay attention to the following factors:
- Budget – evaluate all web hosting types and pricing plans available. It is also important to determine your website needs, decide whether you want to start small or expect a lot of traffic within a short time. A good rule of thumb is to leave room for growth and expand your site as you go.
- Loading time – refers to the time needed to display your content. The shorter it takes, the lower your bounce rate. Not to mention it is also an important ranking factor for Google. A credible web host will provide features that can boost your site speed, such as a reliable web server, automated caching, and unmetered bandwidth.
- Server uptime – this is the amount of time your website is available. You would want your website to be accessible around-the-clock. Thus, never settle with a WordPress host that offers less than a 99.9% uptime guarantee to avoid as much downtime as possible.
- Security – make all of your sensitive information secure by choosing a reliable web hosting provider. A good provider should offer multiple layers of security features to prevent any cyber-attacks. Regular backups and updates are also crucial to prevent data loss and bugs from outdated software.
Another element to get before the site migration is a domain name. You can either buy a domain name from a domain registrar or a hosting provider. However, start with a quick domain availability check to make sure your desired domain name can be registered. If not, consider changing a domain name extension, using an alternative name, or buying it from the current owner.
You can find more instructions on how to buy a domain name in our beginner-friendly guide.
Domain Name Checker
Instantly check domain name availability.
However, if your Squarespace site already has a domain name that you want to keep, you will have to point it to your new WordPress website. The process is relatively simple – we will cover it in the following sections.
6 Steps to Migrate From Squarespace to WordPress
In this section, we will walk you through the six steps to move from Squarespace to WordPress, from exporting Squarespace content to setting up a new WordPress site.
Let’s get into the WordPress migration process.
1. Export Squarespace Content
The first step of migrating your Squarespace site to the WordPress site is to export all of your website data. Unfortunately, Squarespace limits the type of content you can export automatically.
All your basic pages will be exported as WordPress pages. Squarespace will also export all your posts under one blog page as WordPress posts. Moreover, gallery pages along with text, image, and embed blocks can also be automatically exported.
On the other hand, here is the list of content that you need to export manually:
- Event, product, album, and index pages
- Folders and drafts
- Audio, video, and product blocks
- Style changes and custom CSS
- Multiple blogs
You will have to create a new page in WordPress from scratch to export content manually. Then, copy the content from your old Squarespace site and paste it into the new WordPress page.
Additionally, you will also need to export all Squarespace images manually – we will go over the steps of doing so in the following sections.
Now that you know the exporting limitations, follow these steps to start automatically exporting your website data from Squarespace:
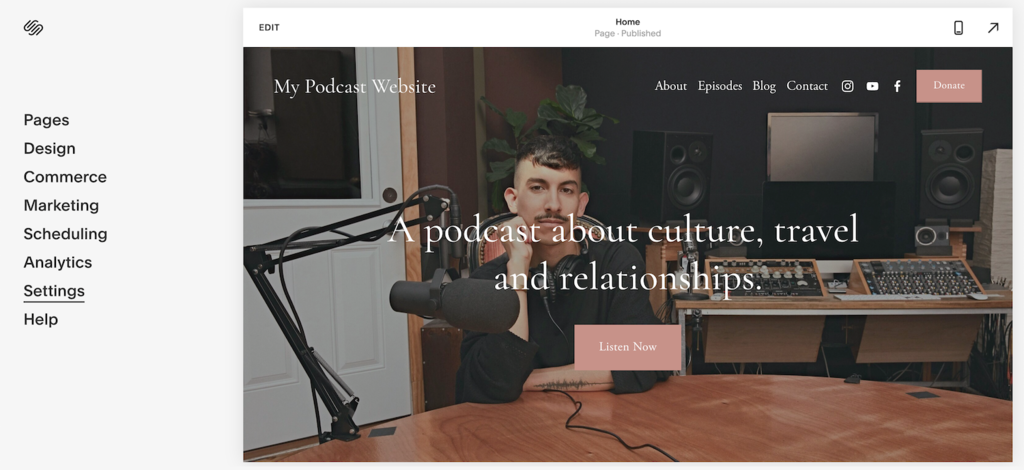
- Log into your Squarespace account, and choose the website you want to export.
- Access the website, and click Settings on the left menu bar.
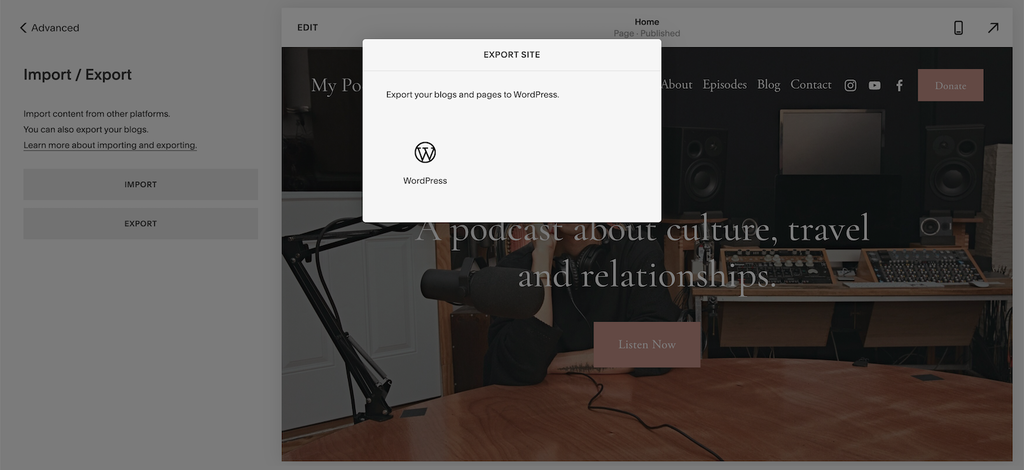
- Scroll down, locate Advanced, and click Import / Export.
- Choose Export, and select WordPress.
- If you have more than one blog page on your site, the Select Primary Blog window will pop up. Select your choice from the drop-down menu and hit Export.
- After Squarespace generates a .xml file, click Download. It might take a few seconds.
Once you have the Squarespace XML file in hand, proceed to the following step.
2. Import Content From Squarespace to WordPress
As this tutorial shows how to migrate Squarespace to WordPress, having WordPress installed on your Hostinger account is a must.
If you have already done that, skip the following steps on how to install WordPress using Hostinger’s Auto Installer:
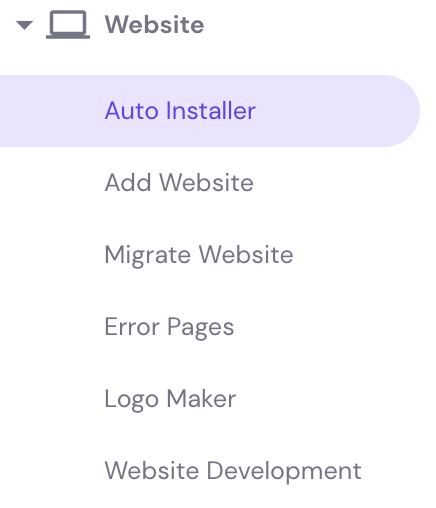
- From your hPanel dashboard, go to the Website section, and find the Auto Installer option.
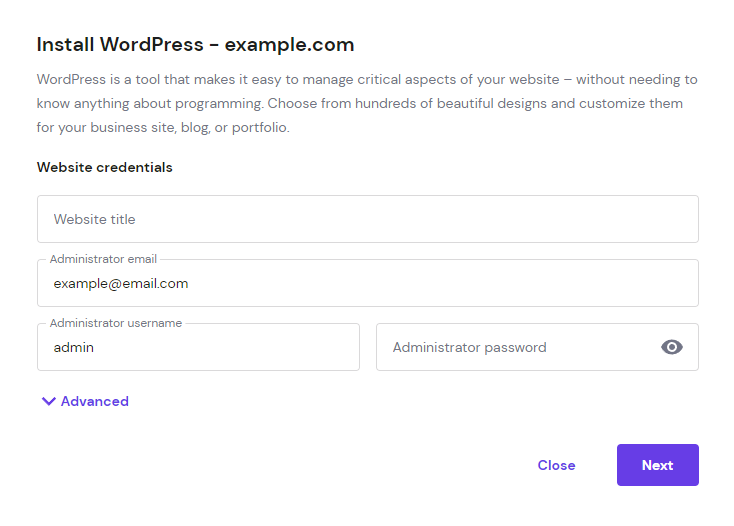
- Choose WordPress, and fill in your details in the required columns. Then, click Next. On the next page, you can change technical aspects like the WordPress version and the auto-update setting. Once you’re done, click Install.
- Wait for a couple of minutes until the WordPress installation process is complete.
Important! Write down your administrator username and password as you will need them to access the WordPress dashboard.
Once you have successfully installed the software, follow these steps to import content from your Squarespace site to WordPress:
- Log into your WordPress dashboard.
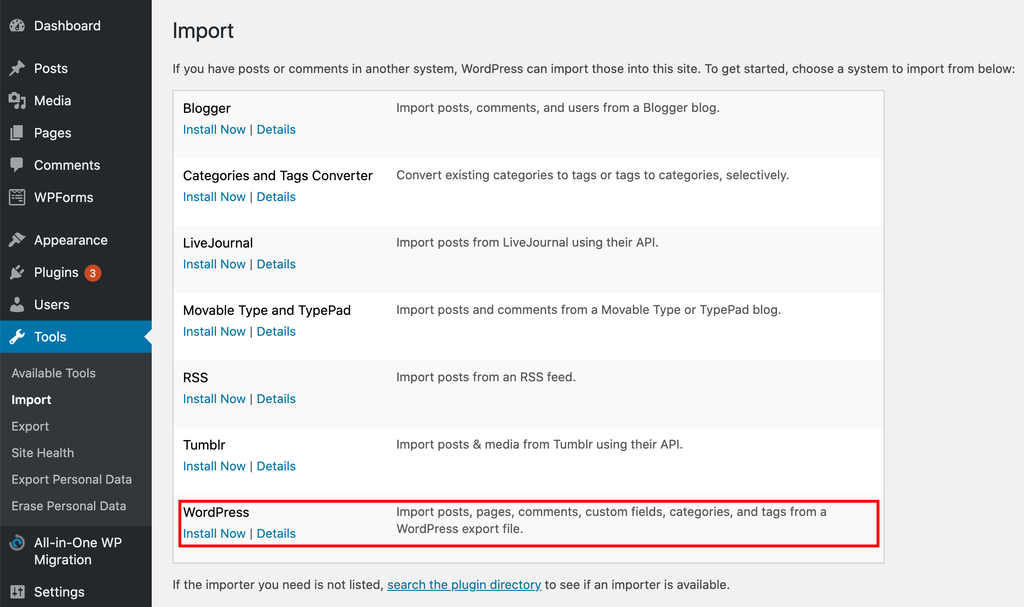
- Since Squarespace exports its content in the WordPress compatible .xml file format, you can use the default WordPress importer. With that in mind, head to Tools → Import. Go to the WordPress section, and choose the Install Now button.
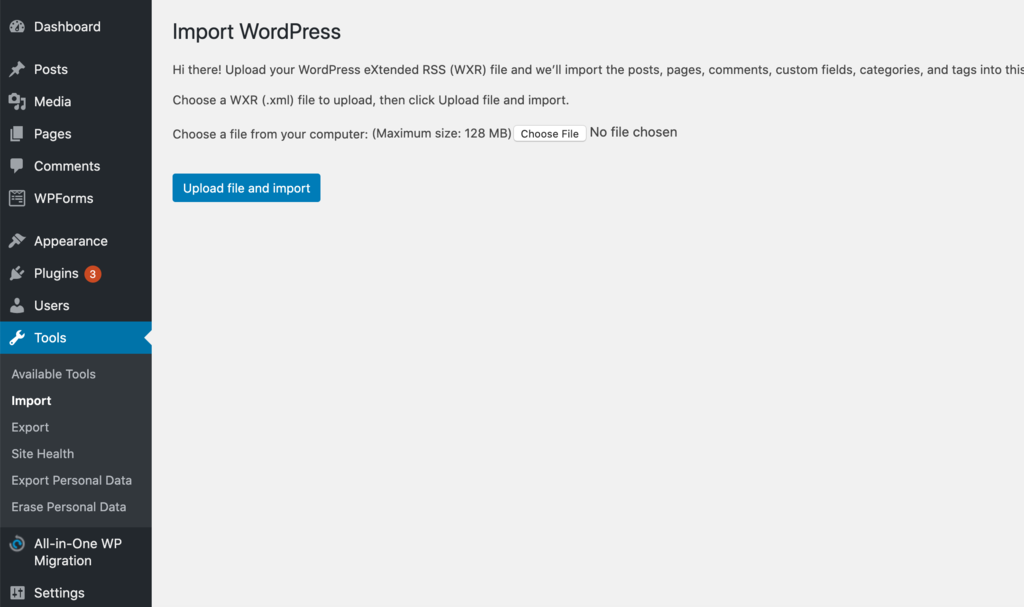
- Once the installation process is complete, click the Run Importer button. Then, select your exported file and click Upload file and import.
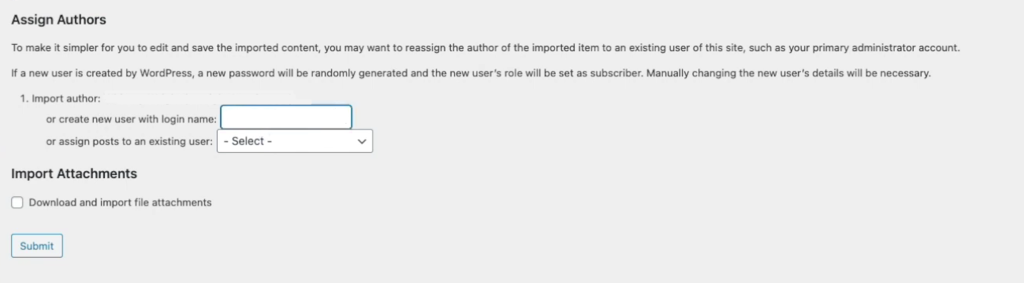
- Once the file is uploaded, the import settings page will ask you to assign an existing admin user or create a new one. You can also choose to download and import file attachments by checking the box. Select the options as per your needs, and click Submit.
If everything works correctly, you should see a success message and all of your content should appear in the WordPress Posts section. Now you can review your WordPress website and make sure all of the needed content is successfully imported.
Important! If the process runs out of time or returns an error message, try unchecking the Download file and import file attachments option. Depending on your Squarespace’s server configuration and the size of your Squarespace site, this option may prevent the import process from completing successfully.
3. Import Images From Squarespace to WordPress
While checking your new WordPress site, you might notice that some of your images are still hosted on Squarespace. It means that the WordPress importer failed to import those images automatically.
To migrate all of your images to WordPress, you will have to add them manually or via a plugin. Since doing it manually can take a lot of your time, we’ll show you how to use the Auto Upload Images plugin instead.
This plugin makes importing images quick and easy. It searches for image URLs in your old Squarespace blog posts and uploads them automatically to the WordPress media library. It also replaces old image URLs with new ones in your server.
All you need to do is install the plugin and activate it in WordPress, then update all of your posts containing images to trigger the auto-upload using Bulk Actions.
Here’s how to do it:
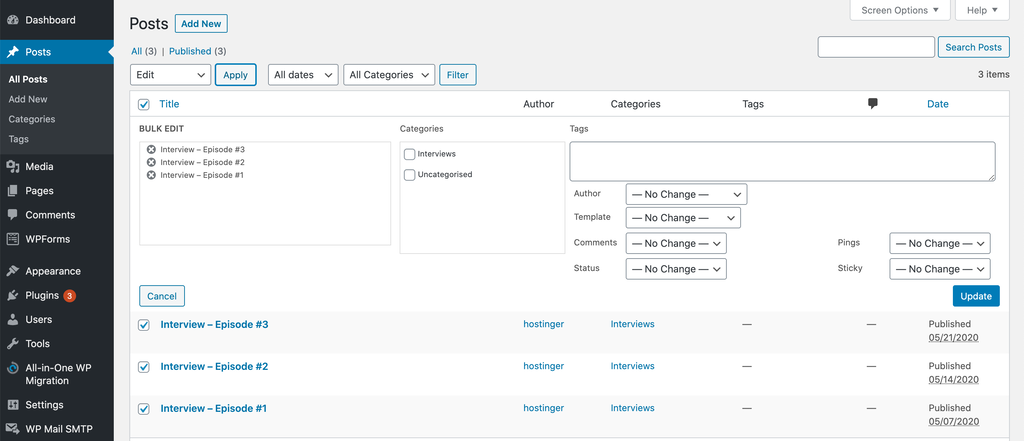
- Go to Posts and select the posts you want to update.
- Head to the drop-down Bulk Actions menu, and choose Edit. Then, click the Apply button next to it.

- Once a new window pops out, don’t change the settings and simply click Update.
- Now, all of the images from Squarespace should be uploaded to your WordPress server and updated in your posts automatically.
4. Point Your Squarespace Domain to Your New WordPress Site
If you’ve been using a custom domain name on your Squarespace site and want to continue doing so after the website migration, you will need to change your domain’s nameservers.
Nameservers help direct traffic from your domain name to the host’s web server, allowing visitors to view your website. When moving to a new hosting provider, it’s vital to point your domain nameservers to the new host to keep your site accessible.
The process depends on where your domain name is registered. If the registrar is Squarespace, log into your Squarespace account, access your DNS settings, and change your nameservers within their hosting dashboard.
However, if you have registered the custom domain with a different company, the DNS details will have to be changed in their system. To illustrate the process, we will show you how to point your domain to Hostinger:
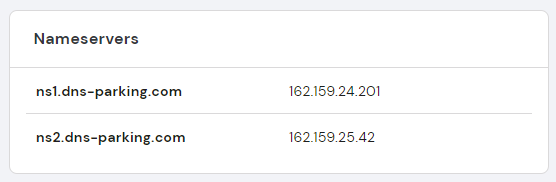
- First, get the nameservers value of your new hosting provider. At Hostinger, users can access the hPanel dashboard and go to Hosting → Plan details. You should find a list of nameservers there.
- Next, replace your domain’s old nameservers with new ones. To do so, access your domain registrar’s dashboard – each registrar has its own setting, but generally, this option should be under the Domain Management or Domain Overview section.
- Hostinger users can go to the Domains menu. Then, choose your domain name and click on the DNS/Nameservers option. From there, select Change nameservers.
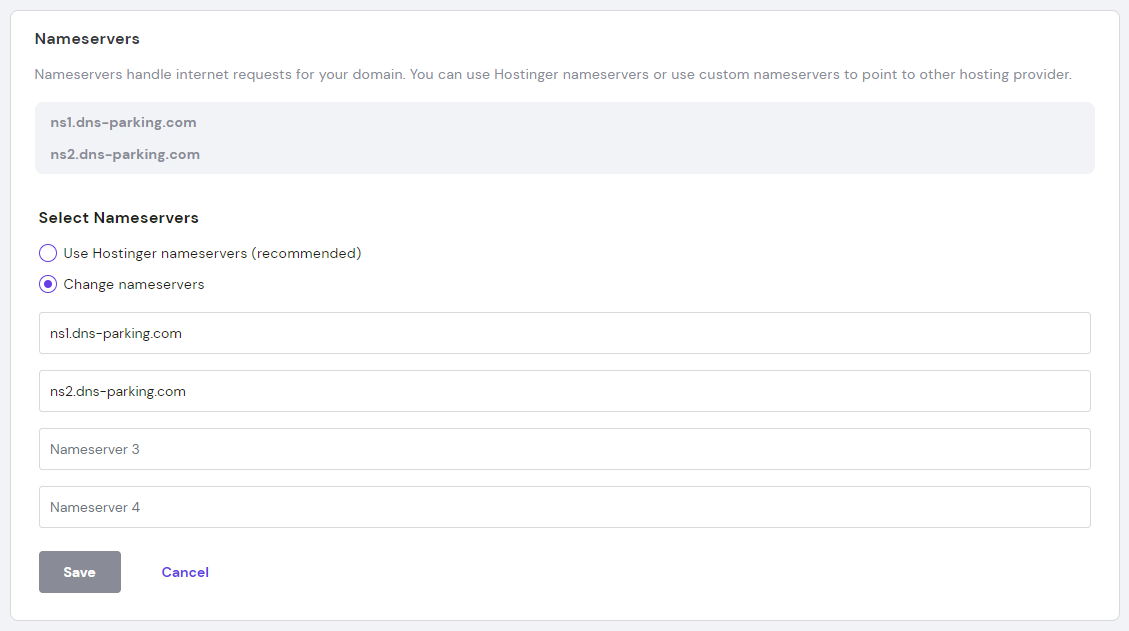
- There are several fields to fill your nameserver values in. Since Hostinger only has two values, fill them out in the appropriate fields. Nameserver 1 begins with ns1, while the ns2 value refers to Nameserver 2.
- Click the Save button to keep your settings.
When the new nameservers are set, it will take some time for the DNS to propagate. It could last for a few hours or even up to two days. To speed up this process, try flushing your DNS cache.
Alternatively, you can transfer your domain away from Squarespace to WordPress. However, this process can only work if your domain has been registered for at least 60 days. Additionally, you might have to pay a transfer fee along with the renewal cost in order to transfer your domain.
Refer to our article on how to transfer a domain from Squarespace to Hostinger for assistance.
This method only works if you have a custom domain name, as you can’t point the built-in Squarespace subdomain to any website or server.
5. Fix Permalinks in WordPress
Squarespace uses a different link structure than WordPress. Hence, migrating content from Squarespace to a new site without changing permalinks will result in 404 Not Found pages.
This error happens when the server can’t retrieve resources because the requested page is moved to a new location. Therefore, it is important to modify the URL structure on your new WordPress website and make it similar to your old Squarespace site.
Doing this step will prevent you from losing your search engine ranking and incoming traffic.
Squarespace uses year/month/day/post-name as the link structure for blog posts. Furthermore, Squarespace URLs also have prefixes like blog-1.
To illustrate, a Squarespace URL with a custom domain looks like the following:
http://www.yourdomain.com/blog-1/2020/1/1/post-example
Here’s how it looks like with a Squarespace subdomain:
http://www.yourdomain.squarespace/blog-1/2020/1/1/post-example
Follow these steps to change the permalinks of your new WordPress site and create the same URL structure as Squarespace:
- Log in to your WordPress dashboard, and go to Settings → Permalinks.
- Select the Day and Name option, as it’s the most similar to the Squarespace URL structure.
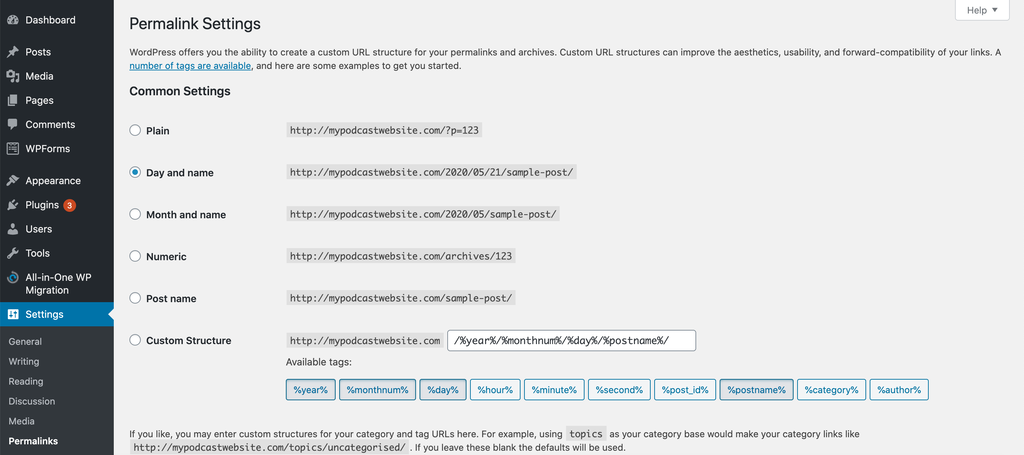
- Head to the Custom Structure field, and add the blog-1 prefix in front of it so it would look like this:
/blog-1/%year%/%monthnum%/%day%/%postname%/
- Hit the Save Changes button at the bottom.
The system will automatically redirect visitors from your old Squarespace site to your new WordPress site by fixing permalinks in WordPress. Hence, minimizing the risk of them running into a “404 error not found” page.
That being said, we recommend you scan and track your WordPress site for any 404 errors. An easy way to do this is by using a plugin like All In One SEO. This plugin helps create redirects for any 404 pages found on your site.
Pro Tip
Choose Post Name as your WordPress default permalink setting for your next posts as it’s short and concise, arguably the best URL structure to maximize SEO.
6. Get Started With WordPress
Now that you have successfully migrated all of your content from Squarespace to WordPress, it is time to tweak your new WordPress site. Start by changing the look of your website by installing a WordPress theme.
The WordPress theme directory has a vast selection of free WordPress themes. Despite being free, the themes come with various features to make your website visually pleasing. Additionally, free themes are built with beginners in mind. Hence, being easy to use.
If you have a flexible budget, it is beneficial to invest in premium WordPress themes as they offer many customization options. For example, themes like Astra and Divi provide multiple ready-to-go templates to create an eCommerce site.
Now, let’s install a WordPress theme. If you download a free theme from the WordPress themes directory, the process is quite straightforward, taking just a few clicks:
- On your WordPress dashboard, click Appearance → Themes → Add New.
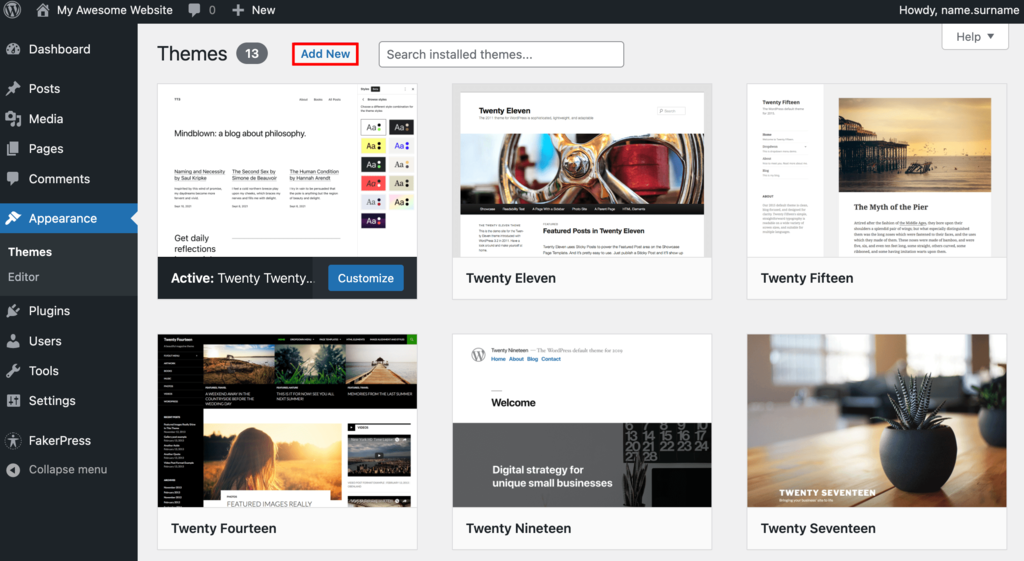
- Choose your desired theme – you can also apply several filters to look for specific themes based on your needs. To get a preview of the theme, click on the Preview button. Once you’re sure about your choice, click Install.
- Next, click Activate. Once the theme has been successfully activated, WordPress will send a notification.

One of the most significant advantages of switching to self-hosted WordPress is the ability to extend the functionality of your site. By installing plugins on WordPress, you can add features as simple as a photo gallery to complex functionality like website analytics and page caching.
To help you get started, below are some of the best plugins to install:
- WooCommerce – adds eCommerce functionality such as payment gateways, shipping options, and inventory management to turn your site into a functional online store.
- Yoast SEO – utilizes various ranking factors to improve on-page SEO and help your website rank higher in the search results.
- W3 Total Cache – increases site speed by improving your server performance and caching various elements on your website.
- MonsterInsights – easily connects your WordPress site with Google Analytics to monitor your website performance.
Warning! Use only one plugin for each function. Installing too many plugins might lead to resource overload. Not to mention, plugins with the same functionality can conflict with each other and trigger website errors.
With that out of the way, let’s install plugins on your new WordPress site. The most straightforward way is through its official plugins directory – here’s how to do it:
- From your admin dashboard, go to Plugins → Add New.
- Look for your desired plugin in the search bar.
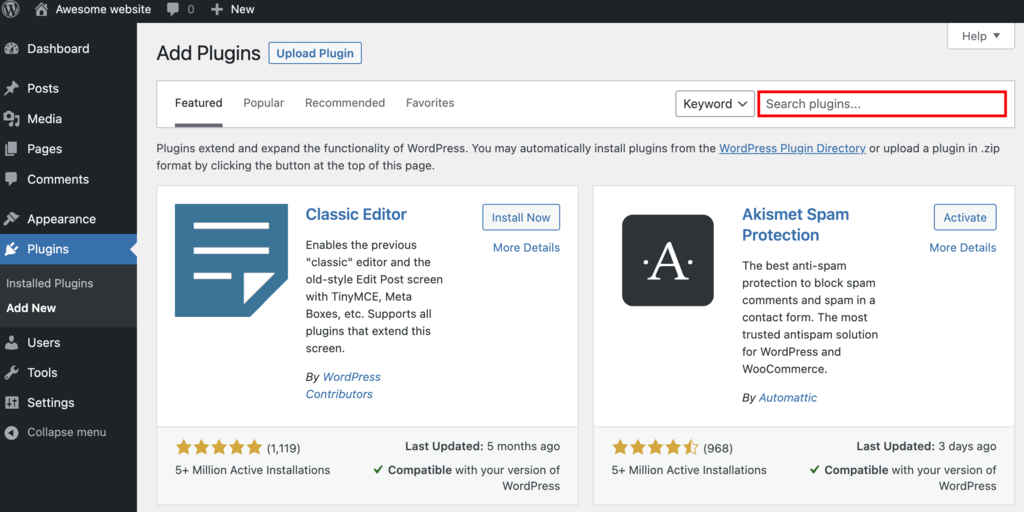
- Click Install Now, wait for the installation to complete, and click Activate.
- Go to Plugins → Installed plugins to find your new plugin and configure the settings.
What’s more, WordPress has a large community ready to answer any question you have about the CMS. Plus, there are many in-depth guides and tutorials to learn WordPress online.

Why Would You Want to Migrate From Squarespace to WordPress?
Squarespace is a popular all-in-one and beginner-friendly web building solution. However, while it is great for simple projects, Squarespace has a few shortcomings, such as not having enough third-party apps and limited design selections.
On the other hand, WordPress is known for its high flexibility. As it is open-source software, anyone can modify WordPress as they need. This allows users to build any type of website, from a simple blogging site to a complex online learning portal.
Although both platforms are viable options for website development, WordPress provides a better solution in the long run. If you’re still unsure whether to move from Squarespace to WordPress, let’s compare some of their core abilities.
Scalability
Scaling a website with Squarespace requires you to upgrade your plan. The more advanced the plan, the more features, and functionality are offered to grow your Squarespace site. However, you will have to spend more money despite not utilizing all of the additional features.
Whereas in self-hosted WordPress, scaling your website is much smoother and easier. Simply examine what your website lacks, find plugins with reliable features, and install them right from your admin dashboard.
Cost
Since the WordPress core software is free to download, the only expenses you should anticipate are the hosting and domain registration fees. Hence, the exact cost will depend on your needs.
For example, with as little as ₹139.00, you can have a Premium hosting plan enough to power a small website or run a business site for ₹239.00 with a Business hosting plan.

Meanwhile, the Squarespace plans cost from $12/month to $40/month. The most affordable plan comes with basic features, such as an SSL certificate and unmetered bandwidth. However, this plan lacks eCommerce and marketing features.
SEO Friendliness
The WordPress software is written using standard compliance code and provides many SEO-friendly features out-of-the-box. For example, WordPress allows users to set up clean permalinks that make it easier for visitors and search engines to understand your pages.
Optimizing WordPress images for SEO is also straightforward. There is an option to create an alternate text for every image. Moreover, there are plugins like Yoast SEO that helps you improve page rankings.
While all Squarespace plans come with SEO features, certain tools are limited to higher plans. Also, the limited integration with third-party applications might prevent you from performing the best WordPress SEO practices.
Learning Curve
Since WordPress comes with high flexibility and wide customization options, this platform has a steeper learning curve. Users might need basic technical knowledge to customize their WordPress sites fully. However, most users can adapt to basic WordPress features relatively quickly.
If you want to get the most out of your WordPress site without dealing with too much technical stuff, consider using managed hosting for WordPress. At Hostinger, we can also help you with the whole process of migrating from Squarespace to WordPress.
On the other hand, Squarespace offers an easy-to-use visual editor. Users can customize web pages simply by dragging and dropping various elements. However, the limited functionality might hinder you from optimizing your website.
Suggested Reading
Wix to WordPress
HTML to WordPress
Blogger to WordPress
Joomla to WordPress
Move WordPress from Subfolder to Root
Conclusion
Squarespace offers a quick and easy solution for beginners to create a website. However, if you need more features to scale your website, Squarespace might no longer be a viable option. In this case, moving your Squarespace website to WordPress can be the best alternative.
In this tutorial, you have learned how to migrate your Squarespace site to WordPress and point your Squarespace domain to the new WordPress site, together with modifying its permalinks to avoid losing traffic.
Here’s a quick recap of the steps:
- Export files from Squarespace.
- Import data to WordPress.
- Move images from Squarespace to WordPress using the Auto Upload Images plugin.
- Point the Squarespace domain to your WordPress site by changing DNS nameservers.
- Fix permalinks in WordPress to avoid losing website traffic.
- Get started with WordPress and get your new website ready.
Keep in mind that migrating all of your content to WordPress can take a while, depending on the size of your Squarespace website.
We hope this article will help with your website migration. Good luck, and leave a comment down below if you have any further questions or suggestions.

Domantas leads the content and SEO teams forward with fresh ideas and out of the box approaches. Armed with extensive SEO and marketing knowledge, he aims to spread the word of Hostinger to every corner of the world. During his free time, Domantas likes to hone his web development skills and travel to exotic places.


Comments
July 03 2019
Can you repeat these steps if you have multiple blogs on squarespace? Will the additional blogs import into your blog posts section?
September 24 2019
Hey Mike, Yes, multiple blogs can be imported into a single WordPress site.
October 28 2020
Can we do it even when the Squarespace license hasn't been renewed? Thanks!
February 02 2021
Hi, Alexandre! It's not possible to export from an expired website, but it could be that your old host still has a backup of your data. You should check with them directly about your backup.
October 20 2021
Thank you, so much...