How to Create a Post in WordPress: A Step-by-Step Guide
Whether you want to share thoughts, promote products, or provide information, learning how to create a post in WordPress is a fundamental skill for any website owner.
Starting a blog on WordPress and posting regularly keeps your site updated, provides valuable information for readers, and boosts search engine rankings.
This article will explain how to create a post in WordPress. We’ll also explore different tools, features, and options you can use. By reading this guide, you’ll expand your WordPress knowledge to create engaging and well-structured posts that resonate with your audience and elevate your site’s appeal.
How to Create a New Blog Post in WordPress
To create a blog post in WordPress, access your WordPress dashboard and navigate to Posts → Add New.
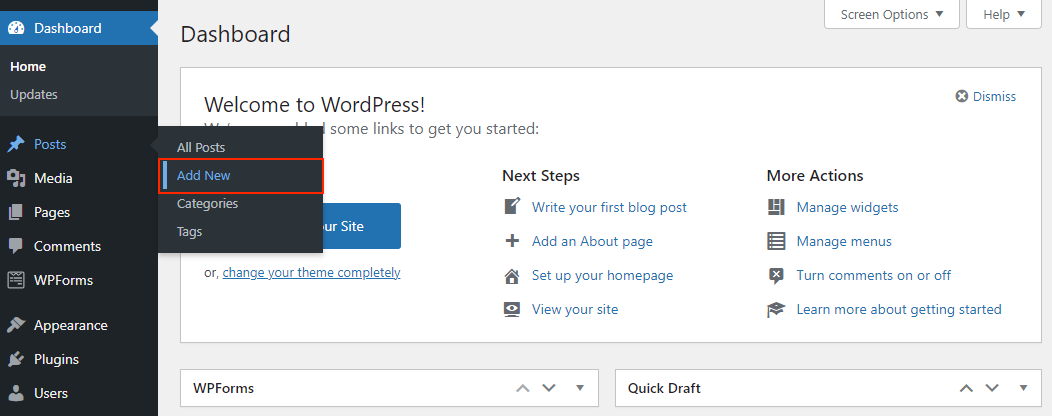
This will lead you to the Gutenberg block editor or the classic editor, depending on your settings. This tutorial will demonstrate how to create a post on WordPress using the block editor.
Pro Tip
Remember, WordPress posts and pages have different functions. Posts are for regular content updates, whereas pages are typically static and updated less frequently.
Once on the editor, make sure to add the following elements before publishing the new post:
1. Add the Title and Content
The post title and content are essential parts of WordPress SEO. While it is possible to publish without titles, readers will need extra help finding the WordPress post, which can hurt your website’s user experience.
The title and content boxes will appear when you open the visual editor. You’ll automatically see an Add Title field at the top of the editor.
Right below the title field is space to add any content type using blocks. If you’re starting with text, begin writing the blog post.
To add other blocks, click the + icon on the top left of the screen next to the WordPress logo.
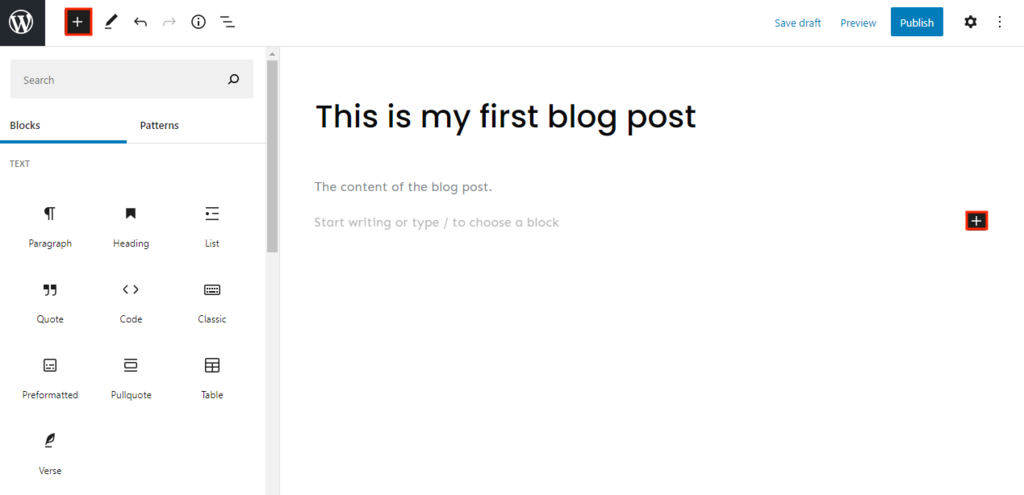
There are blocks for all common content types, including a Paragraph, Column, and Heading. You can also add widgets, such as Latest Comments and Search. There are also blocks designed to embed third-party content.
You can also transform existing blocks. For instance, you can change a paragraph into a column, heading, or quote by clicking the block icon button.
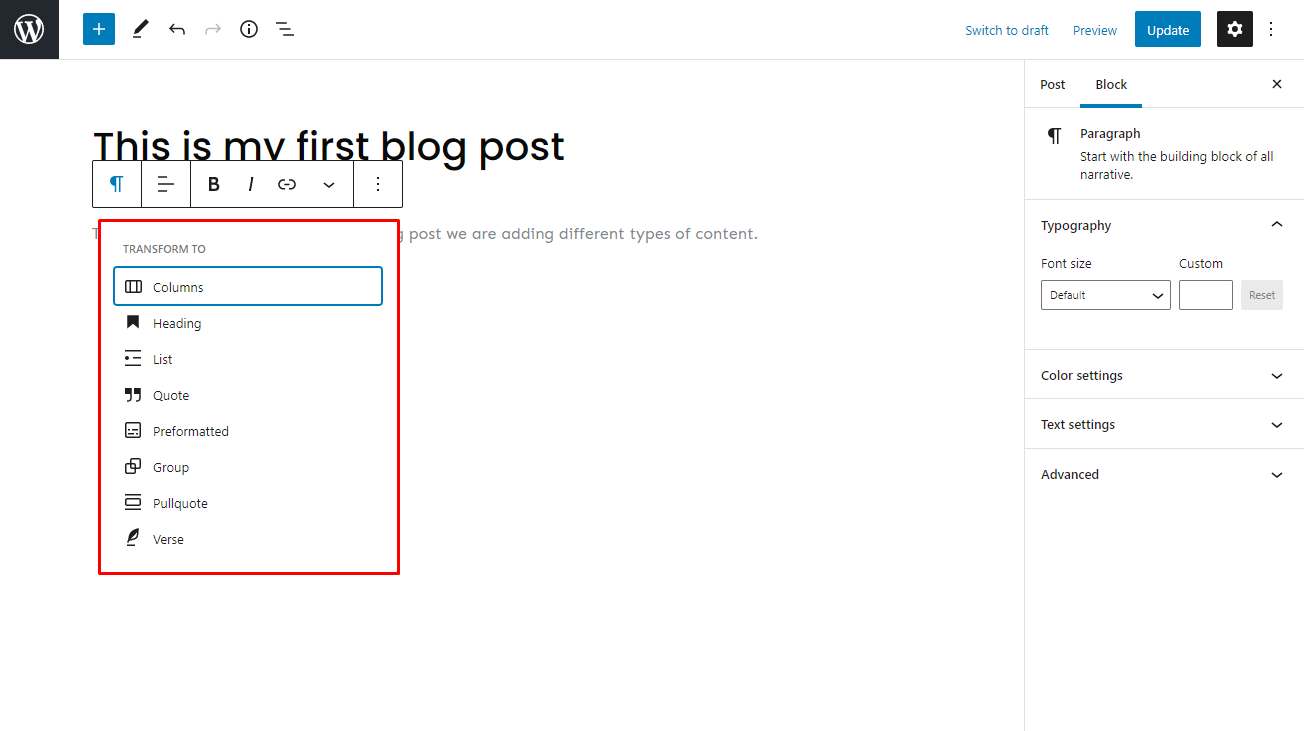
To make further edits, click the WordPress post Settings icon on the upper right corner of the screen. Then, select the Block section to view more editing options for all blocks.
If you find blocks too complicated, the Classic block lets you add content as you would using the classic editor. Then, it converts the content back to block form.
Pro Tip
Streamline your content creation with the Hostinger AI plugin. The AI tool can generate SEO-friendly blog content along with the title and featured image. You can easily transfer the draft to the post editor with a single click. Read our guide on how to use Hostinger AI plugin.

2. Add Images
It’s easier to capture visitors’ attention with images. Well-optimized WordPress images make your posts more appealing, increase site speed, and improve SEO.
There are two main image blocks – the Image block for uploading a single picture and the Gallery block for adding multiple images in a grid layout.
There are three ways to upload images using the WordPress block editor:
- Drag and drop the media directly into the chosen block.
- Add existing media from the Media Library.
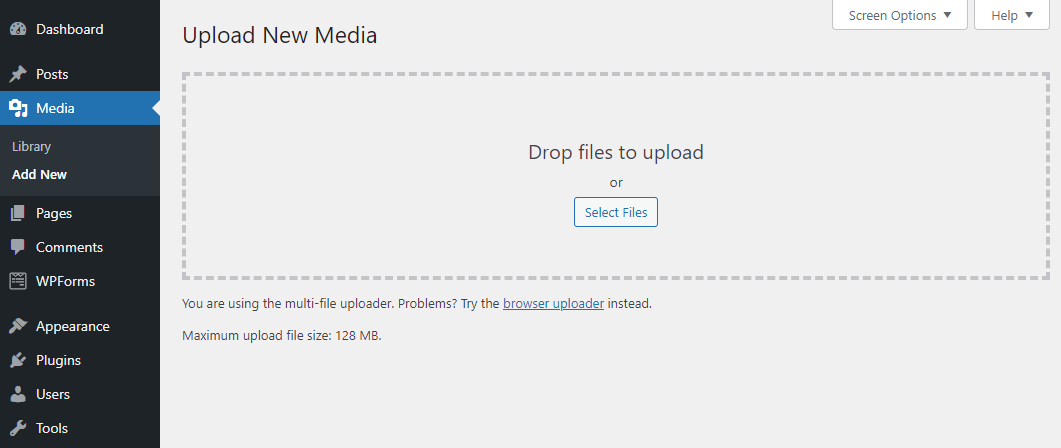
- Upload a new image by going to the WordPress Dashboard → Media → Add New.
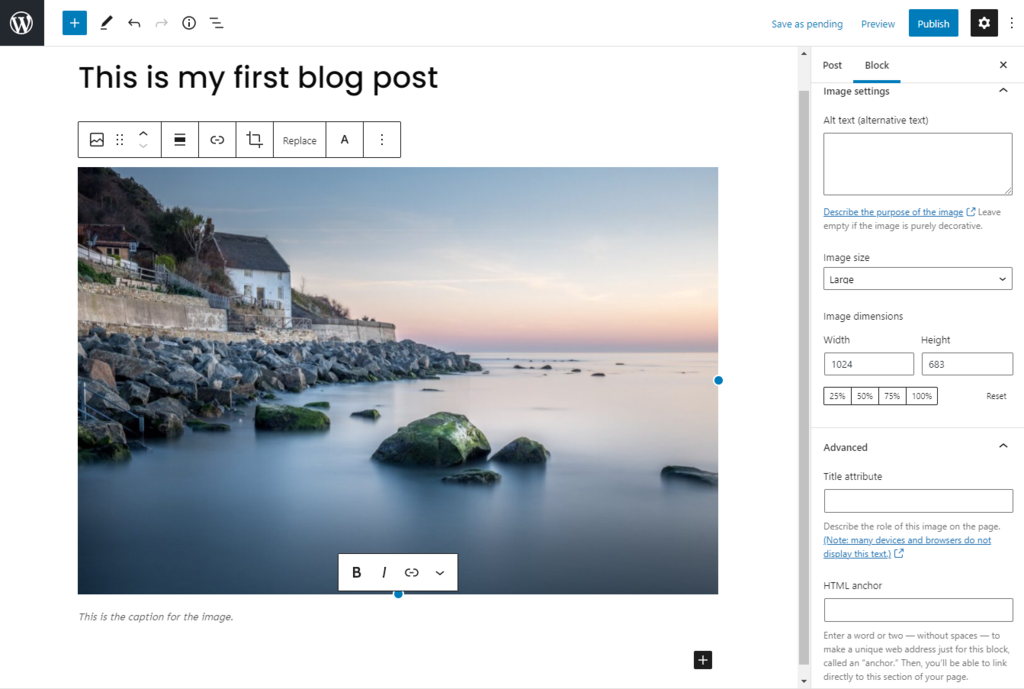
To edit the image, click it and head to Settings → Block. You can change an image’s style, size, and dimensions there. Use the default WordPress image sizes or customize them to suit your website.
3. Add Other Media Files
Other media files can enhance the visual appeal of a WordPress post, including videos, audio, and downloadable documents.
To upload a media file, head to Dashboard → Media → Add New.
You can also add media directly in the block editor. Click on the + sign, and head to the Media section.

Another way to add images, audio, and videos is by copy-pasting the file URL in the block. Since the media isn’t hosted on your server, it can help reduce the load on your hosting resources.
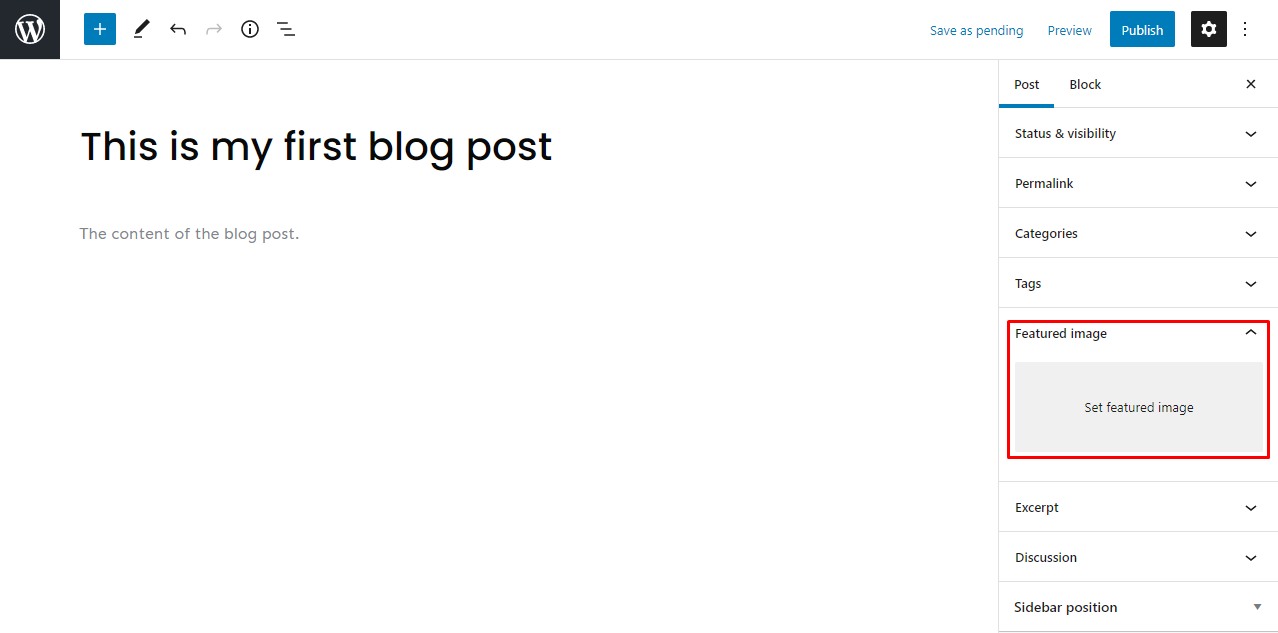
4. Add a Featured Image
A featured image or post thumbnail is a picture that appears on search engines or social media when a WordPress post is shared. It helps attract visitors, increase content value, and improve SEO.
To add a featured image, open your post-editing screen. Head to Settings → Post → Featured image, and click the Set featured image link. It will direct you to the Media Library, where you can pick an image.
Choose the image wisely. It is the first thing your WordPress site visitors will see before opening the post content.
The image you select can be edited using tools on the right side of the Media Library. You can also change the alt text, caption, and image description.
Click the Replace Image button under the Settings section to change the featured image.
However, it’s possible your theme doesn’t support a featured image. In that case, follow this guide to fix the WordPress featured image not showing error.
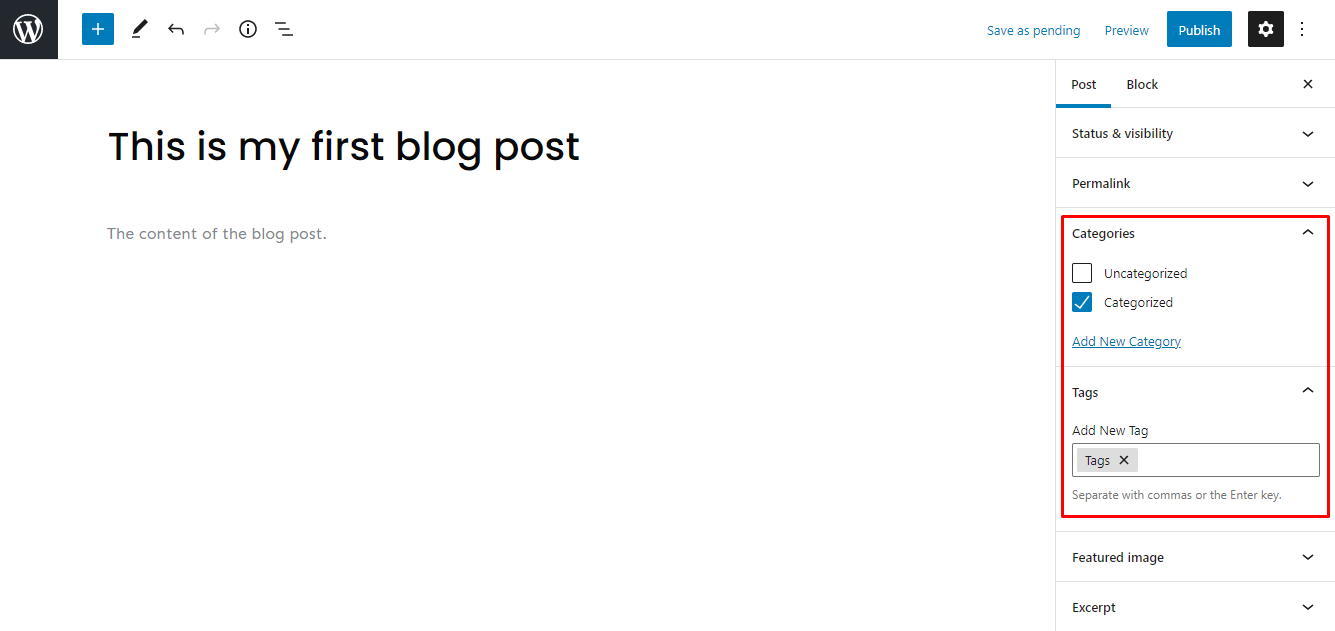
5. Add Categories and Tags
Implementing WordPress post categories and tags is essential for SEO and website organization. It’s also excellent for user experience, as visitors can quickly locate other WordPress posts within the same category.
Categories cover the general topics of the blog. Meanwhile, WordPress tags are more specific to the individual post. For example, when writing blog posts for a food recipe, the tag would be similar to “pasta recipes,” and the category would be “recipes”.
Remember that you can assign multiple categories and tags to a post.
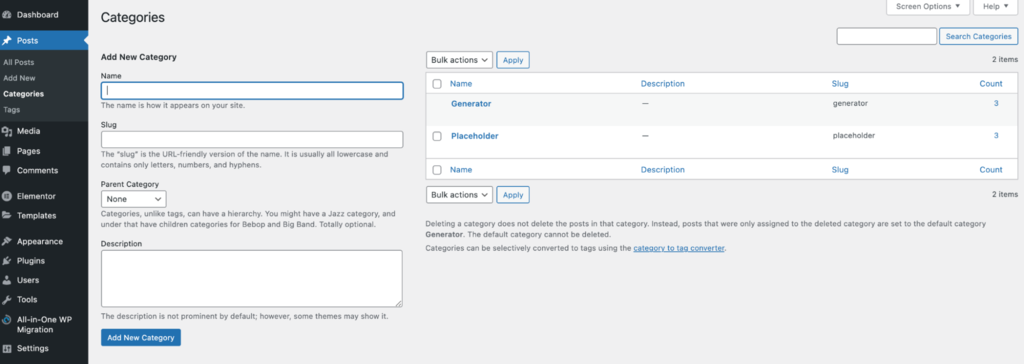
To add a new category or tag, go to Dashboard → Posts → Categories or Tags. From there, edit the name, post URL slug, and description. You can then view all the posts under the categories and tags.
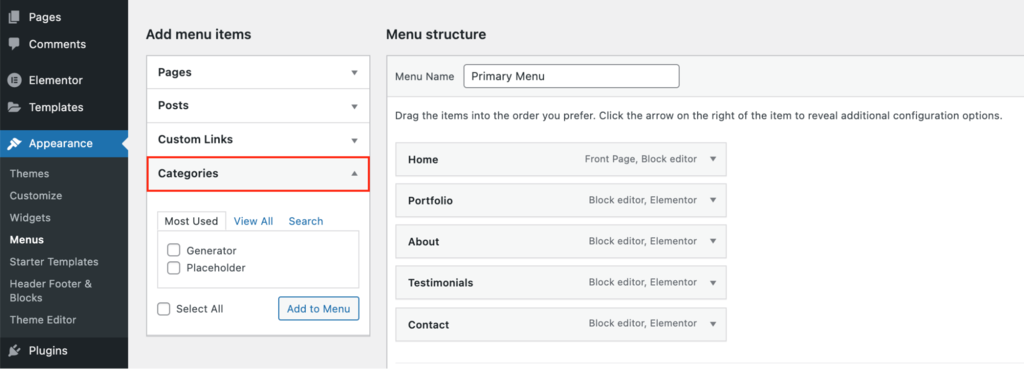
Furthermore, you can add categories to the website menu. Head to Dashboard → Appearance → Menus to find Categories under Add menu items. You can add posts, pages, categories, and URLs to your navigation here.
6. Set Permalinks or Slugs
As an essential part of on-page SEO, permalinks or slugs help increase the post’s ranking on search engines.
Permalink stands for permanent link, the WordPress post URL generated from the post title. Meanwhile, the part of the URL that automatically follows the title is known as the post slug or URL slug. You can edit the post slug via Settings → Post → Permalinks.
Note that punctuations like commas, quotes, and apostrophes are invalid URL characters. They will automatically be replaced with dashes.
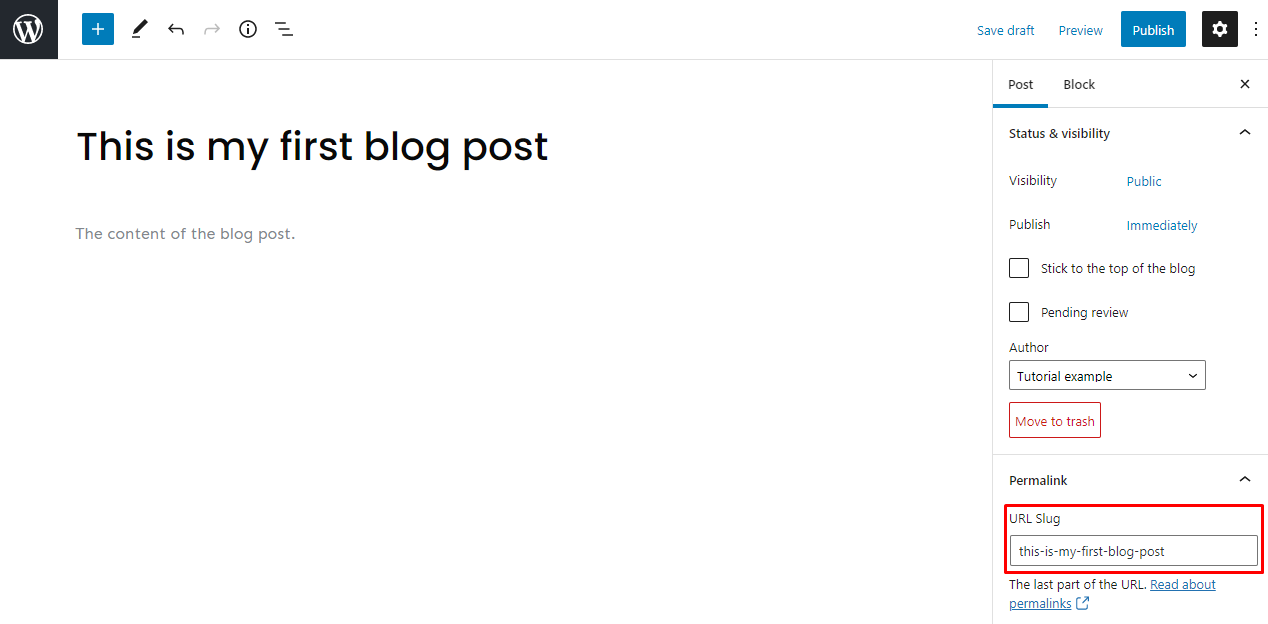
Fortunately, you can change a published post’s slug. If you changed a post title after publishing, recheck the slug.
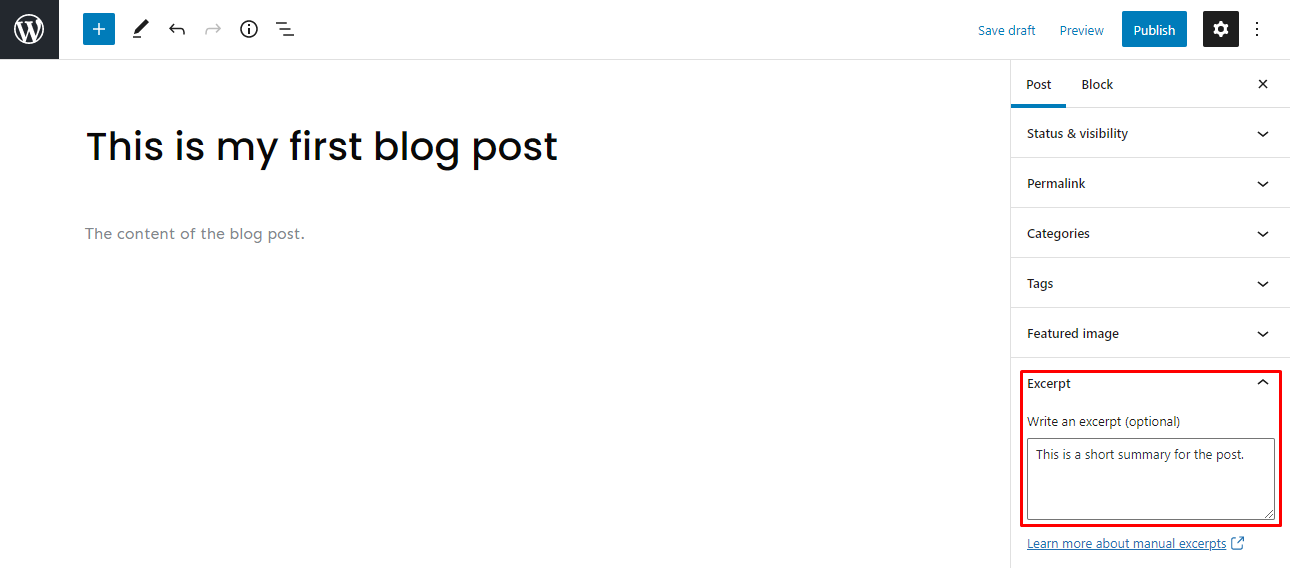
7. Add an Excerpt
An excerpt is the summary or teaser of the blog post. It attracts and engages readers because the title and featured image sometimes need to be revised.
WordPress will automatically use the first 55 words of the blog content to generate the excerpt. However, you have the option to customize it by heading to Settings → Post → Excerpt and writing in the box. You may even customize the word limit using HTML code or plugins.
In WordPress, there’s an option to display the full content of your article and blog post or only to show the excerpt. To display excerpts for your blog posts, head to Dashboard → Settings → Reading. Then, for Each post in a feed, include section, select Summary.
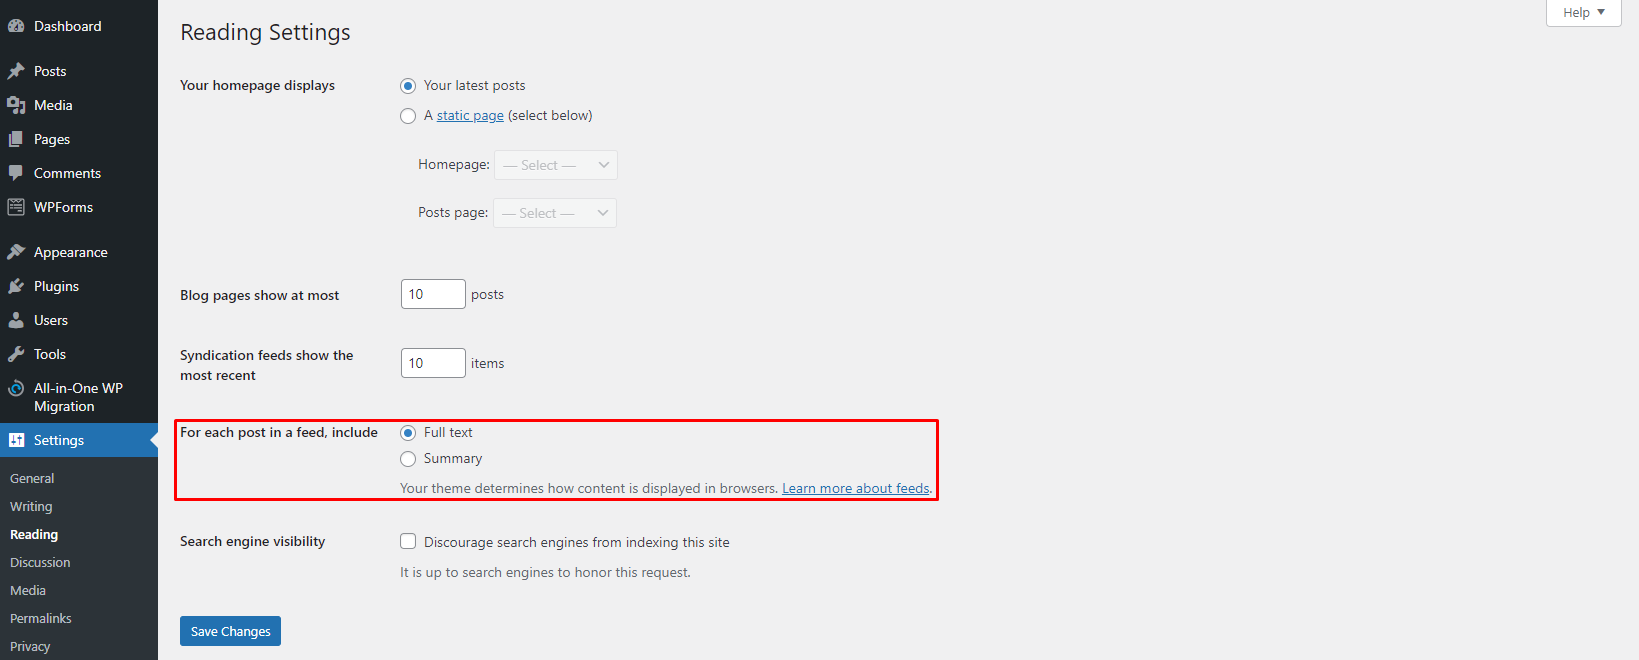
You can display more WordPress posts on the dedicated blog page by only showing excerpts. This can help generate more clicks.
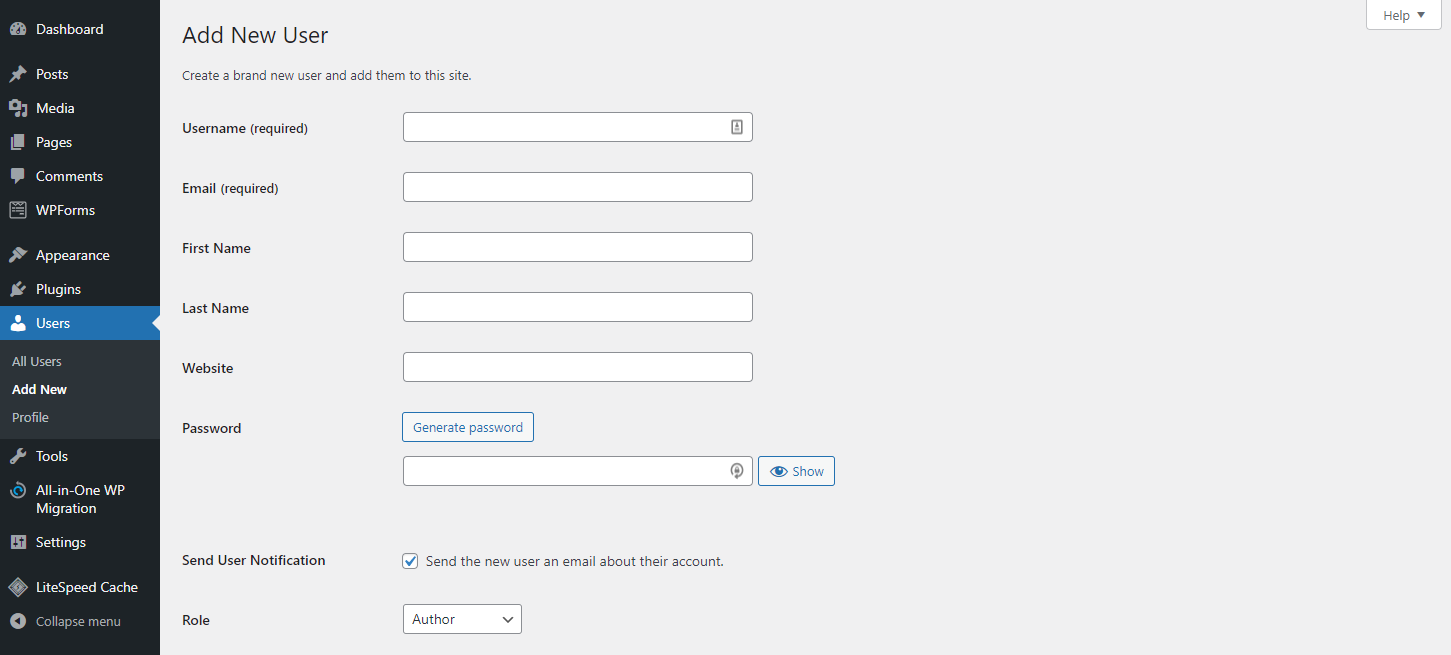
8. Choose the Author
If your website has multiple contributors, assigning an author for each post is important for proper crediting. Although WordPress assigns the website’s creator as the default author, you can select different authors for each post.
To assign different authors, add more WordPress user roles first. Head to the Dashboard → Users → Add New. Fill out the username and email address, then change the role to Author.
To view all authors on your WordPress website, go to All Users. Make sure to check Role in the Screen Options tab. You will be able to see all of the users and the roles.

To change a post’s author, open the block editor and go to Settings → Post → Status & Visibility → Author.
WordPress Post Publishing Options
After learning how to create a new post in WordPress, let’s proceed to publishing.
Draft
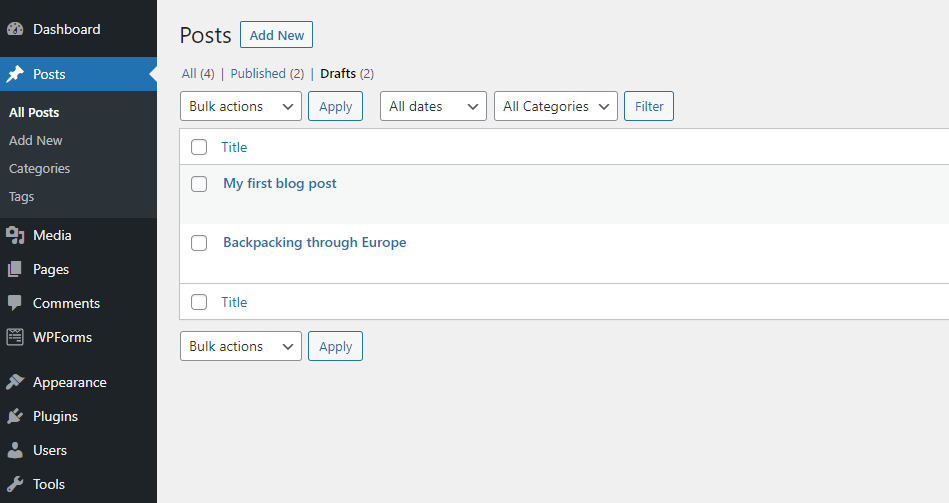
WordPress has a handy autosave feature. However, we suggest saving manually by clicking the Save draft button on the top right corner. The Save draft option lets you save the progress for each post without publishing. To find all drafts, go to the Dashboard → Posts → All Posts → Drafts.
Once you have published the post, there is also an option to change the post back to a draft. To do this, go to the editor and click the Switch back to draft link on the top right corner of the screen.
Preview
The Preview button shows users how the post will appear on the website. This feature helps you check for any necessary adjustments before publishing. Depending on your WordPress theme, the content presentation can change drastically.
The Preview option can also adjust to different screen sizes. It shows a desktop preview by default, but you can also check how the post will look on tablet and mobile.
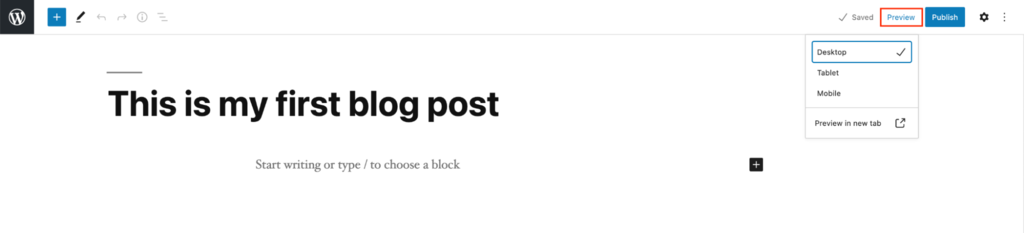
Note that the Preview in new tab option only works for the desktop view.
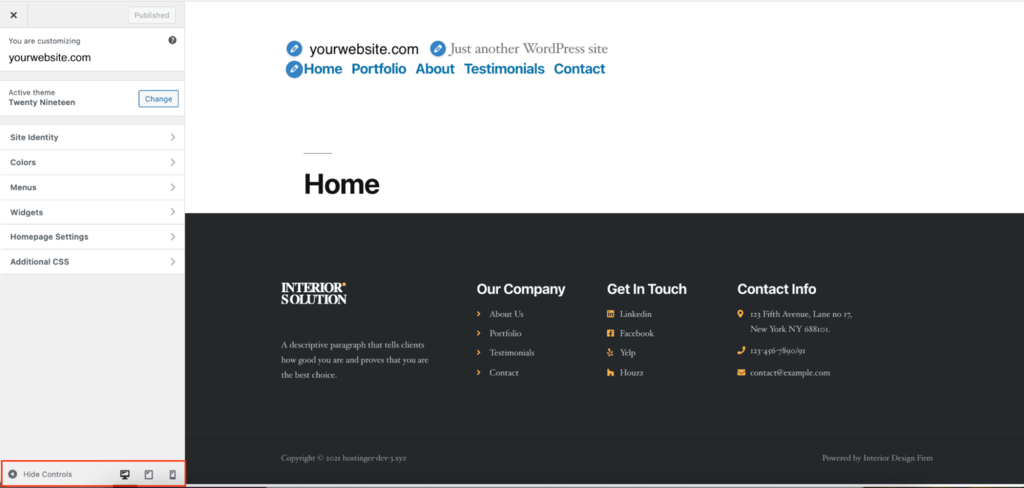
To display the website preview on other screens, head to the Dashboard → Appearance → Customize. Change between the three different icons on the bottom left corner of the screen.
Nowadays, most people browse the internet using mobile devices and tablets. This option helps adjust the WordPress post to different screens.
Status and Visibility
There are three options for post visibility:
- Public – makes the post visible to anyone.
- Private – private posts are only visible to authorized users logged in to the Dashboard.
- Password Protected – create a unique password for your post and give access only to those who know it.
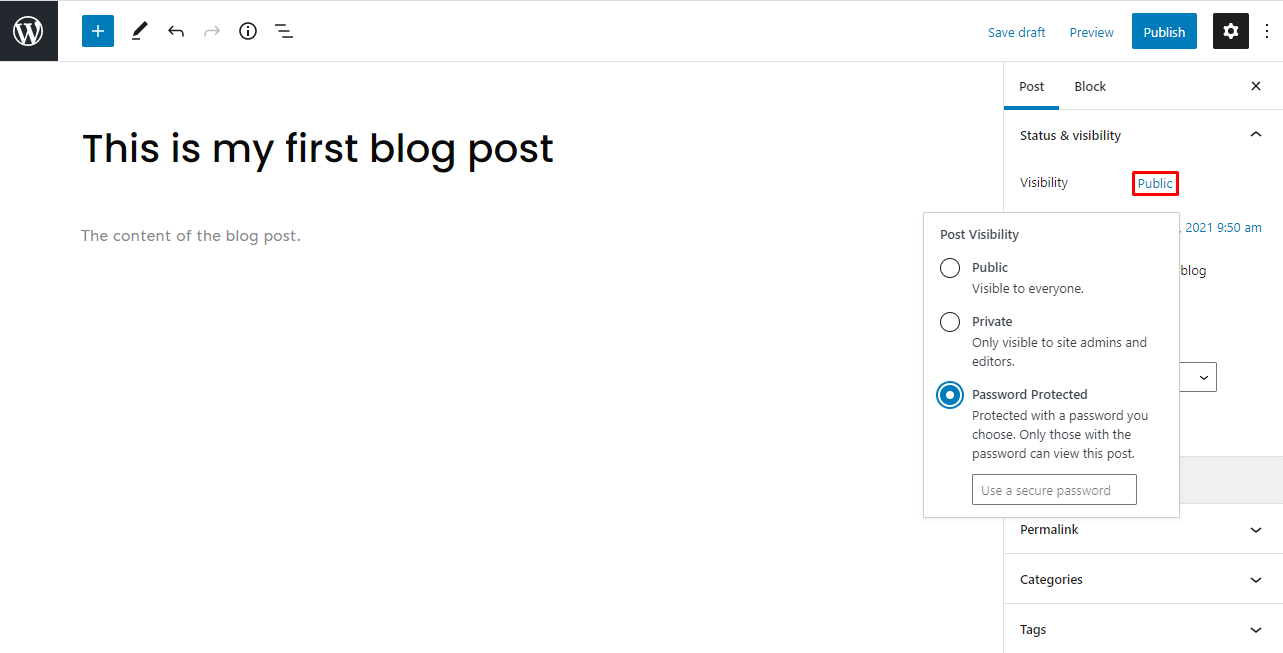
You can change the visibility type of a post that’s already published. To do this, head to Settings and click the link next to Visibility.
Scheduling
If you don’t want to publish immediately, the scheduling posts feature lets you set a specific time for the post to be published.
To schedule posts using WordPress, click the Settings icon and then the link next to Publish. It will display a calendar and an option to set the exact minute, hour, day, month, and year. If you have a global audience, check time zones before publishing.
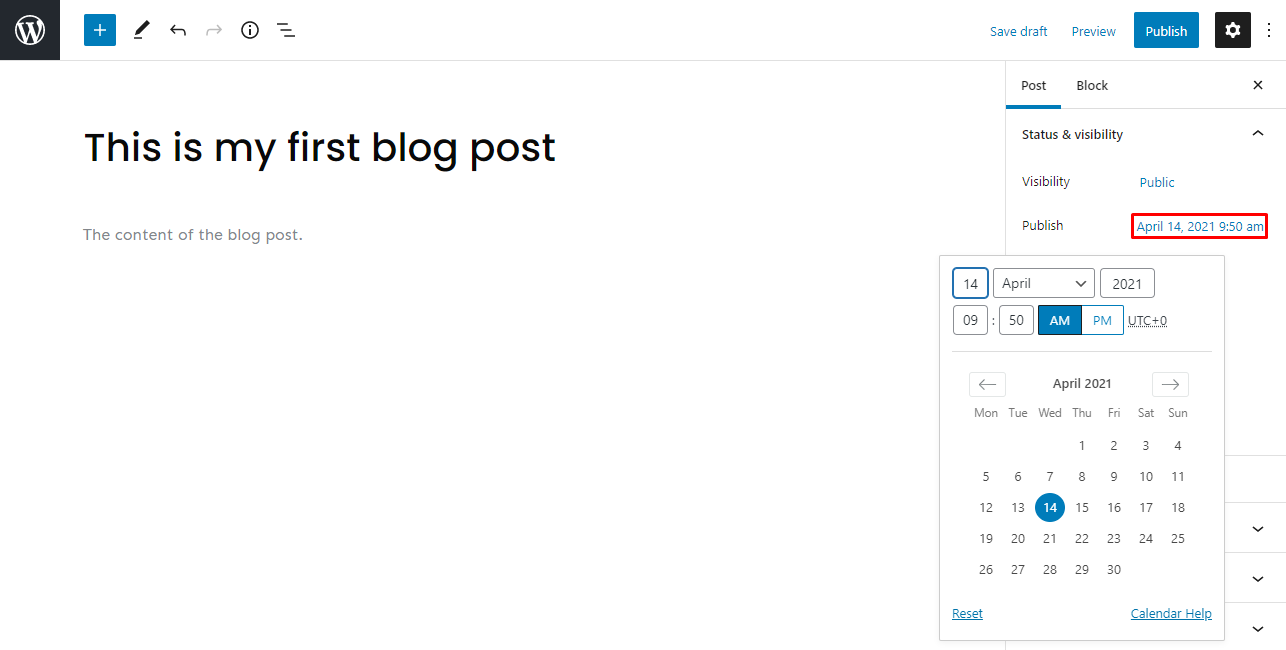
You can schedule WordPress posts for a future or past date. This is useful when you want a post to appear as if it was published immediately on a different date.
Sticky Post
WordPress displays posts in reverse chronological order by default, with the most recent posts at the top. The sticky post feature lets you choose an article to always appear on top of other posts on the WordPress blog page.
Sticky posts are especially useful for featured content or those with an expiration date, like a giveaway competition for readers. Although WordPress doesn’t limit the number of sticky posts, we recommend using this option sparingly.
To pin a particular post, go to Settings → Status & Visibility and check the Stick to the top of the blog option. This will automatically put the article above other posts.

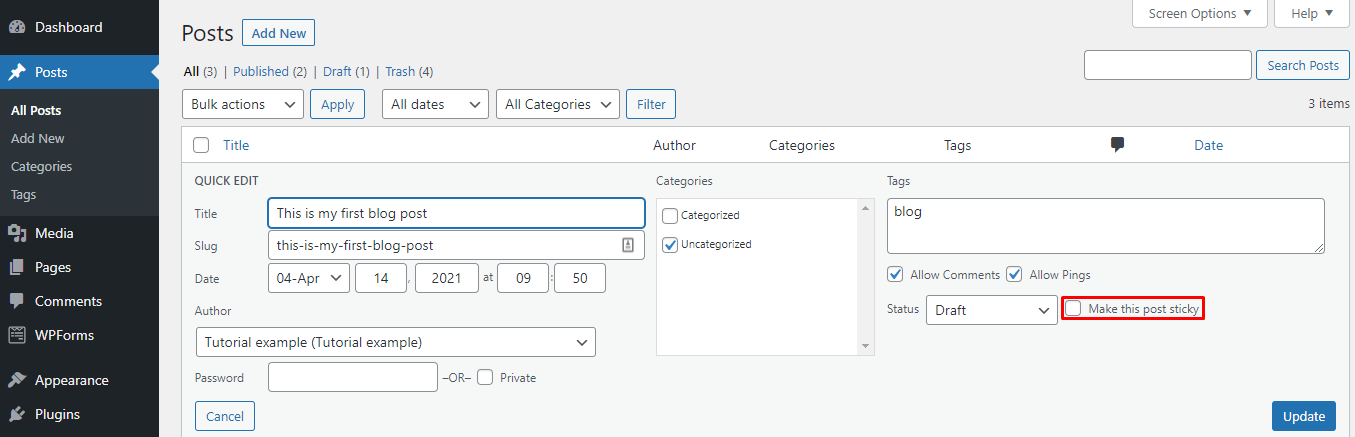
Another way to change the sticky post feature on an article is to go to Dashboard → Posts → All Posts. From there, click on Quick Edit under the article and tick the Make this post sticky option.
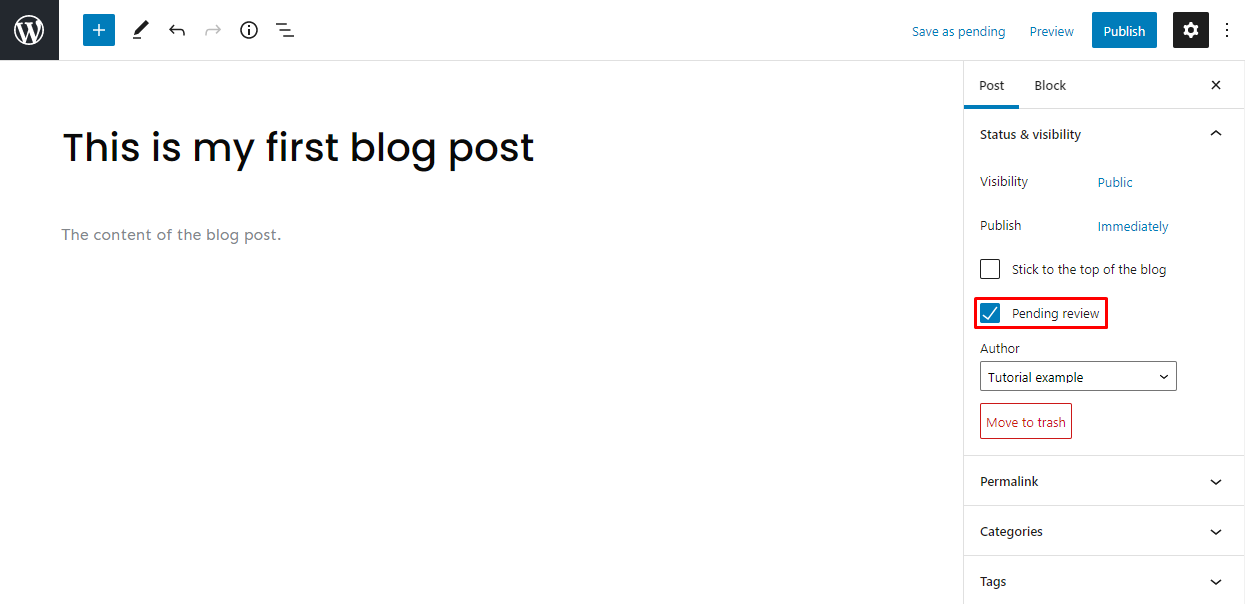
Pending Review
This feature tells other back-end WordPress users that the article is finished and needs to be reviewed before publishing. WordPress adds the Pending status next to your article by checking this setting.
This is a useful feature for websites with multiple authors who need to inform one another about drafts that need to be reviewed. For single-author websites, the Pending status can act as a reminder to review a particular article before publishing.
Publish
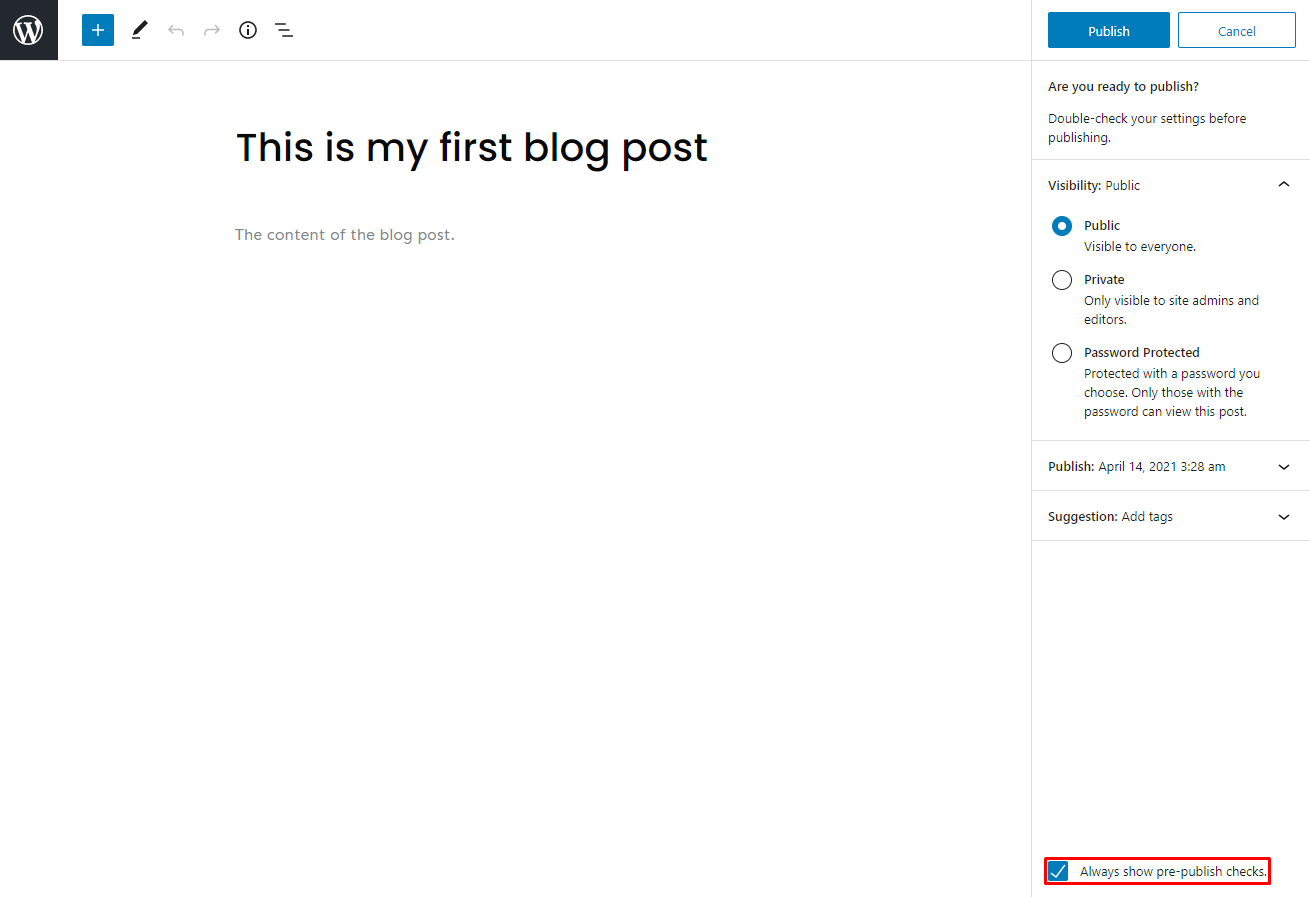
Now that you know the options and processes, it’s time to publish the draft article. When you click the Publish button, it will show the visibility of the post, the publish date and time, and suggestions from WordPress.
If you don’t want to do pre-publish checks for your posts in WordPress, uncheck the box on the bottom right side of the screen.
Delete a Post
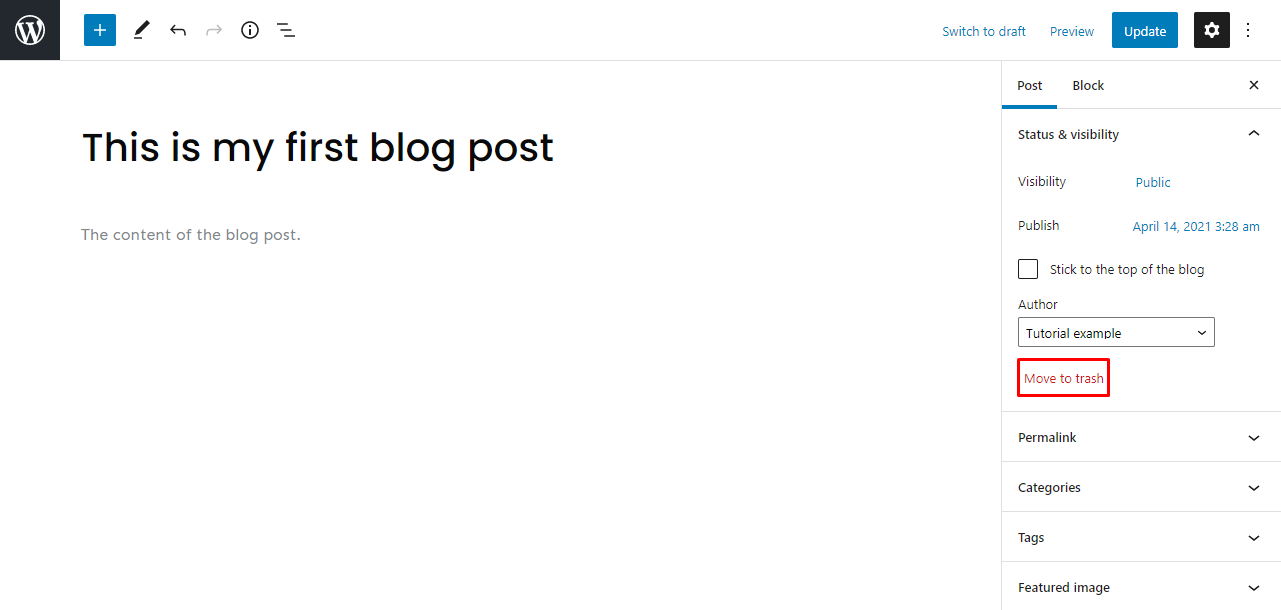
There are different ways to delete a post. The first option is to go to Settings → Move to trash in the editor.
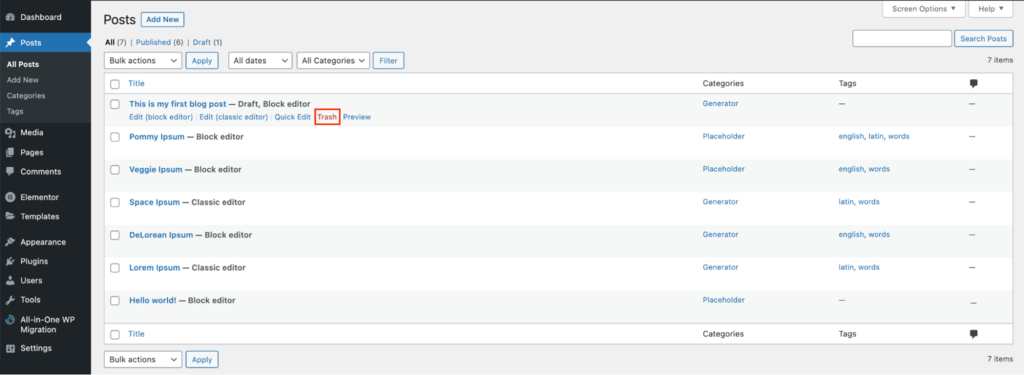
Another way is to go to Dashboard → Posts → All Posts, hover over a specific post, and click Trash.
By default, the WordPress database saves deleted posts for 30 days before removing them permanently. If you change your mind, simply access the trash folder and click the Restore button on a deleted post.
Block Editor vs Classic Editor
The block editor and classic editor are tools for creating and editing posts and pages in WordPress.
The classic editor uses a formatting toolbar similar to Microsoft Word or Google Docs. It includes a visual editor for users who prefer to see what the content looks like visually and a code editor for people who like to edit using HTML code.
Meanwhile, the block editor is a simpler tool to write posts with its drag-and-drop interface. Introduced as the default WordPress editor since version 5.0 in 2018, it employs movable blocks to arrange the content, offering a flexible approach to design and layout.
This streamlines the process of adding posts to specific pages or customizing what to display on the front page. It allows for a more dynamic and visually oriented organization than the classic editor.
While you can’t use the classic and block post editors simultaneously, you can switch from the block editor to the classic editor by installing the Classic Editor plugin.
To change the default WordPress editor to classic, head to the Dashboard → Settings → Writing and change the Default editor for all users setting.
Conclusion
Creating a blog post in WordPress is more than just writing content. In this article, we’ve learned the steps to create posts, explored the publishing options available in WordPress, and discussed the classic vs the block editor.
Here are some of the most commonly used features for creating posts in WordPress:
- Title and content. These are the main aspects of a post. The title should clearly describe the content and what the reader should expect.
- Images and media. Add visual aids to enhance content quality and the site’s SEO.
- Featured image. An image appears on search engines and social media platforms for a particular post.
- Categories and tags. These help organize content and can be used in navigational menus.
- Permalinks and slugs. Primarily used to improve on-page SEO.
- Excerpt. A short description of a post used to attract more visitors.
Meanwhile, the publishing features of WordPress include:
- Draft. An unpublished post that is only accessible by back-end users and is not visible on the website or search engines.
- Preview. Shows what end users would see if the post was published.
- Status and Visibility. Lets you decide which users can see the content.
- Scheduling. Set the exact date and time for a post to be automatically published.
- Sticky post. Makes the post appear at the top of the blog page.
- Pending review. Shows that the post is finished but needs to be reviewed before publication.
Now that you know how to post a blog in WordPress, it’s time to start writing and growing your site. If you have any more questions regarding this topic, feel free to post comments below. Good luck!
Learn What Else You Can Do With WordPress
How to Login to WordPress
How to Install WordPress
Guide to WordPress Security
How to Launch a WordPress Site
How to Edit Categories in WordPress
How to Add Social Media Icons in WordPress
How to Use WordPress Gallery

Astari is a digital marketing expert, with a focus on SEO and WordPress. She loves to share her wealth of knowledge through her writing, and enjoys surfing the internet for new information when she's not out in the waves or hiking a mountain. Her mission is to learn something new every day, and she firmly believes that there is no such thing as too much knowledge.