WordPress Tags: What Are They and How to Use Them Correctly?

WordPress tags is one of the tools you can use to group your posts, based on similar details.
Usually, tags are located under a post or in the sidebar. When a visitor clicks a particular tag, WordPress will open an archive page (tag page) – indexing all the posts and custom post types that have the same tags.
Tags play a vital role in organizing your content. They have a direct impact on your user experience and SEO.
Here is an ultimate guide, where you will learn everything you need to know about tags, with some additional WordPress SEO tips for the tag pages.
WordPress Categories vs Tags
Technically, both categories and tags are WordPress’ taxonomy. Simply speaking, they classify your posts.
However, we use tags and categories in a different way. Here are the main differences:
1. Broad vs Specific
The main distinction between categories and tags is the size of the topic they cover. Categories group broad topics of your posts while tags describe a specific detail in your content.
To make it clear, let’s say you have a food blog. The categories you have might be Culinary Trip, Recipes, Tips, and Food News.
If you have an article titled “The Most Delicious Beef Wellington Recipe”, this article will be included in the Recipes category. And you can use beef, Gordon Ramsay, pastry, etc. as the tags.
Pro Tip
It is not advisable to use something as “Gordon Ramsay” for your category since it doesn’t cover a broad topic of your blog posts. Unless you plan to create a lot of content discussing him, his name should stay a tag, not a category.
2. Necessary vs Optional
Another difference between these two taxonomies is how mandatory they are for your post. Categories are necessary while tags are optional.
If you don’t assign any category to a post, WordPress will automatically set it into default category which is Uncategorized.
Pro Tip
The default category name can be changed by accessing Settings -> Writing from your dashboard admin.
3. Parent-child Relationship vs Standalone Entity
Lastly, categories and tags have a different hierarchical relationships. Categories are hierarchical. It means that you can put child categories or subcategories to the parent.
For example: under the Recipes category, you can add more subcategories such as Appetizer, Main Course, Desserts, and Diet Food Plan.
Under Diet Food Plan, you can include other subcategories such as Low Carbs Food, Low Sugar Food, and Low Fat Food.
Unlike categories, tags don’t have a parent-child relationship. Each tag you add is a standalone item that has no level.
Besides the three differences above, categories and tags also produce a different permalink. You need to use a custom permalink structure to see the difference. Once the custom permalink structure is enabled, your base prefix will look like:
http://examplewebsite.com/category/recipes/
or
http://examplewebsite.com/tags/recipes/
Although these two taxonomies are different in their practical uses, you can use both of them in your posts. A post may have one or two categories and numerous tags.
How to Add Tags in WordPress
Adding tags to your post is fairly easy. However, remember that only posts can have tags.
There are two ways to add tags in WordPress. First, you can add the tags for new blog posts. To do so, follow the steps below.
- From your admin dashboard, go to Posts -> Add New
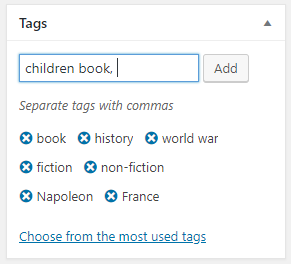
- On the right side of your visual editor, find the tags box.
- Type in the tags you want to add. Each different tag must be separated by a comma.
Secondly, you can add tags for already existing posts. This also helps you to improve your SEO because you can add a slug for your tags.
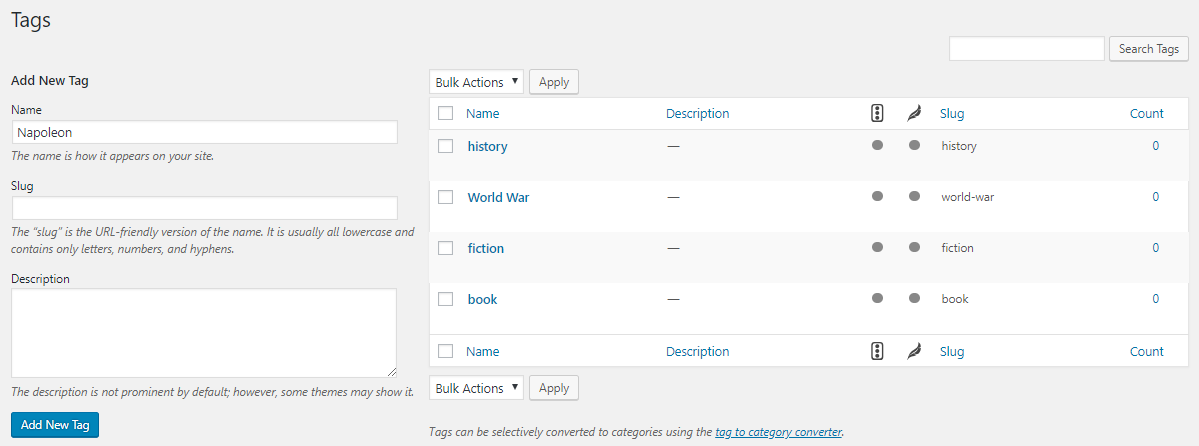
- From your admin dashboard, go to Posts -> Tags.
- Add a new tag on a name form.
- Add the slug for your tag.
How to Display Tag Cloud in WordPress
Using tags in WordPress not only arranges your posts but also improves your site’s usability and accessibility. Therefore, tags create a better user experience.
Additionally, creating a tag cloud widget will improve your user experience even further.
Tag cloud widget helps you to show all the tags you’ve set. With a 1-click action, visitors can skim through your tags and find their favorite subject.
Your website may be very common in your niche. But, with a tag cloud, visitors can find interesting subjects that they can’t find in your competitors’ sites quickly.
Moreover, you can also set a larger font size for more popular tags.
Follow these simple steps to add the tag cloud widget:
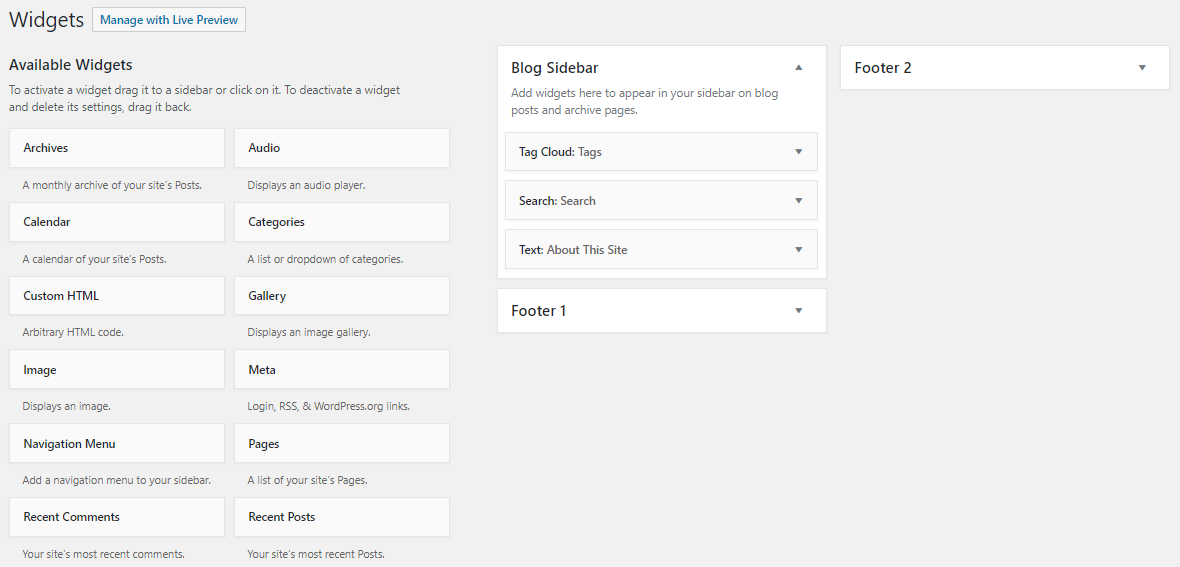
- From your admin dashboard, go to Appearance -> Widgets
- Find Tag Cloud widget and drag it to the widget area where you want to display it. Usually, it is located on the sidebar.
- Give it a title and how many tags you want to include in the cloud. The maximum number is 75.
Adding a tag cloud in WordPress 5.9 involves different steps as this WordPress version uses a block editor for the entire site:
- Go to Appearance -> Editor to open the site editor.
- Hover over the area where you want to add the tag cloud, then click the Plus (+) icon to add a new block.
- Search for tag cloud and click on the block to add it to the page.
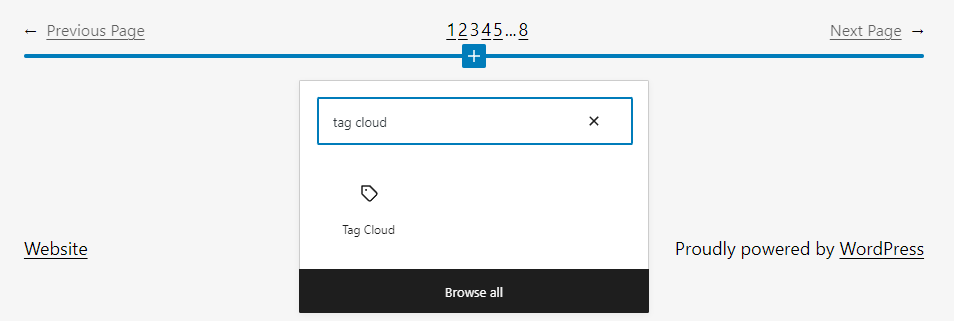
- The tag cloud will appear on the page.
- To modify it, open the block settings by clicking on the tag cloud block and clicking the Settings icon at the top-right corner of the screen.
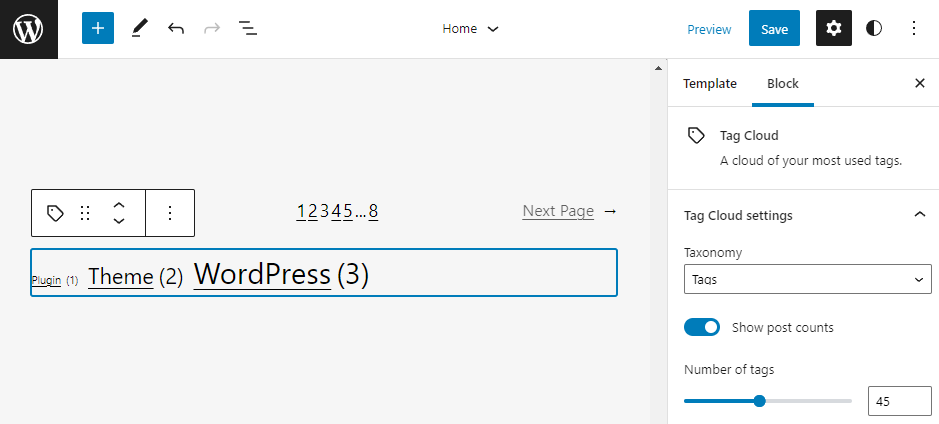
Toggle the Show post counts to show the tag count on the page and adjust the Number of tags slider to set the maximum number of tags to display.
Sometimes, you may want to exclude a tag from the tag cloud regardless of its popularity. To exclude a tag, follow the steps below:
- Go to Posts -> Tags. Choose the tag you want to exclude.
- Now, take a closer look to your browser’s address bar and find the Tag ID. It is a number following tag_ID=.
- Copy the tag ID and go back to Customizer -> Widgets.
- Click on the tag cloud widget settings and open its settings.
- Paste the tag ID into the Exclude box.
- Click Save button to finish the process.
Pro Tip
While tags create a better user experience organizing your content, optimized hosting further improves your website by ensuring faster loading times and better overall performance. Consider opting for a managed WordPress host while choosing a platform for your new project.
WordPress Tags and SEO
WordPress tags are also significant for your SEO. When you do it right, a well-managed taxonomy like tags will escalate your SEO rank.
But you have to keep in mind, that tags could be harmful to your SEO.
When it comes to SEO, WordPress is the best CMS to date. Once you install WordPress, it comes with built-in SEO features to deal with search engines.
These predetermined features guide all search engines to index the posts, pages, categories, and tags in your site and store the information to its database.
However, some faults in using tags will harm this indexing process.
First, sometimes people create a similar name for a tag and a category. This will make two identical tag and category pages. If you have “Recipes” both as a tag and a category, search engines might get confused which one should rank first.
The similar duplication issue may happen for single or plural nouns you use as your tags. “Recipes” or “Recipe” is similar. You need to choose one and consistently use it as your tag.
Moreover, tag pages have no unique content on its own. They only have the posts’ excerpts while the unique content is written in the individual post pages. That’s why search engines prefer to crawl through different post pages rather than tag pages.
Keep in mind that WordPress automatically creates a tag page once you set a new tag. In the next section, you will learn how to use tag pages to help user navigation, without damaging your SEO.

Noindex WordPress Tag Archive Pages
The best method to overcome tag pages’ and SEO problems is by using the noindex WordPress tag. By doing this, you tell search engines to ignore your tag pages while crawling data.
The Yoast SEO plugin is a great choice to get this done. Follow steps below to noindex WordPress tag pages:
- Click on Search Appearance
- Choose Taxonomies tab
- Find Tags section
- Under Show Tags in search results select no
- Click the Save button to finish it.
Conclusion
WordPress tags are a great way to manage your content. It can help your readers to find their preferred topics in a quick and fuss-free way. This increases your overall user experience.
However, some small faults in using tags will harm your SEO. Use the provided tips to maximize tags usability without putting a negative effect on SEO.
Learn what else you can do with WordPress
Guide to WordPress Security
How to Change Username in WordPress
What is a WordPress Slug
How to Install WordPress
Guide to WordPress Widgets
How to Login to WordPress
How to Use SMTP in WordPress to Send Emails
How to Make a WordPress Site Live
How to Add a Post to a Page in WordPress
How to Duplicate Pages in WordPress

Dina has years of experience in digital marketing and website creation. She seeks to help Hostinger users learn more about internet marketing and WordPress. When she's not pounding away at her keyboard, she enjoys taking short city tours and exploring new local food places.


Comments
October 16 2020
Hi. thanks for sharing your views on tags. ut really helped me to learn better and will apply it for my WordPress blog site.
February 02 2021
Happy to hear it helped, Ashwini!
February 02 2022
This is a good post!
October 19 2023
Interesting and informative at the same time
October 27 2023
Hello there! Glad to hear that. If you have any other thoughts or need further assistance, please don't hesitate to let us know ?