How to Sell Food Online: 8 Key Steps to Start Selling
The food industry can be quite daunting for beginners, especially if you don’t know much about the food business. There are many factors to consider while learning how to sell food online, from the production and packaging to food laws and business permits.
Keep reading to learn how to start a food business from home and all of the legal requirements behind it. By the end of this article, you’ll be ready to start an online food store, and you’ll know how to grow it to success.
8 Steps to Start Selling Food Online
To help you get off on the right foot, we’ve broken down the process into eight easy-to-follow steps.
1. Get a Good Domain for Your Food Business
A domain name is what people type into their web browsers when accessing a website. Since your customers will be the ones to use it, it’s crucial to choose a domain name that represents your business well.
Make sure it is unique, related to the food you are selling, and easy to remember. Keep it short and straightforward. Avoid hyphens and numbers to prevent misunderstanding.;
Furthermore, you should also claim close alternatives to your domain to maximize your site traffic. For instance, Coca-Cola’s primary domain is coca-cola.com, but it owns other alternatives like coke.com and cocacola.com.
Use a domain checker to confirm the availability of the domain name you want to use, and then register it. Check popular social networks as well, so you can use the same name across multiple platforms.
Domain Name Checker
Instantly check domain name availability.
As for the domain extension, we recommend going for .com if possible since it is unofficially considered the most professional choice.
2. Create the Online Store
There are three popular platforms we recommend for setting up an online store – WordPress, a website builder, and an eCommerce platform.
WordPress
WordPress is a free content management system (CMS). Its flexibility allows you to install any theme and customize it to match your brand or buy ready-made designs from third-party sources.
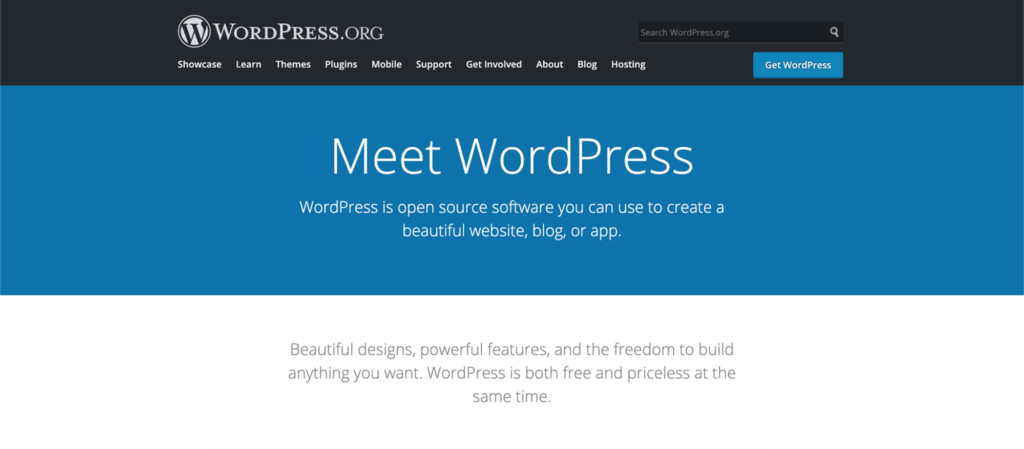
The platform’s plugins also allow you to add various free and paid features to improve your site. For instance, the WooCommerce plugin will turn your website into an eCommerce store by adding a shopping cart, payment gateways, and order management.
Although WordPress is free, users must subscribe to a hosting service to make the website accessible online. The price depends on the type of hosting and the web host, but it can start as low as $1.99/month with Hostinger’s Single plan. You can also use WooCommerce optimized solution for hosting bigger online stores that requires more hosting resources.
Pros of Using WordPress
- Budget-friendly
- Flexibility and customization of the website
Cons of Using WordPress
- Not beginner-friendly
- Must host the website with a provider first
Website Builder
Website builders allow beginners to create and publish a website with ease. Most of them feature intuitive drag-and-drop editors that will enable you to add content and customize existing themes.
There are many restaurant website builders on the market, with Hostinger Website Builder being one of the most affordable.
For just ₹69.00, Hostinger’s eCommerce website builder comes with a large variety of online store themes suitable for selling food online.
You’ll also get integrated online store features, such as secure payment gateways, an inventory management system, and more.
All of Hostinger’s websites are automatically optimized for search engines. They come with a free SSL certificate and free website hosting service with Hostinger.
Pros of Using a Website Builder
- Beginner-friendly
- Fast and simple set up
Cons of Using a Website Builder
- Limited flexibility and customization
eCommerce Platform
An eCommerce platform is primarily used for building and managing online stores. Most come with extensive built-in features for product and order management.
There are two types of eCommerce platforms: hosted and self-hosted. Hosted refers to the platform already comes with hosting services, while self-hosted means you have to find the web host yourself.
We recommend going the self-hosted route if you want full control over your website. An example of a great self-hosted eCommerce platform is PrestaShop. This free and open-source platform offers great business analytics tools, useful marketing features, as well as multilingual and multistore functionalities.
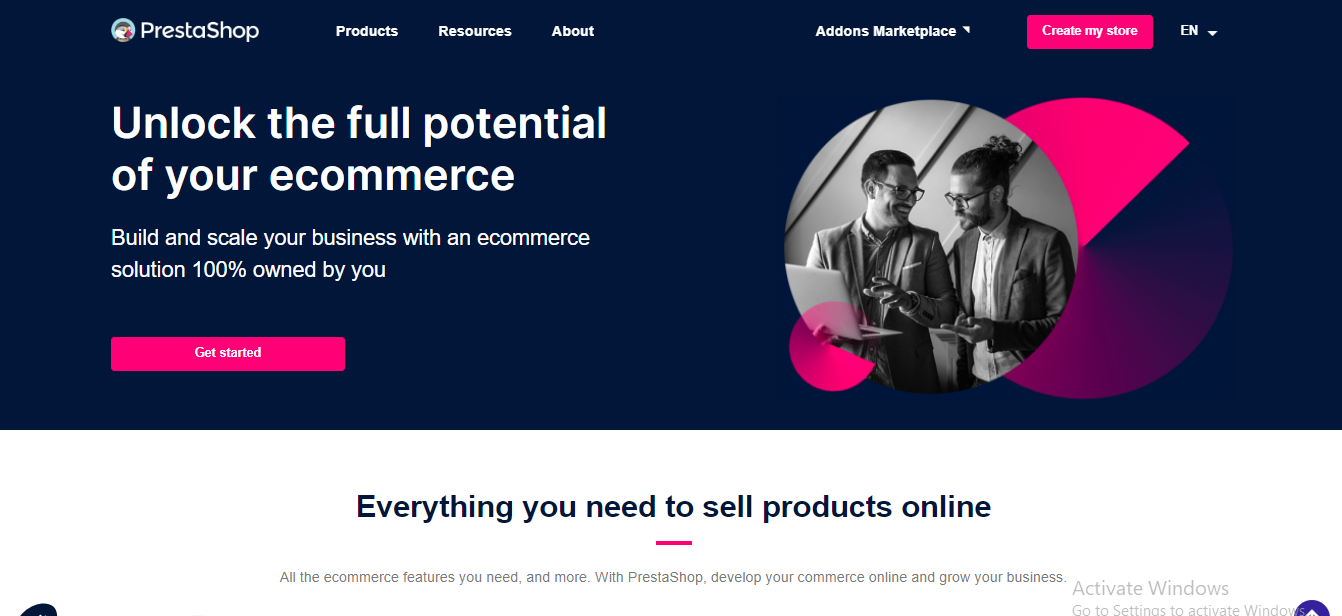
The platform also supports numerous themes and modules for extending your site’s capabilities. You can find official ones on the PrestaShop Addons Marketplace or third-party ones on websites like PrestaHero.
If you choose to create an online store using PrestaShop, make sure to find a hosting service compatible with the platform.
Hostinger, for example, offers three PrestaShop hosting plans: Business at $3.99/month, Cloud Startup at $9.99/month, and Cloud Professional at $14.99/month. All plans come with a free email, an SSL certificate, and a domain name.
Pros of Using an eCommerce Platform
- Extensive eCommerce features
- Easy scalability as the business grows
Cons of Using an eCommerce Platform
- Limited content management capabilities
- May require some technical expertise to set up and customize

3. Customize Your Online Store and Add Content To It
Now that you’ve chosen a platform let’s look at the steps required to create a functional online store.
Pick and Customize Your Theme or Template
If you use a website builder, choose an eCommerce template from the available selection. Doing so will ensure that most of the necessary pages and features for your online store will already be set up.
Meanwhile, if you use WooCommerce and WordPress, browse through the available themes on their respective websites. There are plenty of options there, both free and paid.
To save time, preview any theme that catches your eye and pick one that will not need significant changes and customization to suit your brand.

Once you have chosen the template, customize the design to fit your needs and liking. Modify the fonts and the colors, change the header image, and edit the layout.
Tailor your eCommerce site’s design to your brand while also keeping customer needs in mind. Ensure that it’s easy to navigate, well-organized, and responsive.
Suggested Reading
Baffled by the amount of theme choices in WordPress? Check out our guide for the best WordPress restaurant themes to find the best one for your food site.
Add the Basic Pages
Some basic pages that you should add to your eCommerce website are:
- Homepage. The first page that your potential customers will see when they will search for your site. Make sure it’s uncluttered, easy to navigate, and represents your branding.
- About Us page. This page should contain the story behind your brand’s foundation, its values and beliefs, and what makes it unique.
- Contact page. Include your phone number, email address, and physical address. Or make it easier for customers to reach you by adding a contact form.
- Frequently asked questions (FAQ). This page contains questions that customers often ask, such as delivery information, postage fees, and details of the products you sell.
Set Up Product Pages
Product pages are the heart of your eCommerce store. It’s where customers will discover what you sell and decide whether to buy something or to leave the website entirely.
High-converting product pages have high-quality photos, a detailed description, call-to-action (CTA) buttons, and transparent pricing and delivery information.
Let’s take Perfect Keto as an example. It incorporates all the mentioned elements within a simple, straightforward design.

Don’t create multiple listings if a product has multiple variants. Upload them on one page, so customers can easily find what they’re looking for.
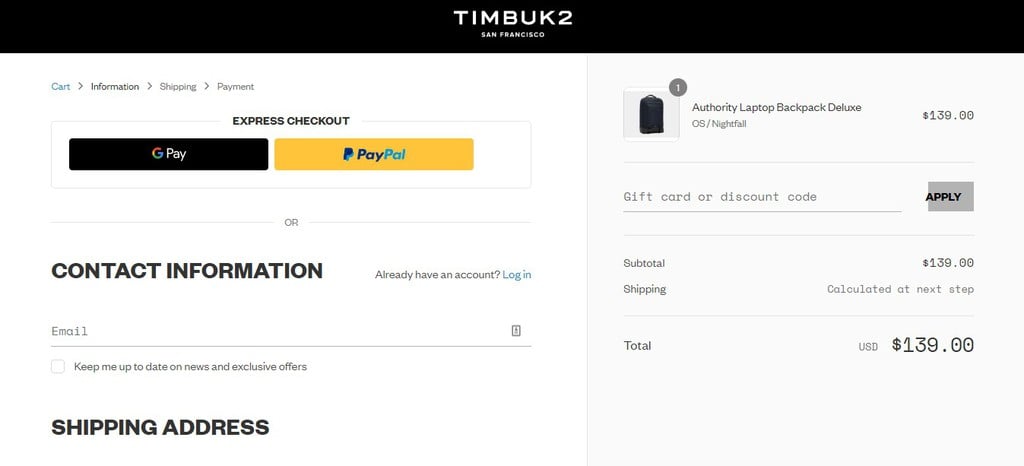
Create the Checkout Page
Checkout pages should be short and straightforward. In fact, more than 20% of customers will abandon their cart if the checkout process is too complicated.
In most cases, eCommerce websites divide their checkout page into three sections – customer information, shipping options, and payment methods. They also enable guest checkouts, so shoppers don’t have to create an account and simply input their email addresses.
The payment methods include popular payment gateways such as PayPal and Stripe. If possible, enable express checkout using these gateways so users don’t have to fill in their billing and shipping details.
Timbuk2, a famous bag manufacturer, offers PayPal and Google Pay express checkout for its customers. This fact plays a part in their estimated $14.90 million annual revenue.
4. Plan What Kitchen Equipment to Use
If you’re planning to cook the food yourself, there are some factors to consider when looking for kitchen equipment:
- Production scale. Home kitchen appliances may be enough when you’re selling food from home, but you need to get commercial-grade equipment for a commercial kitchen.
- Size of production space. Don’t go overboard when you’re just starting out. Measure the space in your kitchen so that bulky equipment such as ovens and stoves can fit comfortably. Moreover, ensure that you’ll have enough storage space for cookware and utensils.
- Long-term use. Purchase equipment that comes with a product warranty for at least one year. Don’t forget to read what the warranty covers to avoid disappointment in the future.
- Food safety regulations. Whether you’re using a domestic or commercial kitchen, ensure the equipment meets current food regulations. For sellers in the US, check the FDA’s Food Code.
- Budget. Always stay within your budget. If one of the appliances is too expensive, consider renting the item instead.
5. Find a Reliable Supplier
Finding a reputable supplier is crucial for your food business, regardless of whether you’re cooking the food yourself or selling ready-made products.
Start local and search for suppliers in your city. Or, take advantage of supplier lists, like one from Careers In Food.
Once you select a few suppliers, check their credibility by tracing the supply chain and asking for certifications. Alternatively, connect with people in your industry to get trustworthy information on which suppliers to work with.
6. Prepare Packaging and Labeling
When you’re selling food online, first impressions are everything. You need to have an attractive packaging design to attract new customers since they can’t taste the food you’re offering.
Due to its significance, consider hiring a professional designer to create the packaging for you. They can provide you with a suitable color scheme, font, shape, and material, ensuring that everything ties together to form an appealing and functional packaging.
Moreover, you should also check the packaging and labeling rules in your region. The FDA’s Nutrition Labeling and Education Act requires most food to have proper food labeling. It should display information about the ingredients, nutrition content claims, and health messages.
If you live in the US, read the FDA’s labeling guide and note the steps you need to take with your packaging and labeling.
7. Final Steps Before Launching Your Online Business
There are some finishing touches you should do to ensure a successful and smooth business launch.
First, test the shopping process. Ensure that customers can quickly complete transactions on your website. Fix any bugs, remove unnecessary steps, and test your site’s performance.
Set up analytics tools for your eCommerce site. For instance, Google Analytics provides you with data to understand visitor browsing habits, monitor site traffic, and track conversions.
Don’t forget to create site backups, regardless of the platform you end up choosing. Most hosting providers and website builders usually come with automatic site backup features, but you should check and confirm it with the support team.
8. Launch Your Food Business and Promote It
Here are some actionable tips to promote your online food business:
- Word of mouth. Tell your friends and family to spread the word about your brand and the products you sell.
- Social media. Create social media accounts with the same name across all channels, and post regularly. Promote your food, answer inquiries, and don’t be afraid to interact with customers.
- Special events. Hold photo and review contests, organize a cooking demonstration, or join a food festival.
- SEO. Optimize your web pages to make them rank high on search engine result pages (SERP). Set up a food blog and post regularly, perform keyword research, build backlinks, and improve the site’s performance. We prepared an article regarding this topic for you to learn more about how exactly SEO works.
- Pay-per-click advertising. With this advertising model, you only pay when someone clicks on your ads. The most popular advertising network is Google Ads, which will display your ads on Google Display Network and its partners’ websites.
Other Important Steps Before Starting a Food Business
The steps described above are everything you need to begin selling food online. However, you can never be prepared enough when it comes to business.
Here are more tips to ensure your online business becomes a success.
Focus on a Niche and Brand the Business Around It
To find a profitable food business idea, start by identifying a specific target audience and analyzing their needs and preferences. Create online surveys, ask friends and family that belong to your target audience, and check online forums to see what they may need.
Once you decide on a specific focus, measure its profitability using Google Trends. Research keywords related to your niche, and make sure to find products that are trending consistently. Doing so will ensure that there’s a demand for the niche you’re about to enter.
To give you some ideas, here are a few examples of niche-food brands:
- Sweet Earth Foods. This company offers plant-based food products, from vegan deli meat to various frozen meals such as burritos and burgers. It targets people who want to maintain a healthy and eco-friendly vegan or vegetarian diet.
- Glutino. Glutino is a brand that provides gluten-free snacks and baked goods, with products ranging from gluten-free pretzels and crackers to baking mixes and pizza.
- Screamin Brothers. This Canadian brand produces dairy-free frozen treats, using coconut milk as a substitute. Its products cater to customers with dietary restrictions or those who are looking for dairy alternatives.
Price Your Food Products
There is no universal formula for pricing food products. The only way to get your pricing right is to calculate the cost per item by looking at ingredient prices, manufacturing costs, labor costs, and manufacturing overhead.
Generally, a 10% margin is considered average, and 20% is high. However, the ideal net profit margin varies across industries. According to CSIMarket, the food processing industry averaged 11.55% in the first quarter of 2021.
Alternatively, research your competition and study their prices. It’s wise to stay within a similar price range, which might help you get the word out and establish your brand presence.
Plan Brand Growth and Product Development
To encourage brand growth, you need conduct market research and experimentation, just as you would when starting any business.
Collect data through various activities, from conducting surveys to adding new items on the menu. Gather feedback from your customers on what to improve and what products they would like to see from you in the future.
To increase sales, you might want to try referral marketing, which Dropbox successfully uses. Encourage customers to promote your products and reward them with gifts or coupons when their friends or family members purchase the goods you’re selling.
Legal Requirements for Food Businesses to Sell Food Online
Selling food online can be one of the most profitable ways to make money, but it’s important to take care of the legal aspects before else. Take a note that that food laws vary between regions. You should find a local lawyer and do further research on regulations specific to your area when getting your license for selling food online.
1. Get the Necessary Permits for the Business
There are several standard licenses and permits you should acquire when selling food online:
- General business license – the necessary permission to sell in your local jurisdiction, perfect if you plan to sell food from home. You can obtain it from your county or city government.
- Health inspection permit – foods and beverages must pass a health inspection before being sold to the public.
- Assumed name certificate (DBA) – if you want to use a business name that is not your legal name or the name of your corporation, you will need to obtain this license to sell food online.
- Tax permit – some states require you to collect taxes on the food you sell. Check your local government’s site to learn more about it because some areas have a special tax for internet sellers.
Registration with the Secretary of State is not mandatory for all businesses, as it depends on your business structure. For example, sole proprietorships do not have to register with the state, while limited liability companies and limited liability partnerships must do so.
Check the local Secretary of State’s website for more information, as the registration process is different for each state.
2. Check General Food Laws
Under the Food and Drug Administration’s (FDA) regulation, food products are categorized into two types – high-risk and low-risk.
Low-risk food products are allowed to be produced from domestic kitchens. This category includes baked goods, dried fruits, jams, candies, and oat flakes.
Meanwhile, high-risk food must be manufactured from commercial kitchens. Food items included in this category are prone to microbiological contamination, like dairy, seafood, and frozen products.
3. Register the Food Facility
According to the FDA, home-based businesses don’t need to register their home kitchen. However, they still need to follow the FDA and local health departments about food safety.
Contact your county or city’s health agencies to understand the regulations in your area.
Meanwhile, if you plan to have a commercial kitchen to produce and pack your products, you need to register it with the FDA before you start selling. You can find more information on the registration process on the FDA’s website.
4. Apply for an Employer Identification Number
An Employer Identification Number (EIN) is a nine-digit number you use when filing your income tax return, opening a business bank account, applying for a business credit card, or getting a business loan.
Apply for an EIN on the International Revenue Service (IRS) website, which should be done right after registering your business.
Note that sole proprietorships do not need an EIN, as the owner’s social security number is enough.
Conclusion
The food industry always has room for new businesses. With increasing competition and customer demand, it’s a good idea to capitalize on eCommerce and learn how to sell online.
Here’s a short summary of what it takes to open an online business to sell food online:
- Get a domain and choose a platform for your online store.
- Customize the website and add relevant content.
- Set up your kitchen and all needed equipment for food manufacturing.
- Find a supplier of ingredients and products if you won’t be producing the product yourself.
- Create branded packaging and labeling.
- Finally, launch your store and begin to sell food online.
Follow the steps above and see your food business journey flourish. With the right information and hard work, you’ll have a successful food business in no time.
If you have any more questions or suggestions, feel free to leave a comment down below. Good luck!

Andzelika is a Content Writer and Editor with over 5 years of experience in the digital marketing industry. With passion for technology and the art of the written word, she loves to combine the two worlds and produce actionable content.

Comments
October 20 2023
I really appreciate the effort you put into your website design. It looks fantastic! Have you encountered any browser compatibility issues? Some of my readers have mentioned problems with viewing my blog on Explorer, but it looks great on Safari. Do you have any advice on how to fix this issue?
November 03 2023
Thank you for your kind words! Browser compatibility can indeed be a challenge. To address this issue, ensure your website is built using responsive design principles, and test it on various browsers ?
October 27 2023
Thank you for sharing your expertise and contributing to a cleaner and brighter environment. Your blog post is a fantastic resource, and I look forward to reading more of your informative articles in the future!
November 08 2023
You're very welcome! We're thrilled that you found our blog post helpful, and we're dedicated to continuing to provide valuable content in the future. If you have any specific topics or questions in mind, feel free to let us know, and we'll do our best to cover them ?