What Is Linux tail Command and How to Use It With head Command
The Linux tail command displays the latest content from the end of a chosen file or files directly to the screen. This function is useful for instantly viewing recent additions to files, as new information is often appended at the end.
System administrators commonly combine it with other Linux commands like sort or rm to manipulate the output. Moreover, they can add various options to modify the utility’s behavior based on the tasks.
To help improve your virtual private server (VPS) management efficiency, this article will explain Linux tail command basics. We will provide its syntax, share practical examples, and demonstrate how to combine it with the head utility.

What Is Tail Command?
The tail ommand outputs the last few lines of specified files, defaulting to ten lines unless adjusted by the user. It’s frequently used for tracking log files and monitoring real-time updates. System administrators often combine it with other commands via pipes to customize the output. When no file is specified, it reads from standard input, and users can define the number of lines or bytes to display.
tail Command Syntax
By default, tail displays the 10 last lines of a file. Here’s the basic syntax:
tail [file_name]
You can use several options for customizing tail output. Here are some of the most popular ones with their long form and functions:
- -c num or –bytes ‒ outputs the last num bytes of data.
- -n num or –lines ‒ specifies the last num lines to show.
- -f or –follow=name ‒ monitors new entries as the file grows.
- -v or –verbose ‒ prints the file name before the data.
- -q or –quiet, –silent ‒ omits the file name before printing the data.
- -version ‒ displays the tail version information.
Important! Note that this Linux command syntax is case-sensitive.
tail Command Examples
In this section, we will explore the common uses and practical examples of the Linux tail command. To run this command on a VPS, connect using an SSH client like PuTTY or Terminal. Alternatively, Hostinger users can use our Browser terminal feature.
Suggested Reading
Haven’t bought a VPS hosting plan? Check out our article on the top VPS hosting providers to learn about the best options for your needs.
Using tail to Print the Last 10 Lines
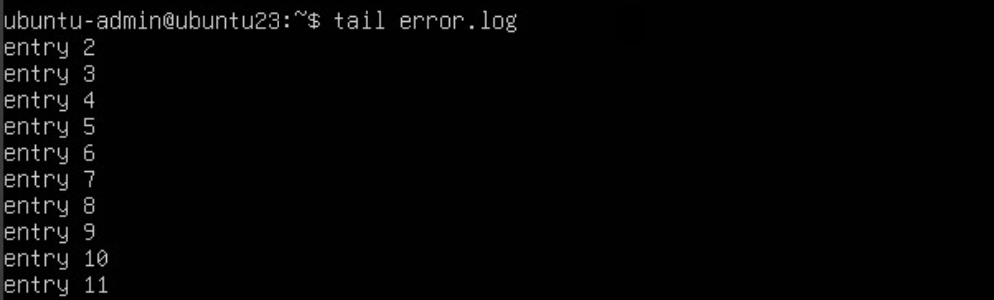
The tail command’s basic functionality is outputting the last 10 entries from a single file. To do so, run it without any option or flag like the following example:
tail error.log
If the log file adds a new entry at the bottom, the tail command will output it as the last line. By default, it presents the data in descending order, starting from the newest addition.
You can also specify the directory path. Here are example commands for tracking the 10 latest entries of different web servers’ log files:
sudo tail -f /var/log/apache2/access.log
sudo tail -f /var/log/nginx/access.log
Using tail to Print a Specific Number of Lines
To display specific lines with tail, add the -n option to your command. Here’s the syntax:
tail -n [num] [file_name]
See the following example command for printing the last two lines of the mynote.txt file:
tail -n 2 mynote.txt

You can also omit the -n option and directly specify the number of lines to print as the flag, like this example:
tail -2 mynote.txt
Using tail to Specify the Number of Bytes
The -c option displays the last number of bytes of the specified file. Administrators commonly use it for regular-sized files containing the ASCII character set, where one character corresponds to one byte.
Here is the syntax:
tail -c [num] [file_name]
The following example outputs the last 50 bytes or characters of the mynote.txt file:
tail -c 50 mynote.txt
The -c option in the tail command counts bytes rather than characters. Therefore, when working with files using the Unicode character set, especially those with multi-byte characters, specifying the last num bytes may not align with character boundaries, leading to potentially confusing output.
Using tail to Sort Data
Combine other utilities and options with tail to query data in a specific order. The command differs depending on how you want to display the information.
For instance, pipe the ls command with -t and -l options to list 10 items within the current directory with the oldest modification timestamps. Here’s the syntax:
ls -tl | tail -n [number_of_lines]
You can also add the sort command with the -M option to reorder the output in ascending order based on the month of creation.
ls -tl | sort -M | tail -n [number_of_lines]
To reverse the output order, add the -r option to the tail command:
tail -n [number_of_lines] [file_name] | sort -r

Using tail to Monitor a File for Changes
The –follow or -f option lets you run the tail command continuously, updating the output in real time whenever the specified file receives new data. Here’s the syntax:
tail -f [file_name]
The header line will highlight the changes in the original file. You can also specify the name as the option’s value like the following:
tail --follow=name [file_name]
If you don’t specify the name, the option will use the “descriptor” default value. It means the command will continue to print new lines from the same file during log rotation.
Even if you rename it or create a new file with the same name, the command will keep monitoring the same one. Using the uppercase -F option yields the same behavior.
Optionally, add the –max-unchanged-stats option to hide identical lines after a specific number of occurrences, simplifying Linux log monitoring. Here’s the command:
tail -f --max-unchanged-stats=5 error.log
To stop printing the new data, quit the update mode by pressing the Ctrl+C shortcut. A common tail -f usage includes real-time log viewing since new status information typically shows at the bottom of a file.
Pro Tip
For continuous log file analysis, run the tail -f command in another terminal instance using a multiplexer like Linux Screen to keep the process running in the background.
Using tail Command for Multiple Files
Processing multiple files simultaneously using the tail command requires you to list their names like the following:
tail [option] [file_name_1] [file_name_2] [file_name_3]
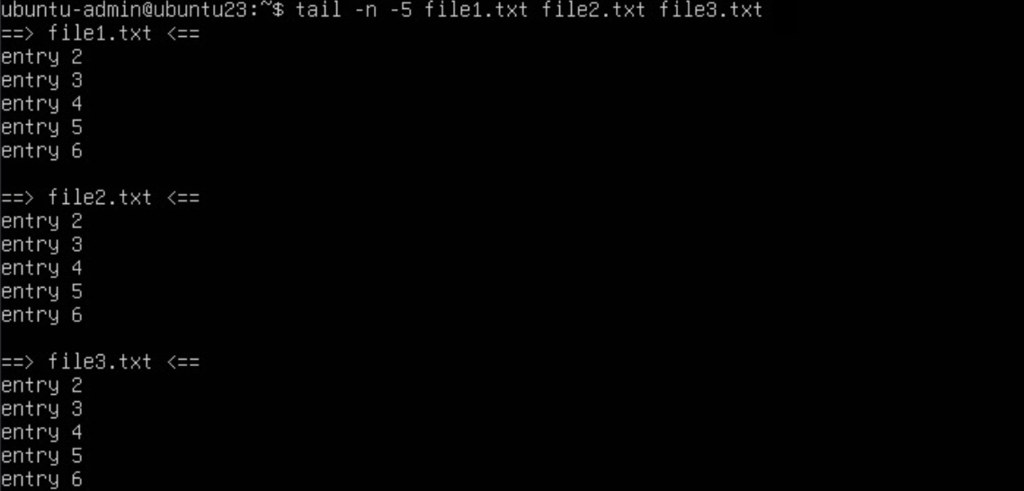
For instance, we will print five lines from multiple text files:
tail -n 5 file1.txt file2.txt file3.txt
If you run the tail command with multiple file names, Terminal will display headers specifying them.
Hide the file header by adding the -q option to enable quiet mode, omitting the information:
tail -q [file_name]
Using tail to Track System Resource Usage
Combine the tail command with resource tracking utilities to monitor your system hardware usage. Here’s an example syntax:
command [interval] | tail -n [number_of_lines]
The resource tracking utility logs hardware usage at specified intervals. The tail command retrieves the data and outputs the last few lines.
For example, enter the following command to track the last five virtual memory usage logs, refreshing every second:
vmstat 1 | tail -n 5
To track your VPS I/O statistics, pipe the iostat command like the following:
iostat 1 | tail -n 5
Meanwhile, combine tail with the netstat command to monitor network-related resource usage:
netstat 1 | tail -n 5
If Terminal shows the “Command not found” error, install the resource tracking utilities using the following:
sudo apt install net-tools procps sysstat
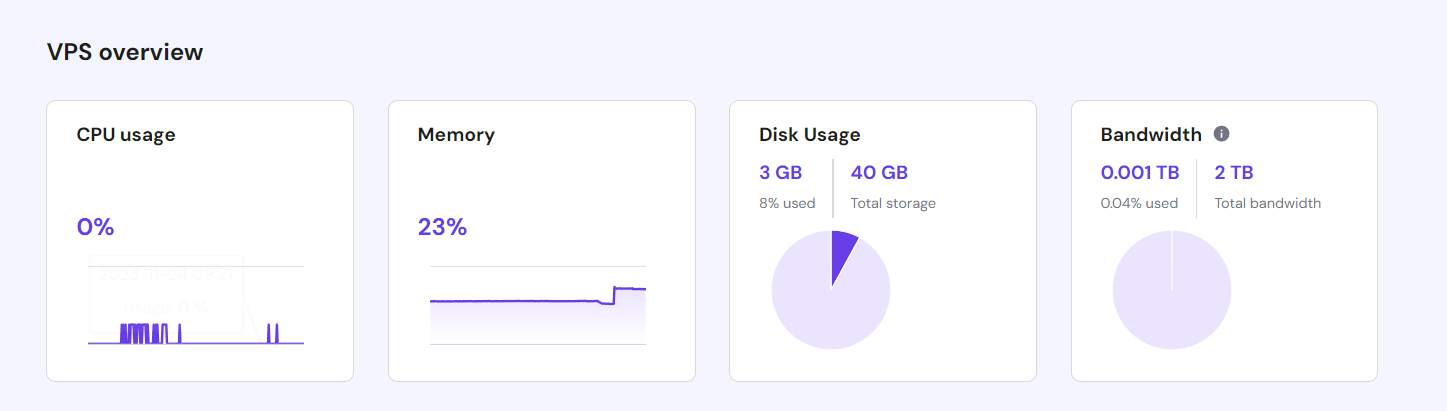
Instead of commands, Hostinger VPS service users can check their server resource usage with our monitoring feature that offers a graphical user interface. To access it, go to hPanel → Backup & Monitoring → Server Usage.

Using tail Command With Pipes
In Linux operating systems, a pipe (|) is a standard output redirection. It lets a command pass its retrieved information to another utility as input.
In addition to file content, use a pipe to pass another utility’s output to the tail command. Here’s the syntax:
command | tail -n [number of lines]
For example, the netstat command prints many lines by default. However, piping its output to the tail utility lets you retrieve only the newest data for simpler analysis.
Using the head Command With Tail
The Linux head command prints the first few lines of one or multiple files as a standard output. Like the tail utility, it is a part of the GNU Coreutils. Here’s its basic syntax:
head -[option] [file_name]
You can use some of the tail command options with head. For example, add -n to print the first num lines from a file.
Combining head and tail commands allows you to output a specific section from a file.
For example, use the head command to extract the first lines from a file. Pipe the data as a standard input to tail to display the last few entries from that particular section. Consider these commands:
head -n 20 access.log | tail -10
head -n 20 error.log | tail -10
In the above examples, the head command retrieves the first 20 lines from the two log files and passes them through the pipe as input. Then, tail prints the last 10 lines.

To extract the first num lines starting from a particular entry, specify the number to the tail command’s -n value. For example, here’s how to output entries starting from line number five:
head -n 10 mynote.txt | tail -5
Conclusion
The Linux tail command prints the last few lines of a file as a standard output. It helps simplify tasks like monitoring log files since system administrators don’t need to manually reopen them to check for new data.
This command-line utility retrieves the last 10 lines by default, but you can display a specified number of entries using the -n option. You can also specify multiple file names and print data based on their byte value.
Moreover, users can combine tail with other Linux command-line tools using a pipe (|) to modify the output for specific tasks. For example, add netstat, iostat, and vmstat to check the latest system resource usage log.
It’s also possible to combine it with the head utility to retrieve a particular section of a file. In addition, pipe the sort command to reorder the tail output based on your needs for simpler analysis.
Learn More Linux Commands for Reading Files
How to Read the Content of a File
How to Read a File With Sed Command
How to Write and Display to File With Tee Command
How to Kill a Process in Linux
How to Use the Linux Shutdown Command
How to Use SCP Command to Copy and Transfer Files in Linux
Tail Command FAQ
In this section, we will answer several common questions about the Linux tail command to help expand your understanding of it.
How Do You Grep Tail Command?
Using the tail and grep combo requires turning on the line buffering mode. It allows the process to resume the search while reducing delay.
To do so, write tail with the -f option and the file name. Then, pipe the grep command with the –line-buffered option and the pattern to search.
How Do I Get Out of Tail Command in Linux?
To stop the tail command process and restore the terminal window, press Ctrl+C. This shortcut sends the SIGINT signal, telling the command-line interface to finish the process properly.
We don’t recommend using the SIGKILL signal since it forcefully terminates the process, potentially causing issues.
How Do I Redirect the Output of tail to a File?
To redirect the tail command output to a file, use the greater than symbol (>) and specify where you want to store the data. For example, running tail data.txt > log_file.txt will save data.txt’s last 10 entries into the log_file.txt file.
When redirecting output, ensure your current user has the write permission over the target file.

Jordana is a Senior Content Writer at Hostinger with a background in Information Systems. She has over five years of experience in WordPress and is casually dabbling with PHP and MySQL. Her passion for writing and technology drives her to create tutorials for anyone wanting to build their online presence. Follow her on LinkedIn.

Aris is a Content Writer specializing in Linux and WordPress development. He has a passion for networking, front-end web development, and server administration. By combining his IT and writing experience, Aris creates content that helps people easily understand complex technical topics to start their online journey. Follow him on LinkedIn.


Comments
December 14 2021
What does the -3 option in the tail command do
December 22 2021
Hi Travis!
tail -3command would work the same astail -n3- it would show the last 3 lines of your file :)