What Is WordPress Heartbeat API and How to Manage it
In 2013, WordPress introduced Heartbeat API – a feature that allows your browser to communicate automatically with the server. However, there are a couple of drawbacks to this feature.
If you use a shared hosting plan, you need to take a closer look at the CPU usage of your server. That’s because some hosting companies might suspend your account when you go over the limit.
Here, we’ll talk about why WordPress Heartbeat API is the usual suspect that causes the issue.
Download all in one WordPress cheat sheet
What Is the WordPress Heartbeat API?
WordPress Heartbeat API provides a communication protocol, using AJAX calls, between the browser and the server.
As the name implies, the API will send continuous pulses and trigger events (or callbacks) upon receiving data. This function helps you to sync all the data between the server and the WordPress dashboard.
The idea behind heartbeat API is quite compelling. For example, when you create/edit a post from the editor, it provides a function to autosave the post periodically.
In a collaborative WordPress site, it has a post-locking function to prevent you from editing a post that’s being worked on by another user. If you use an eCommerce plugin, this API will also help to display sales that happen on your site.
Why Limit WordPress Heartbeat API?
While it’s beneficial to have an autosave function and real-time data notification features, it can be harmful in a specific situation.
Heartbeat API sends AJAX requests (POST requests) using the /wp-admin/admin-ajax.php file. Each request that executes a PHP file is equal to CPU time on the server.
This can cause a large number of requests to be sent to the hosting server, which results in high CPU utilization.
As we noted earlier, this can be a problem for a webmaster with a shared hosting plan. As you reach your quota limit, high CPU usage can eventually lead to account suspension. So be sure to check how to fix spikes in your admin ajax file.
Things to Consider Before Stopping Heartbeat API
If you’re thinking of stopping the Heartbeat API completely, you need to think about it twice. It’s not because you can’t do that, it’s just not practical.
Without the WordPress Heartbeat API, all the changes you made in the post will be lost should you ever forget to click the Save Draft button. And you will no longer have access to the Revisions feature in WordPress.
If you install WordPress plugins that use Heartbeat API, you also can’t display the real-time notifications and information features on your site.
But, if you’re working alone, and all of these functions do not matter much to you, you can then proceed to stop the WordPress Heartbeat API.
Otherwise, you might consider controlling the API instead.
How to Completely Stop Heartbeat API?
You can stop the Heartbeat API by adding this code snippet to your active theme functions.php file.
add_action( 'init', 'stop_heartbeat', 1 );
function stop_heartbeat() {
wp_deregister_script('heartbeat');
}
Please remember, you should do this if you’re the only person working with the website, and you don’t need to install additional plugins that use this API.
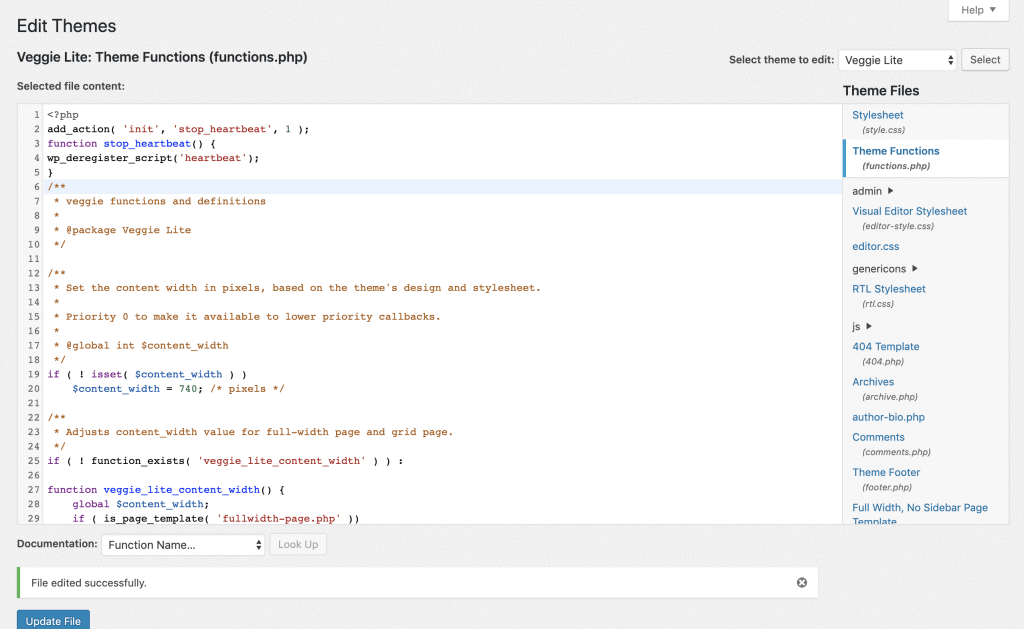
From your WordPress Dashboard, go to Appearance -> Theme Editor. Make sure you’re editing the active theme of your site. Click Theme Functions (functions.php) from the right-hand navigation menu. Paste the code snippet above right after the opening <?php tag and click Update.
That’s it, and now you’ve successfully disabled the WordPress Heartbeat API on your site.

Conclusion
You’ve learned about the WordPress Heartbeat API and the functionality it gives to your site. Although it’s undoubtedly beneficial, in a shared hosting environment, it can cause quite a problem should you not handle it well.
To reduce the CPU usage on your server, you can either control the API or completely disable it. Also, you can do it by adding code to the functions.php file.
Learn Other Expert WordPress Techniques
WordPress Pagination Guide
How to Setup and Manage a WordPress Cron Job
12 Best WordPress Frameworks to Design Themes
How to Remove Query Strings From Static Resources
What Are WordPress Hooks?
WordPress Multisite: What It Is, How to Activate and Manage It

Luqman is a self-proclaimed social scientist. He is passionate about education, technology, and everything in between. He wants to help create a high-quality education system. Having spent the past four years as a social researcher and blog guru, he lends his skills to Hostinger's digital content team. As for free time, he enjoys reading scientific (and not-so-scientific) literature with a cup of black arabica coffee as a companion.


Comments
October 18 2024
While this post is dated late-July, Heartbeat Control was last updated 1-yr ago and hasn't been tested in the last three major versions of WordPress (which poses a security risk and functionality conflicts). Is there a better recommendation than a possibly abandoned plugin?
October 30 2024
Thank you for your feedback! We’ve updated the article and reviewed the list of recommended plugins as well ;)