WordPress on VPS: Best Virtualization + How to Optimize Your Site with KVM VPS

When choosing a virtual private server (VPS) plan, WordPress users must consider its web server and virtualization technology to achieve optimal site speed. At Hostinger, our VPS plans use Kernel-based Virtual Machine (KVM) and OpenLiteSpeed.
In this article, we will explain how to optimize WordPress with KVM VPS at Hostinger. In addition, we will discuss virtualization, its types, and how it affects your site’s performance.
We will also compare popular VPS virtualization technologies and different web servers’ performance for various WordPress website types. Lastly, you will learn how to easily set up an optimized WordPress hosting environment on Hostinger VPS using KVM and OpenLiteSpeed.

What Is Virtualization and Why You Should Care About It
Virtualization technology is software that enables users to create and manage multiple virtual environments, called virtual machines (VMs), in a physical server. Each VM operates as an autonomous server with its own operating system, applications, and dedicated hardware resources.
At the core of VPS virtualization is the hypervisor, a software layer positioned between the physical server and the VMs. It is responsible for allocating resources, creating VMs, and maintaining strict isolation between virtual machines.
Hypervisor allows the actions and processes of each VM in the same server to remain entirely independent, ensuring a secure and reliable hosting environment.
Virtualization’s main objective is to optimize hardware resource utilization, boost operational efficiency, and lower overall hosting costs. By running multiple VMs on a single host, the server can distribute workloads more evenly, resulting in more efficient resource usage.
This setup enables users to deploy diverse operating systems on each VM according to their needs, including Linux-based distributions like Ubuntu or CentOS. Moreover, they can install other software in an isolated environment based on their applications’ requirements.
Types of Virtualization
KVM and Open Virtuozzo (OpenVZ) are popular virtualization technologies with distinct approaches. In this section, we will explain their pros and cons.
KVM or Kernel-based Virtual Machine
KVM is a hardware-level virtualization solution that gives each VM a dedicated kernel for better environment isolation and security. It uses hardware virtualization extensions to create virtual environments.
Pros of KVM:
- Complete isolation – each VM operates as an independent system with dedicated resources, providing robust isolation and security.
- Wide OS support – KVM is compatible with different guest operating systems, including various Linux distributions versions.
- Performance – KVM can achieve near-native performance due to hardware-assisted virtualization.
- Snapshot and live migration – KVM enables users to take VM snapshots and supports live migration, allowing the VMs to seamlessly switch between physical hosts without downtime.
- Flexible resource allocation – the hypervisor can dynamically allocate resources like CPU and memory to VMs based on their requirements.
Cons of KVM:
- Overhead – running a full-fledged guest OS in each VM can lead to higher overhead than other virtualization types.
- Complexity – KVM environments’ setup process can be more complex, especially for beginners, as it requires configuring the hypervisor and installing the guest OS separately.
OpenVZ or Open Virtuozzo
OpenVZ is an operating system-level virtualization solution based on containerization. It shares the host OS kernel among multiple containers – in this case, VPS instances.
Pros of OpenVZ:
- Lightweight – OpenVZ containers share the host OS kernel, leading to minimal overhead and efficient resource utilization.
- Fast deployment – the containers’ quick startup time enables rapid deployment and application scaling.
- High density – OpenVZ allows for a higher container density on the same physical host than full virtualization solutions.
- Easy management – containers are easy to manage and use fewer server resources than full VMs.
- Application isolation – each container provides a degree of isolation, allowing applications to run in separate environments.
Cons of OpenVZ:
- Limited OS flexibility – all containers must use the same OS kernel as the host, which may limit the choice of supported operating systems.
- Reduced isolation – containers share the host OS kernel, meaning they are less isolated than full VMs. A process inside one container could impact other containers or the host.
- Limited kernel modification – the host kernel version must be compatible with the containers’ requirements.
Hostinger uses both virtualizations, but now users can only purchase the KVM plan. To help you understand its benefits, we will compare two Hostinger VPS plans with different virtualization technologies.
For the OpenVZ virtualization, we will use the old Hostinger VPS 2 plan with two cores and 2 GB of RAM. We will compare it against the Hostinger KVM 1 plan with KVM virtualization, one core, and 4 GB of RAM.
This test will measure three main performance metrics – CPU, storage, and network speed.
Pro Tip
As of April 18th, 2023, all of the VPS plans Hostinger offers come with KVM virtualization instead of the OpenVZ one. However, existing OpenVZ VPS users can still renew their plans.
CPU Speed – Geekbench
CPU speed is a crucial factor in determining VPS performance. The CPU is the brain of the server responsible for executing instructions and processing data.
To ensure data accuracy, we use Geekbench CPU benchmark software to test each VPS plan’s performance. A higher score means a faster and more powerful CPU.

The graph shows that the KVM 1 plan offers 35% higher single-core CPU performance despite only having a single core compared to two in Hostinger’s VPS 2 OpenVZ. The multi-core performance is also nearly identical.
Storage Speed – FIO
Storage speed, also known as disk speed or I/O (Input/Output) performance, is another critical factor significantly impacting a VPS’ overall performance. In this benchmark, we are testing a combined random read and write test (50/50).
The read speed measures how fast the drive accesses data stored in it. Meanwhile, write speed measures how quickly the drive saves information.

The graph shows that the KVM plan offers a 67% increase in read and write speeds compared to the OpenVZ one.
Network Speed – iPerf3
Network speed is crucial for fast data transfer, quick site load time, smooth media streaming, low-latency gaming, remote access, and handling concurrent users on a VPS. It ensures efficient content delivery, data backups, and software updates.
In the following benchmark, we compare network transfer speeds for Hostinger KVM 1 and Hostinger VPS 2 OpenVZ plans using iPerf3. This tool measures the maximum achievable bandwidth on a network, including between a client and VPS.

KVM shows 66% better performance in download and upload speeds. In addition, our new KVM plans use a 300 Mbps network, while the deprecated OpenVZ plan uses 100 Mbps.
Choosing Based on Performance
KVM uses hardware virtualization extensions to create virtual environments, like Intel VT-x or AMD-V. As a result, it provides near-native performance for most workloads. It also gives each VM an independent kernel for better VPS isolation.
KVM is generally better for workloads requiring complete isolation, compatibility with various operating systems, and plenty of processing power due to its capabilities to optimize your WordPress website.
Best Virtualization for WordPress
The best virtualization technology to optimize your WordPress site depends on various factors such as performance, resource requirements, scalability, isolation, and management complexity.
Both OpenVZ and KVM have their advantages and drawbacks for hosting WordPress websites. To help you pick the best one, let’s compare them based on their performance, scalability, and isolation.
Performance
KVM provides near-native performance since it operates as a full virtualization solution with dedicated resources and hardware virtualization extensions. This makes it suitable for resource-intensive applications like WordPress, especially when you need consistent performance.
OpenVZ has lower overhead due to sharing the host OS kernel. It can achieve better resource efficiency and performance for lightweight applications or when hosting multiple instances of the same WordPress site.
Scalability
KVM offers greater flexibility and scalability when adding more resources like CPU, RAM, and disk to individual VMs to accommodate various workloads.
OpenVZ containers share the host’s resources, making scaling out and deploying multiple instances of the same WordPress site easier.
Isolation
KVM offers complete isolation between virtual machines, providing better security and separation between WordPress sites.
While OpenVZ containers provide some isolation, each VM is not fully independent. This could be a concern if you want to host multiple unrelated WordPress sites as it may cause software conflict.
KVM and OpenVZ for WordPress: Which One is Better?
KVM is the better choice for a WordPress website if you prioritize high performance, complete isolation, and the ability to handle resource-intensive workloads.
In addition, KVM’s full virtualization approach ensures dedicated resources and strong isolation between VMs, preventing software conflicts. It makes the virtualization suitable for hosting multiple WordPress sites with different requirements.
To support this, we will compare the more powerful Hostinger VPS 4 OpenVZ plan with 4 CPU Cores + 4 GB of RAM against the Hostinger KVM 1 plan with a single core + 4 GB of RAM.
We will use GTmetrix to test three website types – personal, eCommerce, and web design agency. We will run the test five times and take the average score to see which configuration offers the fastest fully loaded time.
Important! All tests in this section use the LiteSpeed cache plugin on an OpenLiteSpeed web server. In addition to the virtualization, both software can significantly affect performance.
Personal
A simple personal website usually functions to showcase personal information, interests, or projects. It typically serves as a digital identity or online portfolio, allowing visitors to learn more about the website owner and their activities.

The VPS requirement for this type of site is generally modest since personal websites are simple, draw low traffic, and consume minimal server resources. A VPS plan with one CPU core and 1-2 GB of RAM should be sufficient. Here’s the test result:

The graph shows that the KVM plan offers a considerable 10% site speed improvement. Moreover, it performs better despite having three fewer CPU cores than the OpenVZ one.
eCommerce
Unlike personal websites, an eCommerce website has more resource and feature requirements. It needs additional features for handling online transactions, showcasing product catalogs, and processing customer data.
As such, a WordPress-based online store is generally more resource-heavy than a simple personal website. Aside from the additional functionalities, an eCommerce website typically has more data and web pages to offer a seamless shopping experience to customers.

For these reasons, eCommerce websites deal with more complex operations and potentially higher traffic. So, we recommended having a VPS with at least two to four CPU cores and 4 GB to 8 GB of RAM to ensure optimal site performance.

Despite the fewer processing units, the KVM plan handles the eCommerce website well and offers a 21% page load time improvement compared to the OpenVZ VPS.
Web Design Agency
A web design agency site is a digital platform showcasing a company’s services, expertise, portfolio, and contact information. Its primary purpose is to attract potential clients, demonstrate the agency’s capabilities, and provide essential information to visitors.

The requirements for a VPS will depend on factors such as the expected traffic, the number of websites hosted, the WordPress theme, and the web pages’ complexity.
For instance, the server resource consumption will increase if a page uses many JavaScript (JS) files and external HTTP requests. In addition, the more web pages a website has, the longer it takes to load.
You will also need a higher-performance VPS if the website requires specific services or applications, like a map API. A VPS hosting plan with at least two CPU cores and 4 GB RAM for a web design agency should be sufficient to start with.

Based on the findings, our new KVM 1 plan handles the web design agency WordPress website well, offering a 5% page speed improvement compared to the OpenVZ plan.
Best Web Server Choice for WordPress
In addition to the virtualization technology, choosing the best web server is crucial to speed up your WordPress website performance. To help with your WordPress optimization, this section will compare three popular web servers – Apache, NGINX, and OpenLiteSpeed.
Apache
Apache is a popular web server currently powering around 30% of websites worldwide, making it the second largest in the market. This open-source web server is known for its performance, extensive compatibility, and module system.
It is compatible with various operating systems, including OpenVMS and other Unix-like operating systems, like MacOS or Linux. It is also a recommended web server for hosting a WordPress site.
The module system lets users add or remove functions to configure their web server according to their needs. In addition to flexibility, Apache modules are dynamically loadable, resulting in more efficient memory utilization and better performance.
Pros:
- Extensive support – wide community support and comprehensive documentation.
- Simplicity – easy to set up and configure, making it beginner-friendly.
- Dynamic modules – Apache modules can be loaded anytime during runtime for easier development.
- Directory-level configuration – it provides a .htaccess file to allow users to tweak the site’s settings without modifying the main server.
Cons:
- Resource-demanding – due to its architecture, the Apache web server is less efficient at handling concurrent connections and static content than NGINX.
NGINX
NGINX is a free, open-source web server popular for its high performance, resource efficiency, and speed. It has a similar market share as Apache but is currently the most used web server, powering over 34% of websites worldwide.
Unlike Apache, NGINX uses an asynchronous, event-driven architecture that efficiently distributes client requests across worker processes. It allows the web server to serve many concurrent connections with consistent performance and minimal resources.
Pros:
- High performance – superior performance in handling concurrent connections and static files.
- Resource-efficient – NGINX’s efficient resource utilization makes the web server well-suited for high-traffic websites.
- Low memory footprint – NGINX requires a small amount of memory to run, suitable for systems with limited resources.
- Dedicated support – the web server’s premium version, NGINX Plus, offers dedicated support from the developer.
Cons:
- Difficult setup – configuration syntax might be complicated for beginners.
- Limited configurability – since NGINX doesn’t provide .htaccess files, users may need to modify certain WordPress plugins.
Learn More About NGINX vs Apache
Want to learn more about these two web servers? Check out our in-depth comparison between NGINX vs Apache.
OpenLiteSpeed
OpenLiteSpeed is an open-source variant of LiteSpeed, a commercial web server designed to replace Apache. It is compatible with Apache configurations, enabling users to switch between the web servers without making significant changes.
However, OpenLiteSpeed offers significant performance and scalability improvements over Apache. It incorporates the asynchronous event-driven architecture similar to NGINX, resulting in better efficiency when handling concurrent connections.
Since Apache is more popular, OpenLiteSpeed’s community support may be less extensive. Moreover, it’s only compatible with Unix-like operating systems.
Pros:
- High performance – the web server can handle many concurrent connections and PHP requests efficiently to ensure optimal WordPress website speed during high traffic.
- Built-in caching features – users can use LiteSpeed Exclusive Features to enable the LiteSpeed Cache WordPress plugin to speed up their WordPress site.
- Beginner-friendly – due to its similarity to Apache, OpenLiteSpeed is easy to set up and configure.
- Drop-in replacement – OpenLiteSpeed is compatible with Apache’s rules and configurations, making it easy to transition between the web servers.
Cons:
- Open-source version limitations – the free version might lack some advanced features compared to the commercial Enterprise and Standard LiteSpeed editions.
Choosing the Best Web Server
When choosing a web server for your WordPress website, note that each option has its strengths. Apache is well-established, user-friendly, and compatible with various applications. Meanwhile, NGINX performs better, efficiently handling concurrent connections and serving static content.
On the other hand, OpenLiteSpeed may be an excellent choice if you want an alternative to both web servers. It offers NGINX’s PHP handling performance with seamless Apache compatibility and straightforward configuration.
OpenLiteSpeed provides a balance between performance and ease of use, making it an ideal option for hosting a WordPress site. Its built-in caching capabilities and efficiency in handling PHP requests ensure optimal page speed and responsiveness.
Moreover, transitioning from Apache to OpenLiteSpeed is relatively seamless due to its compatibility with the web server’s configurations. Plus, you won’t experience a performance drop when switching from NGINX for their similar architecture.
To objectively measure their performance, we tested each web server by running personal, eCommerce, and web agency WordPress websites. Like the previous test, we will use GTmetrix and focus on the fully loaded time metric.
We also use the same VPS plan, Hostinger KVM 1 with one core and 4 GB of RAM.

Our tests show that OpenLiteSpeed offers faster page speed for every website type than Apache and NGINX. It is 16% to 32% faster in fully loaded time than Apache and performs 14% to 38% better than NGINX.
How to Set Up Best-Optimized WordPress on Hostinger VPS (with OpenLiteSpeed and KVM)
In this section, we will explain the steps to set up OpenLiteSpeed and KVM virtualization using Hostinger’s VPS hosting for your WordPress site. Before proceeding, ensure you have purchased the new KVM hosting plan.

Step 1. Install a Template With OpenLiteSpeed and WordPress
Hostinger offers templates that let you change your server’s operating system and install an application in one click. These templates make the VPS configuration process faster and easier since you don’t need to manually install the software individually.
For this tutorial, we will use the Ubuntu with WordPress template, which comes with OpenLiteSpeed. After setting up your VPS, follow these steps to apply the template:
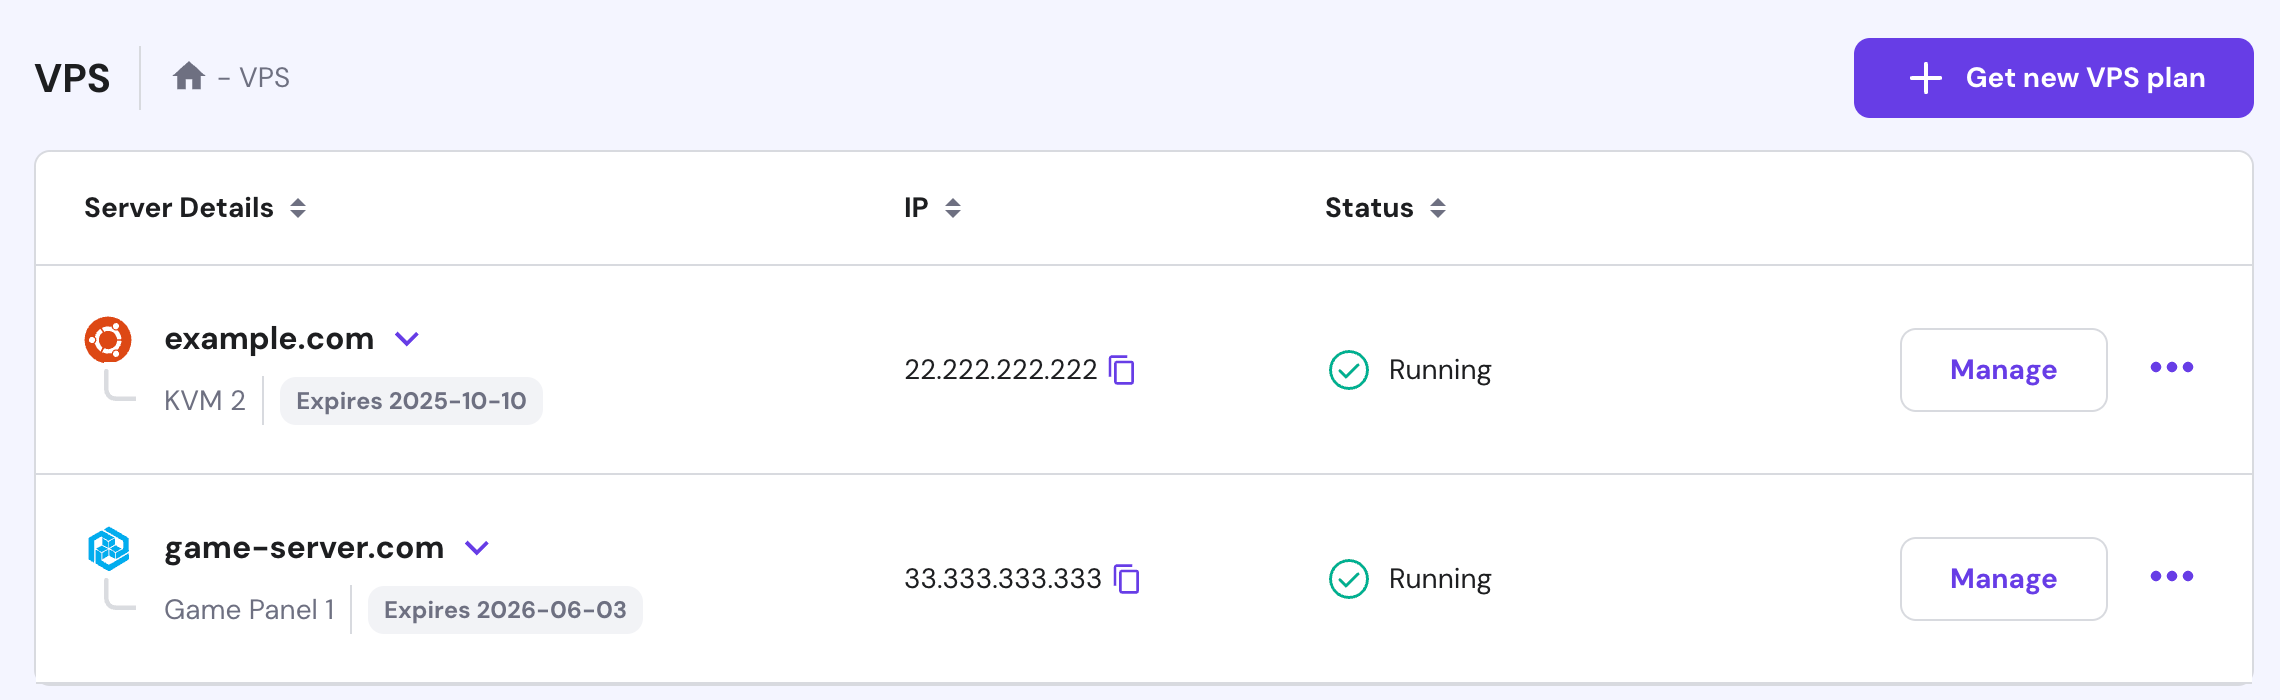
- Log in to hPanel and select VPS on the sidebar. Click Manage on your VPS plan:
- Navigate to the sidebar → OS & Panel → Operating System section, choose Applications, and select the WordPress template:
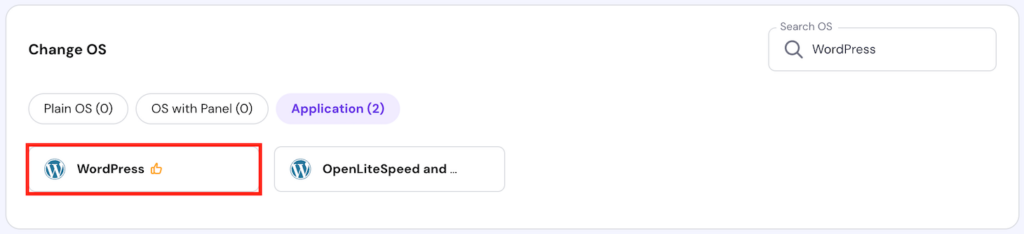
- Lastly, click on the Change OS button.
Wait until the installation is complete, which usually takes around 10 minutes. Once finished, you will see a confirmation message at the top of your screen.
Pro Tip
In addition to WordPress, Hostinger VPS provides OpenLiteSpeed templates for other content management systems like Joomla or Drupal. We also offer templates for installing web development frameworks like Ruby on Rails or Django.
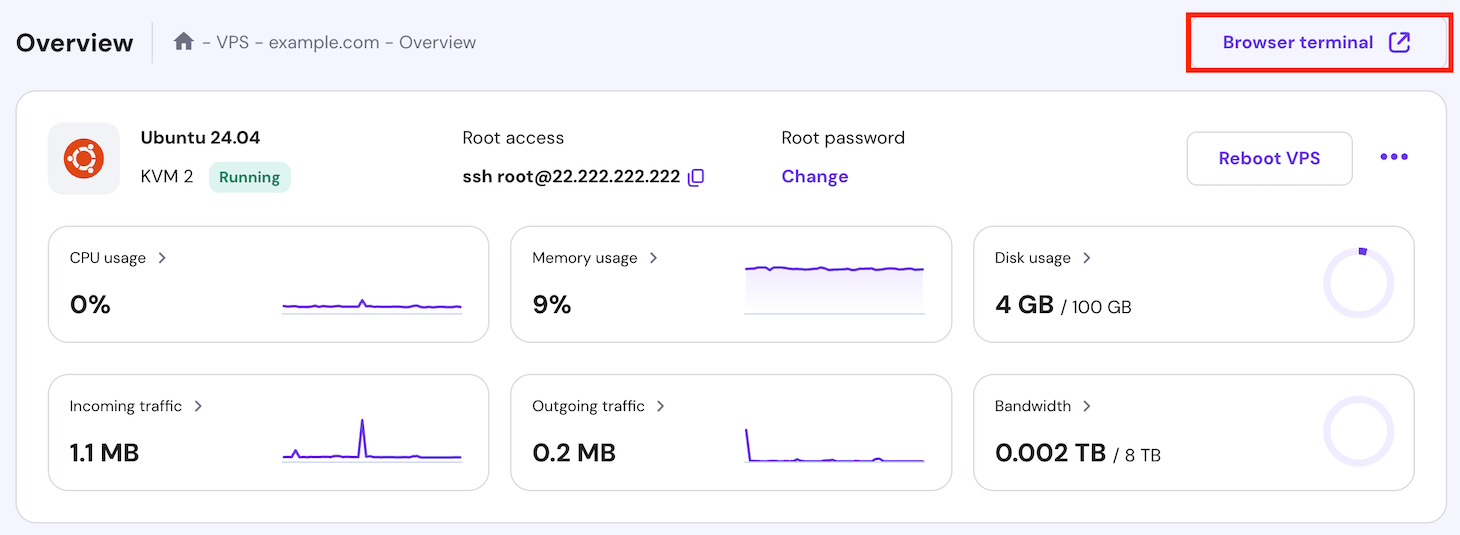
Step 2. Log in to SSH and Run the Interactive Script
After installing the template, run the bash script via SSH to configure the web server. You can use an SSH client like PuTTY or Terminal, but we recommend hPanel’s Browser terminal since it is more convenient.
On hPanel’s VPS overview menu, follow these steps:
- Click Browser terminal. If your browser returns a pop-up notification message for permission, select Allow.
- Enter your VPS root username and password. You can find them in the SSH access tab.
- An interactive script will appear after logging in. Enter your domain or VPS IP address to start the installation.

- The command line will prompt you with various questions. Enter y or n to answer the prompts and continue the installation.

Once the OpenLiteSpeed web server is installed, the command line will output a confirmation message.
Step 3. Install and Configure WordPress
After setting up the web server, install and configure the WordPress platform. To do so, open your web browser and follow these steps:
- Visit your website using its domain name or VPS IP address.
- Choose the WordPress installation language.

- Fill in the required information, like the site title, username, and password, then click Install WordPress to confirm.

WordPress is now ready to use, and the LiteSpeed caching plugin will install automatically.

Want a Simpler Hosting Solution?
For beginners, we recommend our managed WordPress hosting solution instead of VPS since it is simpler to set up and maintain. It comes with various WordPress development features, a free domain, and an in-house content delivery network (CDN).
Step 4. Start Managing Your Server
After installing WordPress, configure OpenLiteSpeed’s Web Admin control panel and phpMyAdmin to manage your website.
Setting Up Web Admin
OpenLiteSpeed has a pre-installed management panel called Web Admin, which offers a graphical user interface that helps simplify system administration tasks.
To access Web Admin, enter https://vpsip:7080 into your browser and replace vpsip with your actual IP address. Also, ensure your operating system firewall opens port 7080 to make the panel accessible.
You can open the port using Ubuntu’s Uncomplicated Firewall (UFW) command utility via SSH. Here’s the command:
ufw allow 7080
For more information, refer to the LiteSpeed control panel access manual. Once you successfully access Web Admin, you will see a login screen similar to the one below.

Enter your Web Admin access credentials and click Login. By default, the login username is Admin. For the password, check it by running either of the following commands in Browser terminal:
sudo cat /home/ubuntu/.litespeed_password
sudo cat .litespeed_password
In the control panel, you can manage your domains, SSL certificates, and other server settings:

Setting Up phpMyAdmin
The OpenLiteSpeed template automatically installs a MySQL WordPress database for your website. It also provides phpMyAdmin for managing the database, accessible via http://vpsip/phpmyadmin.
The default login username is root. Meanwhile, run one of these commands via SSH to check the MySQL and WordPress user passwords:
sudo cat /home/ubuntu/.db_password
sudo cat .db_password
Your web server is now ready for hosting a website. We recommend checking the official LiteSpeed documentation to learn more about optional setup processes, like enabling HTTPS and configuring SSL.
Step 5. Configure LiteSpeed Cache WordPress Plugin
One of OpenLiteSpeed’s key features is its capability to enable users to fully leverage the LiteSpeed Cache WordPress plugin. It is pre-installed with the web server and accessible via the Plugin menu on your WordPress dashboard.
You can adjust various caching settings based on your needs. For this tutorial, we will choose the default options and enable Object Cache:

Suggested Reading
Check out our LiteSpeed optimization guide to learn more about the settings of one of the best caching plugins on the market.
LiteSpeed Cache Performance
To demonstrate the page speed improvement, we will test three WordPress site types with LiteSpeed Cache enabled and disabled. In this test, we will use the same Hostinger VPS plans with KVM and OpenVZ virtualization.
Personal Website

The graph shows that the KVM plan offers a 10% decrease in page load time with the LiteSpeed Cache plugin enabled compared to OpenVZ.
KVM also remains faster without the LiteSpeed caching plugin. It still offers a 4% lower loading time than the OpenVZ plan with the plugin enabled.
eCommerce Website

For an eCommerce WordPress site, both plans perform similarly. However, the KVM plan offers 8% and 11% faster loading time, with the LiteSpeed caching plugin enabled and disabled, respectively.
Web Design Agency Website

Both VPS plans offer nearly identical performance, but the KVM plan outperforms with a 5% faster loading time with LiteSpeed Cache on. With the plugin disabled, it still offers a 3% shorter loading time.
To summarize, KVM VPS consistently delivers up to 11% better performance than OpenVZ. The LiteSpeed Cache plugin also improves website performance significantly when paired with the KVM virtualization technology.
The combination provides faster page loading speed and responsiveness, regardless of the website type. If you want to scale and speed up your WordPress site, Hostinger’s VPS hosting OpenLiteSpeed template is an excellent choice.
Conclusion
Hosting a WordPress site on a VPS plan offers flexibility as you have different options for virtualization technologies and web servers. However, finding the ideal configuration for your needs can take time and effort, as choosing the wrong one can lead to a slow website.
Virtualization separates a physical server into multiple isolated virtual machines with their own operating system and hardware. Meanwhile, web server software controls how web users access web content online.
Based on our tests, combining KVM and OpenLiteSpeed offers the best performance for hosting a WordPress site. At Hostinger, you can easily set up a VPS to speed up your WordPress site using these steps:
- Install the OpenLiteSpeed and WordPress template via the VPS operating system configuration menu in hPanel.
- Open the Browser terminal and log in via SSH. Run the interactive script to complete the web server setup process.
- Complete the initial configuration by installing WordPress, the Web Admin control panel, and the phpMyAdmin database management tool.
- Enable the LiteSpeed caching plugin via WordPress to improve your website loading speed.
With caching enabled, the KVM and OpenLiteSpeed VPS hosting solution performs better than its OpenVZ counterpart. According to our tests, it reduces personal website loading speed by 10%, eCommerce by 8%, and web design agency by 5%.
WordPress with KVM – FAQ
In this section, we will answer several commonly asked questions about optimizing WordPress with KVM VPS. If you have another one, leave us a comment below.
What is KVM VPS?
KVM VPS stands for Kernel-based Virtual Machine Virtual Private Server. It is a virtualization technology that enables multiple virtual web hosting servers to run on a single physical machine. Each VPS operates independently with its own dedicated resources and isolated environment.
What is OpenLiteSpeed?
OpenLiteSpeed is a lightweight open-source web server software. It provides a high-performance, scalable, and feature-rich platform for serving websites and web applications. It is designed to be a faster alternative to Apache, with support for PHP and other popular web technologies.

Ignas takes great satisfaction in helping people tackle even the most complex technical issues. His current goal is to write easy-to-follow articles so that these issues will not happen at all. During his free time, Ignas likes to play video games and fix up things around his house.

Aris is a Content Writer specializing in Linux and WordPress development. He has a passion for networking, front-end web development, and server administration. By combining his IT and writing experience, Aris creates content that helps people easily understand complex technical topics to start their online journey. Follow him on LinkedIn.