How to install Suricata on Ubuntu to secure your network
Intrusion Detection System (IDS) and Intrusion Prevention System (IPS) help prevent cyber criminals from infiltrating your server. These network security tools automatically drop traffic and trigger alerts upon finding a malicious activity.
In an Ubuntu virtual private server (VPS), Suricata is a popular IDS and IPS solution. In addition to being open-source, this network traffic monitoring is available for various operating systems, including Windows and Linux.
In this article, we will explain how to install Suricata on Ubuntu servers to help improve your network security. You will also learn how to modify the default settings and set up new detection rules to suit your VPS security practices.

Prerequisites
Although Suricata doesn’t mention its minimum hardware requirements, we recommend a minimum of 2 CPU cores and 4 GB of RAM to ensure optimal performance.
If you don’t have a VPS hosting plan, we recommend starting with Hostinger’s KVM 2 plan and upgrading as needed.
This plan is ideal since its 2 vCPU cores and 8 GB of RAM provide enough headroom for hosting other applications while still being affordable, costing ₹549.00/month.
For the operating system, ensure your VPS supports Ubuntu 22.04 or later. Older versions might be incompatible with the latest Suricata version.
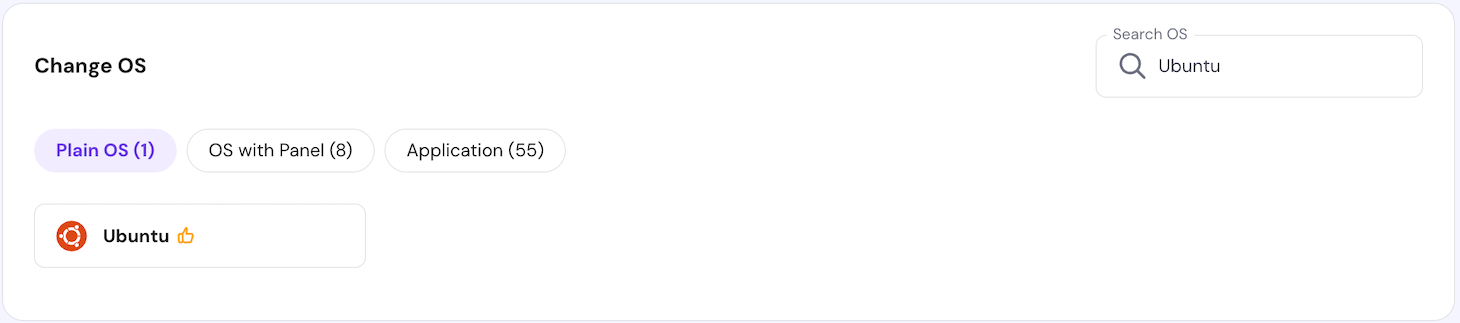
Hostinger users can use hPanel’s one-click installer to switch to other operating systems. To do so, navigate to your VPS overview menu’s sidebar → OS & Panel → Operating System → Plain OS. Select the Ubuntu and click Change OS.
Suricata installation also requires root or superuser privileges to run Linux commands. To avoid permission issues and ensure a smooth command-line installation process, choose a VPS hosting provider with full server access, like Hostinger.
Aside from extensive compatibility, the best VPS hosting providers should offer reliable uptime and various features. For example, Hostinger comes with an AI Assistant Kodee, allowing you to simplify tasks by entering different AI prompts for VPS management.
We also provide a Browser terminal that lets you connect to your Ubuntu system without using an SSH client like PuTTY. To access your VPS remotely, use the login credentials in the Overview menu’s SSH Access tab.
Important! By default, you will log in as the root user. We recommend switching to another account with superuser privileges to avoid accidentally executing destructive commands.
All of our VPS hosting plans offer a 99.9% uptime guarantee and a 30-day money-back guarantee.

How to install Suricata on Ubuntu
In this section, we will explain the steps to install Suricata on a VPS running Ubuntu 22.04. If you want to install it on a gateway host to scan incoming and outgoing network traffic, you might need additional steps, like modifying firewall rules.
1. Update Ubuntu packages
Before installing Suricata, update APT to ensure you receive the latest local version. This step also applies the newest patches for other system packages to help improve security and avoid incompatibility issues.
To list the available system package updates in your APT repository, run the following command:
sudo apt update
Install updates for all system packages using this command:
sudo apt upgrade
The process might take minutes or hours, depending on the total update size and your internet speed.
2. Install Suricata
There are several methods to install Suricata on Ubuntu. In this section, we will explain the three common ways, starting from the easiest.
Install Suricata using APT
Use this command to install Suricata on Ubuntu using the local APT repository:
sudo apt install -y suricata
To verify if Suricata is installed properly, check its version number using this command:
suricata -V

Important! Ensure correct capitalization when entering commands since they are case-sensitive.
Alternatively, list installed packages on Ubuntu using the apt list command and filter Suricata using grep like the following:
sudo apt list --installed | grep suricata
Note that this method might install an older release since you are using the local APT package manager repository.
Install Suricata using binary packages
To install the latest stable release, import the Open Information Security Foundation (OISF) repository from the Suricata server. To do so, run these commands:
sudo apt install software-properties-common
sudo add-apt-repository ppa:oisf/suricata-stable
Press Enter if Terminal asks for confirmation. After importing the repository, update APT and unpack the software with this command:
sudo apt install suricata
If you are running other Debian derivatives, use the backports repository to get the latest stable release. Refer to the Suricata binary packages installation guide to learn more about it.
Install Suricata using source distribution files
Setting up Suricata from the source distribution files lets you configure the installation settings. However, you will need to install several dependencies and various development headers.
After installing the Suricata dependencies, run the following commands subsequently:
tar xzvf suricata-6.0.0.tar.gz
cd suricata-6.0.0
./configure
make
make install
3. Configure Suricata
The Suricata package includes a YAML configuration file for tweaking the tool’s settings and behavior. You can edit it using a text editor like nano:
sudo nano /etc/suricata/suricata.yaml
The suricata.yaml file has several parameters you can adjust. Here are the most common ones:
- Interface configuration. Determines the method and network interface for capturing the packet. Some of the settings are af;-packets, af-xdp, and pcap.
- Logging. Modifies where Suricata logs the network detection, its format, and alerting level. You can change the settings via the outputs parameter.
- PID file. Sets the process identification (PID) file for running Suricata as a daemon or service. Determine its name and directory in the pid-files parameter.
- Detection rules. Defines the files containing packet-filtering rules and their locations. The parameters are default-rule-path and rule-files, respectively.
- Packet sizes. Changes the maximum packet size to be processed by Suricata and transmitted by your network. Specify the byte value in the max-pending-packet and default-packet-size parameters.
- Community Flow ID. Identifies Suricata network flow to enable integration with another tool like Zeek. The community-id parameter is set to false by default.
Edit the configurations and press Ctrl + X, Y, and Enter to save the changes. To quickly search for a specific parameter, use the Ctrl + W shortcut to enable the lookup feature.
In addition to reading the provided instructions, check the Suricata configuration file documentation to learn more about the settings. For commented parameters like community-id, remove the hash symbol (#) at the beginning to enable them.
4. Enable network interfaces
To process network traffic and block malicious packets from damaging your system, Suricata must monitor an interface.
By default, Suricata doesn’t track any connectivity from and to your server. Users must specify which network interface to monitor and determine the packet capture method via the YAML file.
For example, we want to use the af-packet capture method and monitor the venet0 network interface. Here’s how the configuration looks:
af-packet:
   - interface: venet0
Enter this command to display the default interface and other routing information:
ip -p -j route show
Set the packet capture method based on your needs. For example, the af-packet is suitable for live network tracking, while pcap is ideal for offline analysis.
To monitor multiple network interfaces, add these new lines at the bottom of the capture method section. Ensure the cluster-ID is unique:
-  interface: interface name
   cluster-id: 29
5. Start Suricata
Enable the Suricata service using the systemctl command to run it in the background:
sudo systemctl start suricata
To check if it is running correctly, run the following:
sudo systemctl status suricata
If the Suricata service is running, Terminal should show the loaded and active statuses like the following.

Remember, always restart the Suricata service after modifying the configuration file to ensure the new settings apply properly. Here’s the command:
sudo systemctl restart suricata
Alternatively, stop Suricata and rerun it using the systemctl start command. To terminate the daemon, enter the following:
sudo systemctl stop suricata
6. Automate Suricata startup
Automating Suricata startup helps maintain optimal VPS security since you don’t need to manually reactivate it after rebooting the system. This helps improve server management efficiency.
To do so, create a new systemd service unit file to automatically deploy Suricata when the server starts using the following command:
sudo nano /etc/systemd/system/suricata.service
Within the service unit file, enter the following lines:
# Define the Suricata systemd unit
[Unit]
Description=Suricata IDS/IPS
After=network.target

# Specify the Suricata binary path, the configuration files location, and the network interface
[Service]
ExecStart=/usr/bin/suricata -c /etc/suricata/suricata.yaml -i venet0
[Install]

WantedBy=default.target
Press Ctrl + X, Y, and Enter to save the changes. Run the following command to enable Suricata to load automatically upon system boot:
sudo systemctl enable suricata
Then, run the systemctl start command to start Suricata. Check the status to ensure the service is running.
If Terminal returns the “No rule files match” error, Suricata might not be able to load the network monitoring rules. To fix it, run suricata-update to refresh the directory path.
Then, open the suricata.yaml file and modify the configuration rules, like the following:
default-rule-path: /var/lib/suricata/rules
rule-files:
   - suricata.rules
Save the file and restart the service to apply the changes.
7. Test Suricata functionality
After starting Suricata, validate its configuration file to ensure the tool works. The easiest way to do this is by using the built-in test command:
sudo suricata -T -c /etc/suricata/suricata.yaml -v
The -T option lets you run the Suricata test mode, and -c allows you to find the configuration file in the specified path. Additionally, the -v option enables verbose mode, providing details about command execution, including errors.
If you have numerous rules and limited CPU threads, the process will run longer but shouldn’t exceed a few minutes. Terminal will print the test logs like the following.

During this step, look for the warning message indicating misconfiguration in your YAML file. To simplify troubleshooting, we recommend asking our VPS AI Assistant Kodee for solutions.
Then, check Suricata rules to ensure they detect malicious traffic properly. The Suricata quick start guide recommends using ET Open rule number 2100498 and connecting to a test URL using the curl command:
curl http://testmynids.org/uid/index.html
The command will send an HTTP request to trigger the alert rule. Then, Suricata will generate log events in the eve.json and fast.log file about the detected traffic.
Check whether Suricata labels the HTTP request as potentially malicious traffic in the fast.log file. To do so, run the grep utility to filter the rule ID number:
grep 2100498 /var/log/suricata/fast.log
The output should show a log labeling the packet as “Potentially Bad Traffic.”
Since the eve log formats its entries as JSON, analyzing it requires the jq utility. Skip this step if you have installed the utility. Otherwise, run the following:
sudo apt install jq
Then, enter the following command to filter the log file entries based on the signature ID and alert type:
jq 'select(.alert .signature_id==2100498)' /var/log/suricata/eve.json
You should see the rule ID and the same “Potentially Bad Traffic” category. It means Suricata has matched your network traffic with the correct detection rule.
These logs are helpful for alert management and network security monitoring. For example, you can block suspicious traffic sources in Ubuntu’s Uncomplicated Firewall (UFW) or iptables.
8. Update Suricata rules
Suricata detects suspicious packets using user-defined signatures or rules. It includes some by default, but they might be insufficient if your server receives traffic from many sources.
To add new rules, fetch additional rulesets from various third-party providers. While some of them are free, others might charge a subscription fee. To list them, run the following command:
sudo suricata-update list-sources

You will see the providers’ vendors, summaries, licenses, and subscription information. To import a ruleset, run the following command:
sudo suricata-update enable-source provider-name
Replace the provider-name placeholder with your desired ruleset source. For example, run this to retrieve sslbl/ja3-fingerprints:
sudo suricata-update enable-source sslbl/ja3-fingerprints
Then, rerun the suricata-update command to update and validate the rule files in the /etc/suricata/rules directory. If you don’t add an external source, updating Suricata will retrieve the default rules from ET OPEN.
After updating the default ET OPEN source, you will see that Suricata has processed inspecting packet payload signature and ip-only rules.
The update message should end with the tool cleaning up the signature grouping structure. If you are up-to-date, Terminal will print “No changes detected, exiting.”

We recommend running the Suricata update tool regularly to ensure your system receives the latest rule. Enforcing the newest detection method helps maintain optimal Ubuntu server security.
Optionally, use Suricata rules management tools like Pulledpork and Oinkmaster to fine-tune the detection method. Use nano to modify the file:
sudo nano /etc/suricata/rules/rule_name.rules
The Suricata rule syntax is as follows:
action protocol source-ip/port -> destination-ip/port (options; options; ... )
Here are what each parameter means and its accepted values:
- action. The action to take when the rule condition is met. Possible values include drop, alert, and log.
- protocol. The monitored network protocol, including TCP, UDP, ICMP, or IP.
- source-ip/port. The IP and port from which the traffic originates.
- destination-ip/port. The IP and port on which the rule applies.
- (options; options; …). Keywords determining additional settings or conditions.
To learn more about these parameters and possible options, check out the Suricata rules documentation.
Conclusion
Suricata is an open-source IDS and IPS system that helps prevent malicious traffic from infiltrating your server to improve your system security. It works by detecting and dropping suspicious traffic based on a rule.
In this article, we have explained the Suricata configuration on Ubuntu 22.04 or later. After installing the distribution and gaining root access to your server via SSH, follow these steps:
- Update Ubuntu packages. Run the apt update and apt upgrade command to install the latest version of all packages.
- Install Suricata. Install the tool via APT or the OISF repository if you want the newest Suricata version.
- Configure Suricata. Use a text editor like nano to edit the suricata.yaml file and tweak the default configuration.
- Enable Network interfaces. Change the packet capture method and network interface parameter to enable Suricata to monitor your server’s traffic.
- Start Suricata. Run the systemctl command to start Suricata as a daemon.
- Automate Suricata startup. Create a Suricata systemd service unit file and use systemctl to enable the tool during system startup.
- Test Suricata functionality. Validate the Suricata configuration file using the built-in test feature and check the rules by sending a mock-up HTTP request.
- Update Suricata rules. Run suricata-update with the enable-source flag to retrieve a ruleset from an external source. Update Suricata to apply and validate the new rules.
We hope this article helps you install the tool in your Ubuntu VPS. If you have any questions or encounter issues during the setup process, leave us a comment below.

Aris is a Content Writer specializing in Linux and WordPress development. He has a passion for networking, front-end web development, and server administration. By combining his IT and writing experience, Aris creates content that helps people easily understand complex technical topics to start their online journey. Follow him on LinkedIn.