How to Create an Email Account for Professional Use and Set Up a Mail Client
Creating an email account for your business makes communicating with clients easier.
A professional email address with your company’s name will immediately show customers who sent the email, increasing your credibility and trust.
Furthermore, it will boost your email marketing strategy to drive sales.
In this article, we will explain how to create a business email account using Hostinger, Titan Mail, and Gmail. Additionally, we will show you how to set up an email application using Microsoft Outlook, Mozilla Thunderbird, and Apple Mail.

What Is a Professional Email Address?
A professional email address is based on a custom domain that is your business name. It also typically includes a person’s name or a generic noun, like john@yourbusinessname.com or information@yourbusinessname.com.
How to Create an Email Account for Professional Use – Video Tutorial
Learn how to create a professional email account in 8 minutes with this Hostinger Academy video.

How to Create a Professional Email Address
Here are the three most common ways to create a professional email address:
How to Create an Email Account via Hostinger
We recommend setting up business email addresses with a web hosting plan, as doing so lets you manage websites and emails using one hosting provider. Furthermore, our hosting plans come with a 30-day money-back guarantee, giving you peace of mind during the trial period.

In this section, we’ll go over a business email setup for Hostinger users.
1. Choose a Web Hosting Plan
The first step is choosing a web hosting plan. At Hostinger, most of our hosting plans include a free domain name and an email service. If you need more than one email account, we recommend picking the Premium Web Hosting package starting at ₹149.00, as you can create up to 100 domain-based email addresses.
If you want just email hosting, you can pick up a business email hosting plan – the premium one comes with a free domain name, too.
Follow these steps to set up a hosting account:
- Go to Hostinger’s Web Hosting page, select a suitable hosting plan, and click Add to cart.
- Choose a period between one month to four years, create or log in to your account, and select the payment method. Once you’ve entered the personal contact details and card information, click Submit Secure Payment to finish the checkout process.
- After completing the payment, you’ll be redirected to hPanel. There, click Setup to configure the hosting plan.
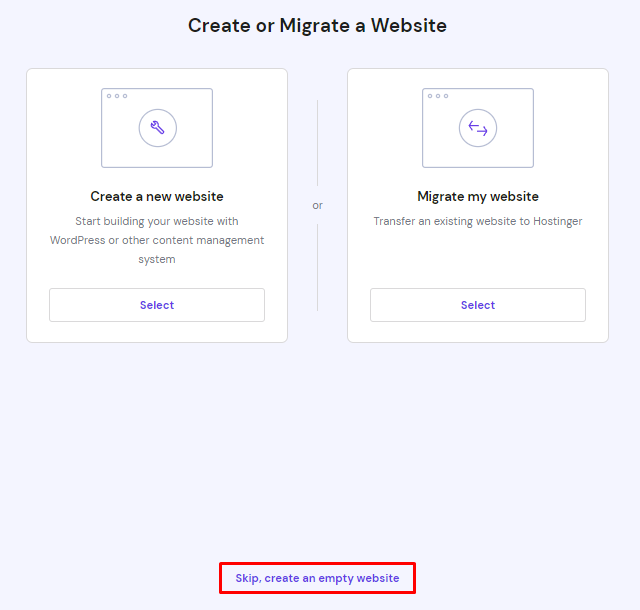
- Select whether you want to create a new website using a content management system (CMS), migrate an existing site, or build an empty website. In this example, we’re choosing Skip, create an empty website.
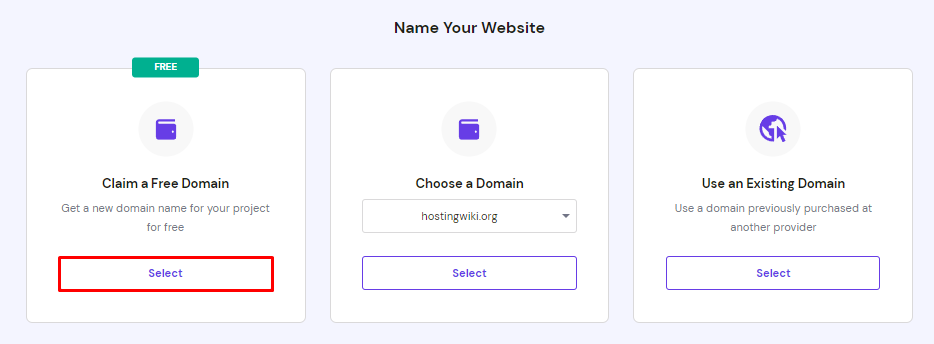
- Click Select under the Claim a Free Domain section to register a new domain name that will appear after the “@” symbol on the email address – for example, johnsmith@yourdomain.com. Usually it is your brand name and domain extension, like .com or .email. Feel free to use our domain availability checker to come up with more name ideas.
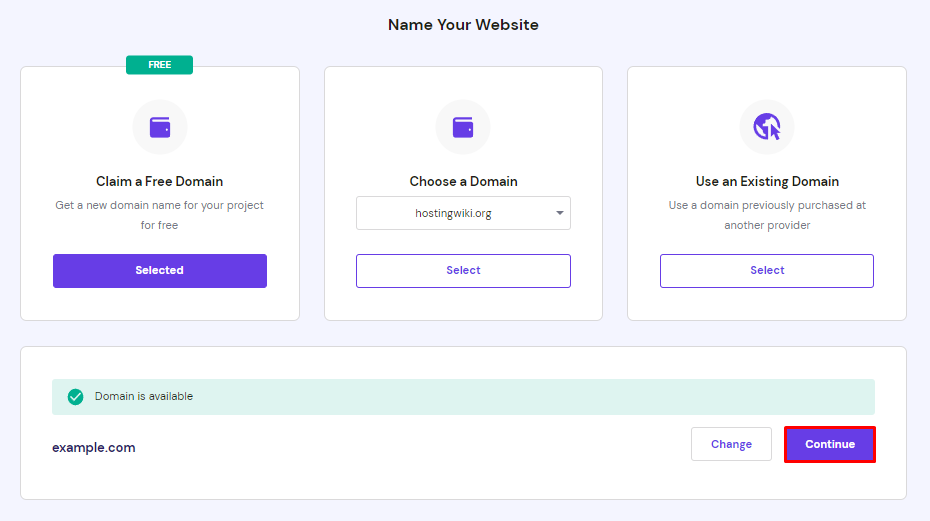
- Enter your preferred domain name, click Search to check its availability, and select Continue.
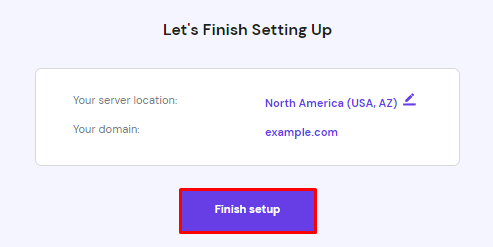
- Review the server location and domain name and click Finish setup to complete the process.
- Fill all the forms with your personal contact information, as it will be shown in the WHOIS database lookup tool. Once done, select Finish registration.
- Verify the domain name within 15 days to activate it.
Pro Tip
After you bought a domain name from a registrar, add it to your hosting account and point the DNS to our servers.
Alternatively, transfer the domain to Hostinger using
– How to Transfer Domain To Hostinger From Google
– How to Transfer Domain To Hostinger From IONOS
– How to Transfer Domain To Hostinger From GoDaddy
2. Set Up Your Custom Email Account
Here’s how to set up custom emails on your hosting account:
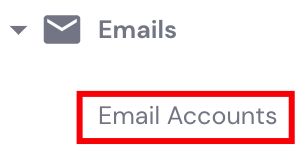
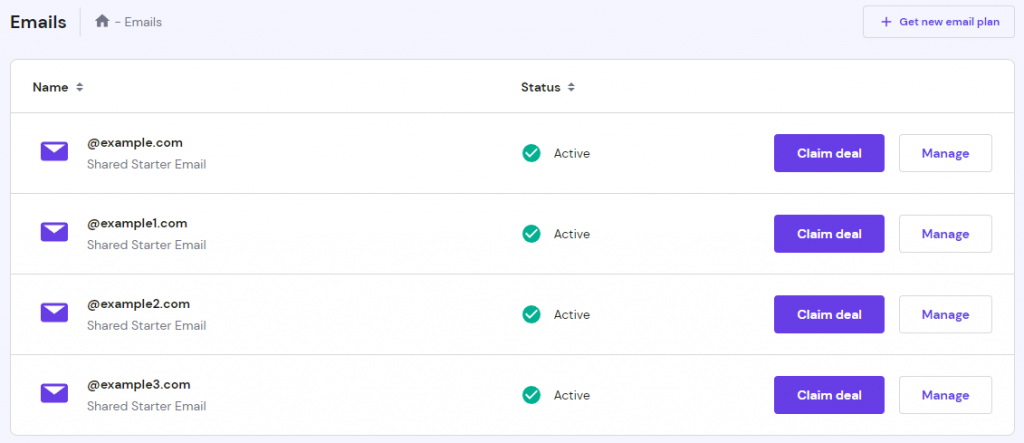
- Go to the hosting dashboard, click Emails, and select Email Accounts.
- Choose the domain and select Manage.
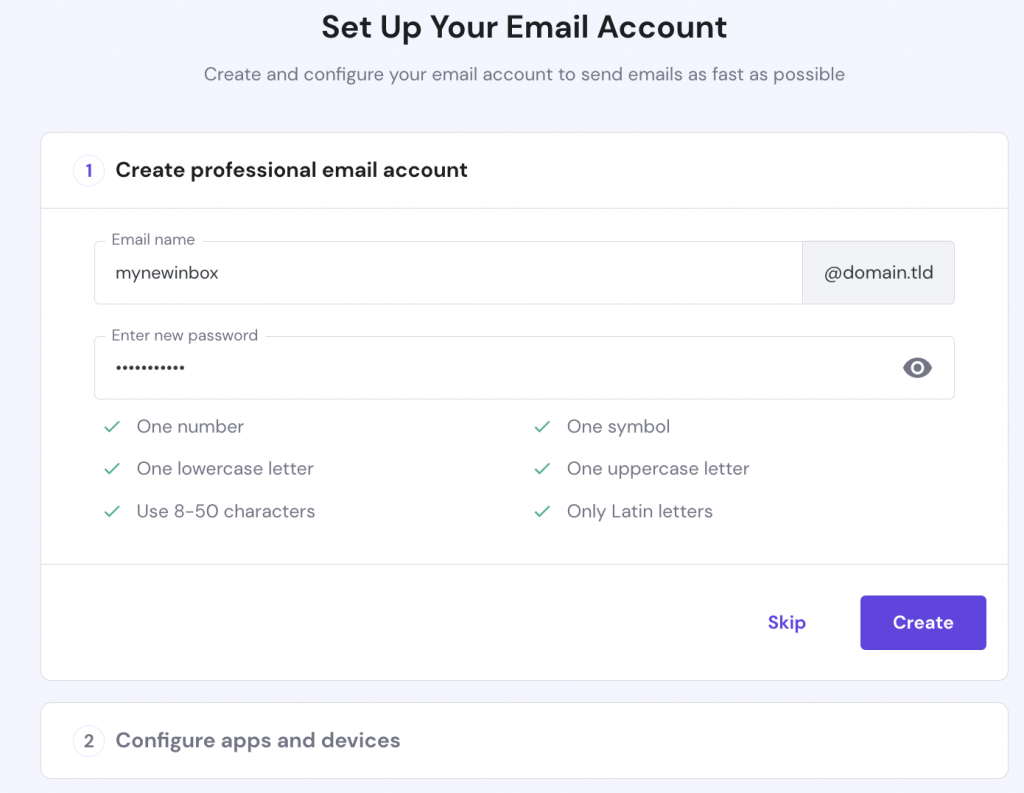
- Click Create email account.
- Enter the email name and password, and choose Create.
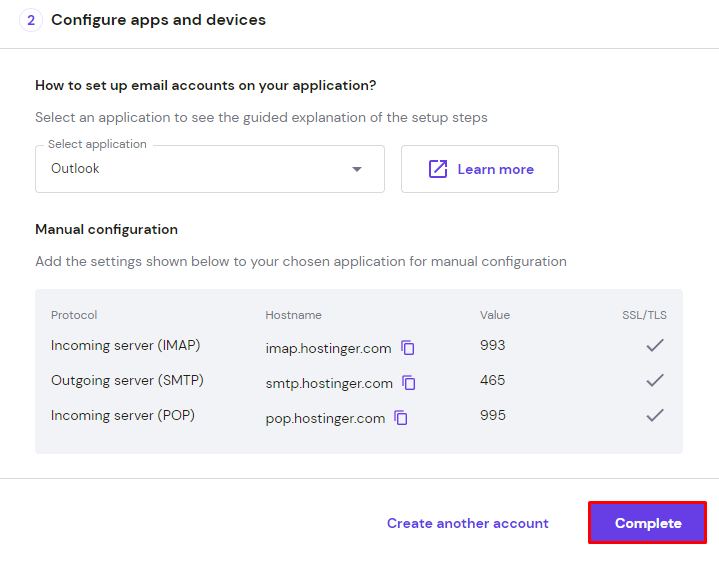
- Select the email application or mobile device to configure the email account. For Apple Mail, Hostinger provides an Automatic Apple device setup option. Follow the instructions and click Complete.
Alternatively, you can manually configure the email account by adding the IMAP, POP3, and SMTP protocols.
You can also choose the Create another account button to make more custom email addresses.
Important! Ensure the domain is pointed correctly to its server before creating the email address.

3. Personalize the Email Account
Personalizing your professional email account will immediately convey both your and your company’s identity.
One of the ways to do so is creating an email signature. Doing so lets you include your full name, company name, contacts, and logo after every message.
Follow these instructions to add a signature using Hostinger Webmail:
- Open your hosting dashboard, go to Emails, and choose Email Accounts.
- Choose the email address and click Webmail.
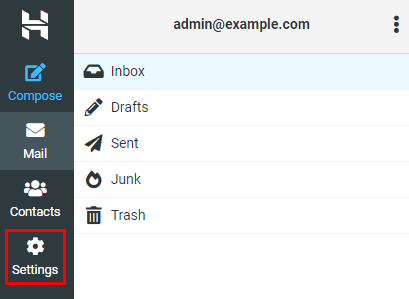
- Log in to your email account and select Settings.
- Click Identities and choose the email address.
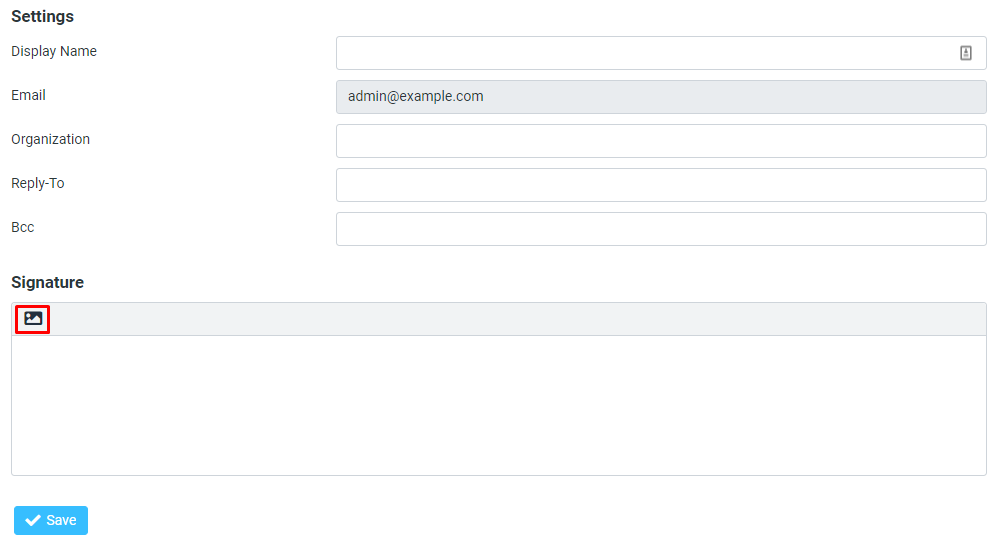
- Add the email signature in the Signature section. Select the image icon to open the format options.
- Once done, click Save.
You can also use free tools to design email signatures, such as Designhill Email Signature Generator, MySignature, Mail-Signatures, and HubSpot. While some provide pre-made templates, others have drag-and-drop functionality for design customization.
How to Create a Business Email Through Gmail
To register a professional Gmail account, use Google Workspace. This Google product offers a set of communication, productivity, and collaboration tools for businesses.
Hostinger also offers a Google Business Email that includes a free domain name, advanced phishing and malware protection, the Smart Reply feature, and 30 GB of email storage. It costs $6/month and integrates with Google tools, such as Calendar, Meet, Chat, Drive, Docs, and Sheets.
Here are the steps to create a Google Workspace email on Hostinger:
- Click the Claim domain banner on hPanel if you don’t have a domain for your custom email address. Follow the registration process and wait for the verification email.
- If you use an existing domain, click Setup on the Google Workspace Email order on hPanel.
- Enter your business information, including its name, country, and zip code, and click Next step.
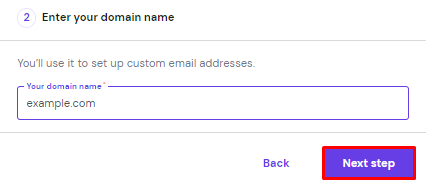
- Insert your domain and select Next step.
- Re-confirm your domain by clicking Confirm domain.
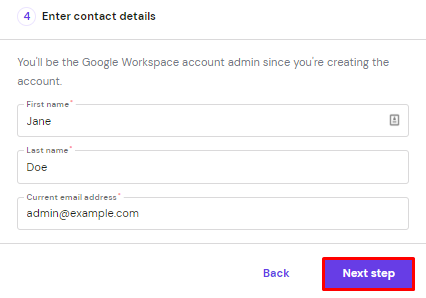
- Enter the contact details, including the name and current email address. Click Next step to proceed.
- Set up the admin account by typing in the username and password and selecting Next step.
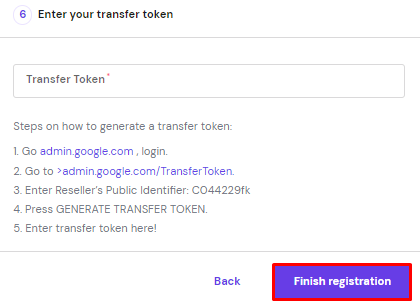
- Enter the transfer token and click Finish registration to complete the process.
- Open the Emails menu on hPanel, choose the domain, and click Manage to open the email mailbox.
After creating the email address, open the Google Admin console to get a TXT or CNAME record for verifying domain ownership.
Copy the verification code, and return to hPanel → Domains → DNS / Nameservers. Paste the record and click Add Record.
Lastly, return to the Google Workspace setup tool page, scroll down to the bottom of the section where you copied the verification code, and select Verify my domain.
Important! The DNS record changes may take up to 24 hours to propagate fully.
To send and receive email messages, you must set up MX records by opening hPanel and going to Domains → DNS / Nameservers → DNS Records. Enter Google MX records and click Add Record.
For those who already have a website, you can verify the domain by adding a meta tag from the Google Admin console. In the Admin console, click the Menu icon → @ Account → Domains → Manage domains → Add a domain. Type in the domain name, select the domain type, and choose Add and start verification.
To start the verification process, you can upload an HTML file or add an HTML tag to your website. Here’s how to do it:
- Download the provided verification file.
- Upload it to your website. Ensure it is located in the root directory and browsable using a web browser. For example, if the file is examplefile.html, you can browse it by entering example.com/examplefile.html.
- Once the google-site-verification text appears, return to the Google Admin console and click Verify.
For the HTML tag option, copy the provided meta tag and paste it on your site’s home page. For example, if your domain is example.com, a visitor who enters it on their browser will get redirected to example.com/homepage. Then, the search console will look for the verification tag on example.com/homepage.
Put the code after the <head> section and before the first </body> tag. Here’s an example of what it looks like:
<html>
  <head>
    <title>Your Page Title</title>
    <meta name="google-site-verification" content="your verification string">
  </head>
<body>
Once verified, your professional email account is ready to use.
Suggested Reading
What Is an SMTP Port
What Are Email Headers?
How to Use Google SMTP Server
How to Block Unwanted Emails
How to Forward Your Emails
How to Back Up Your Emails
How to Set Up an Email Client
An email client is an application that lets you send, receive, compose, and read emails directly across multiple devices, including computers and mobile phones. It works with email servers to store and route all emails from the web.
An email application enables users to manage multiple email accounts in one place, making their work efficient. The program usually provides third-party integrations with various platforms, such as Google Calendar and Dropbox, to boost productivity.
There are many email applications you can use to set up an email client, including Microsoft Outlook, Mozilla Thunderbird, and Apple Mail. Before configuring them, locate the IMAP/POP3/SMTP settings on your hosting account. These are the protocols that email clients use to fetch messages from email servers.
Here’s how to find IMAP/POP3/SMTP settings on Hostinger’s web hosting plan:
- Open hPanel, go to Hosting, and click Manage.
- Select Emails, choose Email Accounts, and click Manage.
- Go to Configuration settings and copy the email server settings under the Manual Configuration section.
If you use a Business Email Hosting plan, log in to your account → Emails → Manage → Configure Desktop App.
However, if you use the Google Workspace Email Hosting package, sign in to your Gmail account → Settings → See all settings → Forwarding and POP/IMAP. Choose Enable IMAP and press Save Changes.
Lastly, enter the incoming and outgoing email server details on your email application. However, the option may vary depending on the application. Here’s how to configure a professional email account on Microsoft Outlook, Mozilla Thunderbird, and Apple Mail.
Microsoft Outlook
Here’s how to set up Outlook for Microsoft 365 2021:
- Open Outlook, go to File, and click Add Account.
- Enter your email address and select Advanced options.
- Tick the box for Let me set up my account manually and click Connect.
- Select the account type. You can choose either POP or IMAP. If you use more than one device to open the email address, select IMAP.
- Enter the hostnames and port numbers of your incoming and outgoing email servers on the IMAP Account Settings section and click Next to continue.
- Type the password and choose Connect.
Thunderbird
Follow these instructions to configure Thunderbird:
- Open Thunderbird, and the Account Setup page will open.
- Enter your full name, email address, and password. Select Continue to proceed to the next page.
- Mozilla Thunderbird will automatically locate and determine the outgoing and incoming email server details based on the domain. Click Done to complete the process.
However, if your email service provider doesn’t exist in Thunderbird’s automatic configuration database, try setting up your email account manually. Here’s how to do it:
- After entering your full name, email address, and password on the Account Setup page, select Configure manually.
- Choose the protocol and insert the hostname, port, connection security, authentication method, and username.
- Click Done to finish the configuration.
Alternatively, click Re-test until Thunderbird can detect the settings.
Apple Mail
Note that this program is only available on Mac OS 10.0 or later. Here are the steps to add an email account on Apple Mail:
- Open Apple Mail, choose the Other Mail Account option, and click Continue.
- Insert your full name, email address, and password and click Sign In.
- Apple Mail will connect to the email server automatically. If it encounters an error, the Unable to verify account name or password message will appear. In that case, manually enter the user name, account type, and incoming and outgoing email servers.
- Lastly, select Sign In to finalize the process.
Apple Mail can integrate with multiple supporting applications from your mobile device, such as contacts, notes, and calendars.
Learn More How to Set Up Email on Different Applications
How to Set Up Email on Android
How to Add Email to iPhone
How to Use Gmail with Custom Domain
Conclusion
Making a business email address is important, as it can boost your brand awareness, establish credibility, and increase revenue.
Ways to create a professional email address may vary depending on the email service provider. Here are the main steps to create an email ID:
- Choose an email service. You can purchase a hosting package that includes a free domain name and a custom email, use Titan Mail, or Google Workspace.
- Set up the email account. Create a professional email address by entering the full name, email address, and password.
- Personalize the message. Add an email signature to look more professional.
- Set up an email application. Connect your email address to an email client, such as Microsoft Outlook, Mozilla Thunderbird, and Apple Mail.
For those who also need a business website, we recommend choosing a web hosting plan that includes a free email and a domain name. It will be more comfortable to have everything in one place.
If you want complete control over the mailing service, consider hosting your own email server with Hostinger’s virtual private server (VPS).
We hope this article has helped you understand the email ID creation process. If you have any questions or suggestions, leave them in the comments section below.
How to Create an Email Account FAQ
Now that you know how to create an email account for professional use, here are some frequently asked questions about the topic.
How Do I Create a Free Email Account?
If your hosting provider includes free email services, you can set it up on your hosting account. Hostinger users can go to hPanel → Email Accounts → Create email account. You could go with Gmail too, but having a business email without a branded domain may look unprofessional and untrustworthy.
How to Create an Email Signature With a Logo?
Most email service providers include webmail access to open your email account and set up email signatures with a logo or an image. At Hostinger, go to Webmail → Settings → Identities. Choose your email account, click the insert image icon, and attach the logo.
What Are the Best Email Providers for Professional Use?
When choosing the email service provider, ensure they support IMAP and POP3, offer access to web and mobile applications, and provide 24/7 support. There are many providers that include those features, such as Hostinger, Google Workspace, and Microsoft 365 Business.
Do I Need to Own a Website to Create a Professional Email Address?
You don’t need a website to have a professional email – a domain is enough. Simply purchase a name from a domain registrar and sign up for email hosting. However, having a website opens up more possibilities. Some hosting providers, like Hostinger, add a free email service to their hosting plans.
How to Open My Custom Email on Mobile Devices?
You will need to set up an email client to manage your custom email on mobile devices. First, locate the IMAP/POP3 and SMTP server settings in your email hosting. Then, add the email server details to the email client on your mobile device.








Comments
September 14 2020
Great beat ! I wish to apprentice at the same time as you amend your web site, how could i subscribe for a weblog site? The account helped me a applicable deal. I have been tiny bit acquainted of this your broadcast offered vivid clear idea
November 11 2020
Hey Margo. Currently we have no way to subscribe to our tutorials, to receive info when new one is being added, but you can check the tutorials listed by "Newest" here. That way you can keep up to date with all of our content.
December 07 2020
what does the reply-to stand for in identities under email setup. Please help. I just bought a domain and setting it up.m not so technical kinda guy.
February 09 2021
Hi there! This is used in order to force recipients to send answers to a particular email address instead of the sender email address.
December 17 2021
Hello good to be here
December 22 2021
We're happy to see you with us as well :)
March 19 2022
Good
May 18 2022
With every domain name comes a free email account by hostinger. My questing is, when I change "from email address" in woocommerce email setting sections as my free domain related email (contact@mysitename.store) doesn't work? When a customer placed an order they receive email from psv.eu5.com alike emails not my email so how to fix it?
May 18 2022
Hi there! I would suggest to start with checking this guide about WordPress email deliverability. If anything, feel free to check in with our Customer Success. team - they'll be happy to check the issue for you :)