How to Transfer a Domain From Squarespace to Hostinger in 7 Simple Steps
Low starting costs, AI website builder, and user-friendly hosting services are among many factors that make Hostinger an excellent Squarespace alternative.
If you want to migrate your site from Squarespace to Hostinger, consider transferring your domain name as well. Hostinger is a versatile hosting and domain provider That simplifies your website’s transition and management.
This article will walk you through the domain name transfer process from Squarespace to Hostinger.

How to Transfer a Domain From Squarespace to Hostinger
Before we dive into the domain transfer steps, let’s see the requirements for migrating a domain from Squarespace:
- Domain age. The domain must be at least 60 days old.
- Domain status. The domain must be active and not in a locked state. We’ll show you how to unlock it later.
- No pending payments. Ensure there are no outstanding payments on your Squarespace account.
- Valid email. The domain owner’s contact email must be accessible.
If you meet these criteria, follow these steps to transfer your domain from the current registrar to Hostinger.
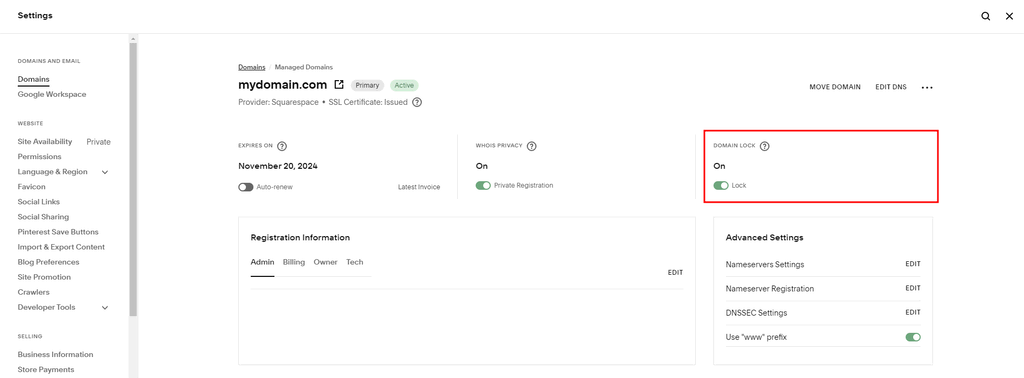
1. Unlock the Domain on Squarespace
A domain registrar typically has a lock feature that protects your domain from unauthorized changes. When transferring your domain to a new host, you must turn off this security layer.
To do so, access your Squarespace account and go to the Settings section. Navigate to the Domains panel and select the domain you want to transfer. Disable the Domain Lock by toggling it off.
When transferring a domain from Squarespace, be aware of potential issues that can trigger a 60-day registrar lock:
- Recent domain purchase or transfer. If a domain was recently purchased or transferred to Squarespace, it must remain with the current registrar for at least 60 days before you can move it again, as per ICANN regulations.
- Owner’s contact information changes. Changing the domain’s owner contact details can trigger an optional 60-day lock. You can turn off this setting in the Domains panel.
- Registrar-specific lock. Your recently transferred domain might be registered with Tucows. Use the WHOIS tool to see whether you’re registered with Squarespace Domains LLC or still with Tucows.
2. Disable WHOIS Privacy Protection
The new registrar must verify the registrant’s contact information during the domain transfer process. However, privacy protection can conceal this information, potentially hindering the transfer progress.
The WHOIS Privacy setting is located next to the Domain Lock. Toggle it off to disable it.

3. Point Your Domain to Hostinger Nameservers
Changing the nameservers before transferring your domain is crucial for minimizing website downtime.
This step aligns with your new domain host transfer requirements, ensuring a seamless transition by allowing DNS changes to propagate in the background. Consequently, it simplifies post-transfer troubleshooting.
Here’s how to point your domain to Hostinger:
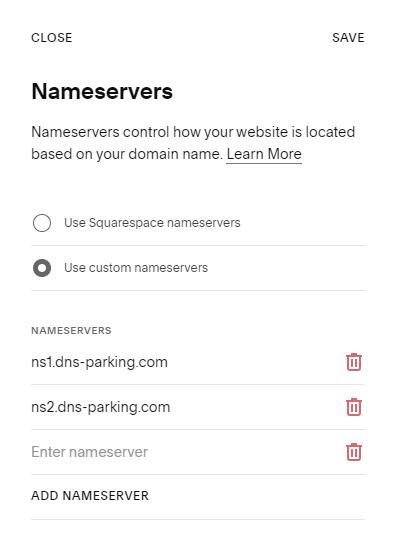
- In the Domains panel, click Edit next to Nameservers Setting.
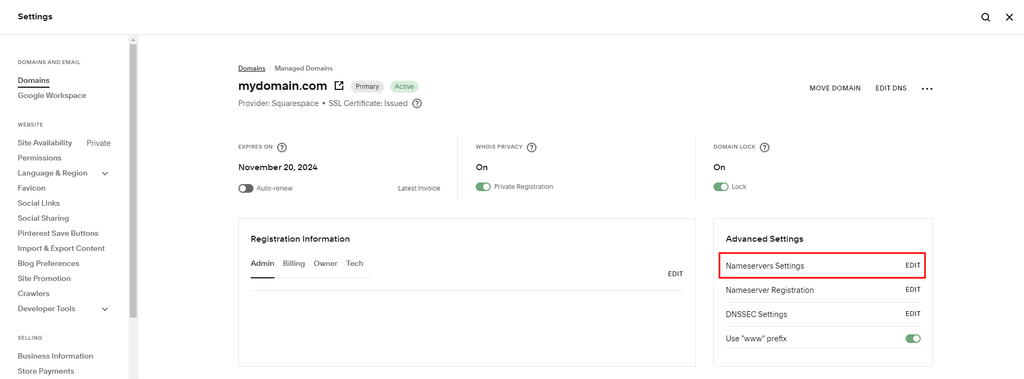
- Select Use custom nameservers and add Hostinger’s nameservers. The default nameservers for our web hosting or cloud hosting plans are ns1.dns-parking.com and ns2.dns-parking.com. Click Save once you’re done.
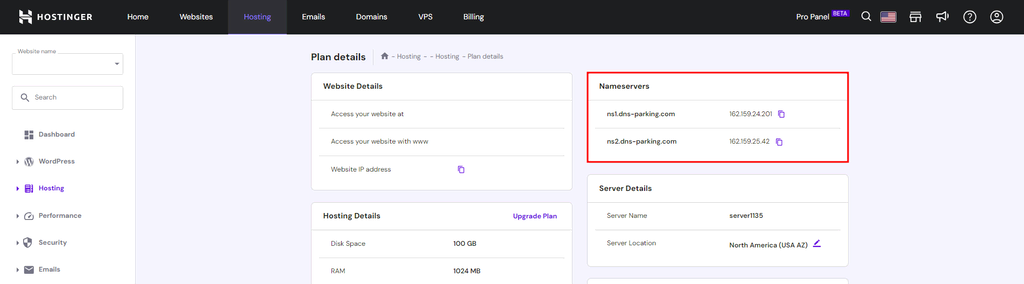
If you want to double-check your nameservers, navigate to Hosting → Plan details in your Hostinger account.
Important! DNS settings typically take about 24 hours to propagate worldwide. Updating the nameservers before starting the domain transfer process is recommended to ensure transfer stability and minimize the risk of unexpected downtime.
4. Get the Transfer Authorization Code (EPP Code)
An Authorization Code, also known as the EPP Code (Extensible Provisioning Protocol Code) or a transfer key, is a unique string of characters assigned to a domain name. This code ensures security during domain transfers.
To obtain this transfer key, open the three dots menu in the Domains panel and select Send Transfer Authorization Code.
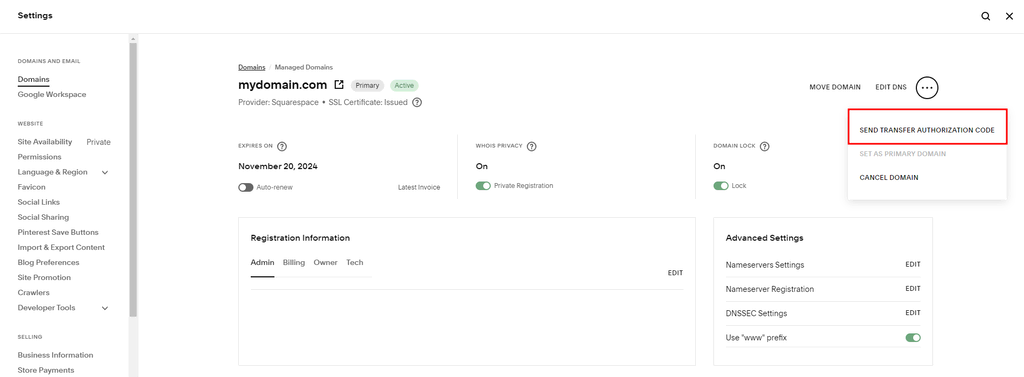
The authorization code will be sent to the domain’s owner contact if the domain name is registered with Squarespace Domains LLC. You can find the email address in the WHOIS database.
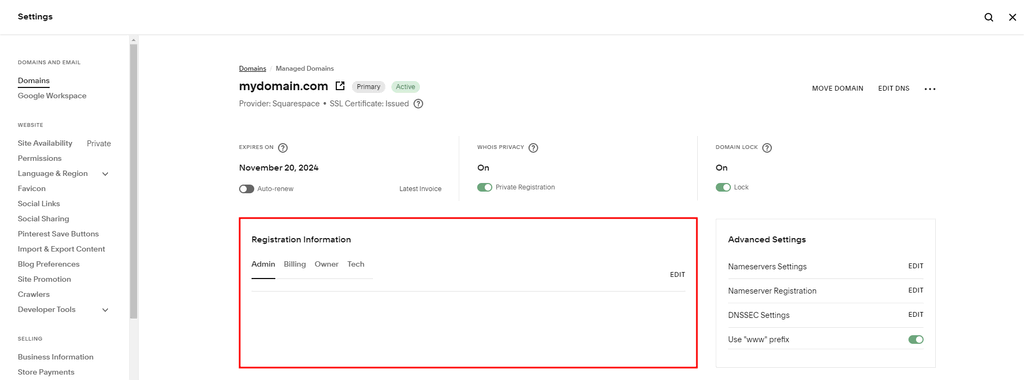
For Tucows-registered domains, the EPP/Auth code is sent to the domain’s admin contact. Refer to the Registration Information section in your Domains panel if you don’t know the domain contact’s email address or want to change it.
5. Purchase a Domain Transfer at Hostinger
Hostinger offers domain transfer services with pricing plans based on top-level domains. Prices start at $0.99/year, with some TLDs including WHOIS privacy protection.
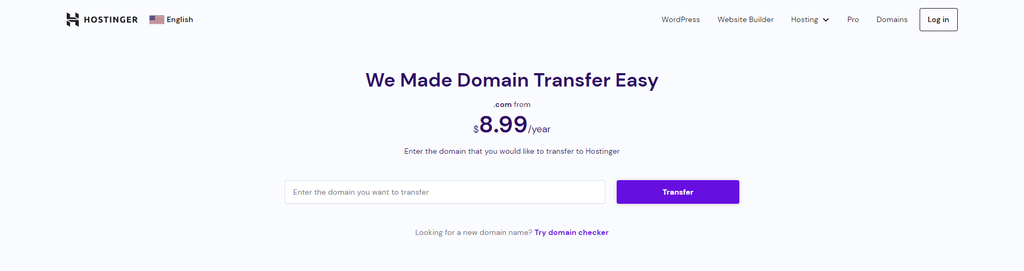
Navigate to the Domain Transfer page and enter the domain name you want to transfer to in the available field. After selecting Transfer, complete the transaction by submitting the required information and billing details.
Pro Tip
If you don’t own the domain, use the WHOIS lookup tool to find the domain owner’s email address.
6. Initiate the Transfer on Hostinger
Once you obtain the EPP code for domain transfer, follow these steps to start the migration process:
- Log in to your Hostinger account and navigate to Domains from hPanel.
- Select the Transfer an existing domain option.
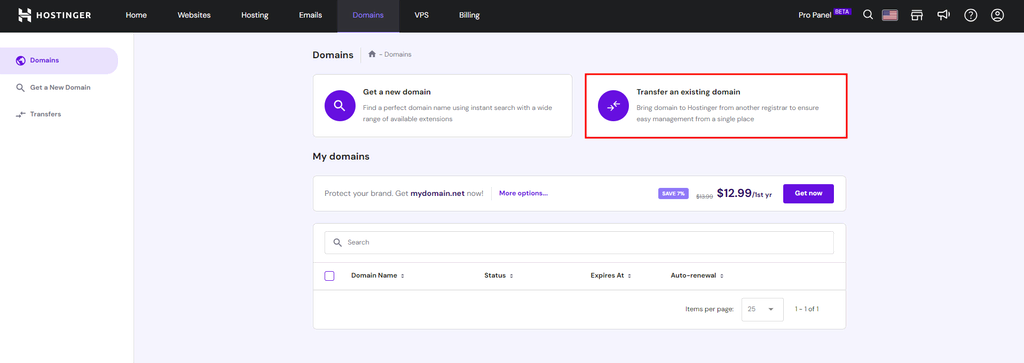
- Enter the domain you want to transfer to the available field and hit Transfer.
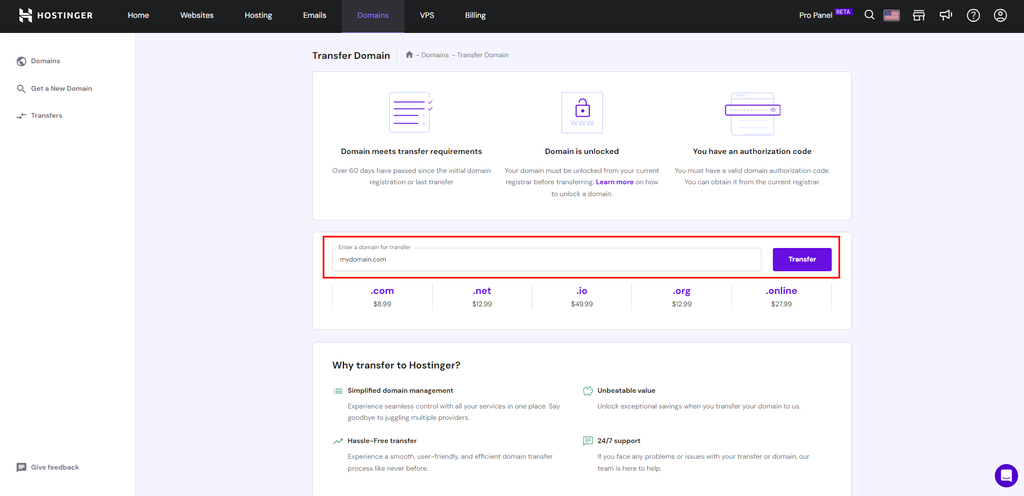
- Complete the payment process and submit the transfer code.
- Follow the rest of the prompt to finalize the domain transfer request.
7. Confirm and Finalize the Transfer
Once you’ve submitted the transfer request, Hostinger will send a confirmation email for your approval. The transfer process usually takes five to seven days from the request submission.
Your domain transfer status is available in the Transfer list, accessible via Domains → Transfers. Your domain is successfully registered with Hostinger when the status changes to Completed.
Here are several recommended steps to ensure everything is set up correctly:
- Verify domain details. Check that all your domain details, especially contact information, are correct in the new registrar.
- Update DNS settings. Ensure the DNS records are pointing to Hostinger.
- Test website functionality. After DNS changes, test your website to ensure proper loading. The Hostinger guide will help you navigate through the platform.
- Monitor website performance. Monitor your website’s performance and functionality closely for the first few days after the transfer.
- Update domain renewal settings. Check the domain renewal settings in Billing to ensure automatic renewal or note the expiration date for manual renewal.
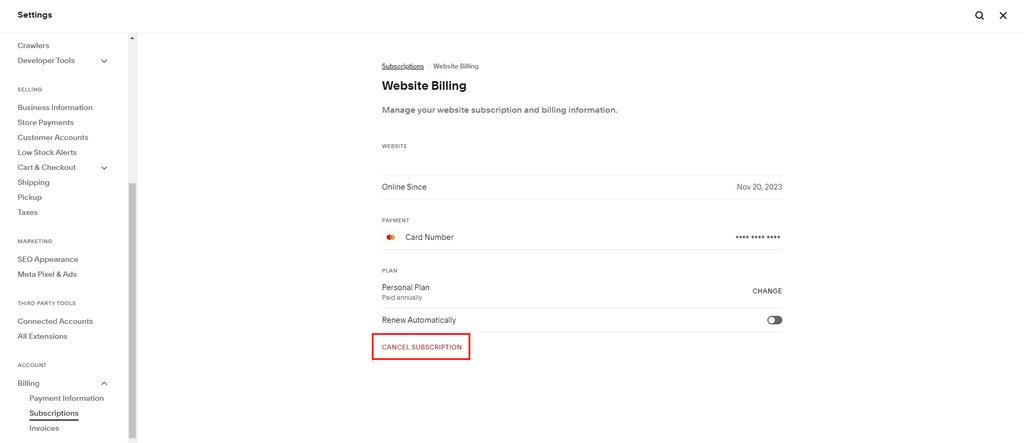
After confirming that your domain works properly in Hostinger, cancel your Squarespace site subscription. To do so, navigate to Billing → Subscriptions and select Cancel Subscription.

Conclusion
Transferring a domain to a new registrar is a common practice when migrating a website. This article specifically covered the domain transfer process from Squarespace to Hostinger.
Here are the steps for moving a domain from Squarespace to Hostinger:
- Unlock your domain name on Squarespace.
- Turn off the WHOIS privacy protection.
- Point your domain name to Hostinger’s nameservers by updating Squarespace’s DNS settings.
- Purchase a domain transfer at Hostinger.
- Get the domain transfer authorization code or EPP key from Squarespace.
- Initiate the domain name transfer from Hostinger’s hPanel.
- Complete the domain migration process by following the steps provided by Hostinger via email.
We hope this article helped you perform a successful domain transfer to Hostinger. If you still have questions about domain transfer, check out our FAQ section or leave a comment below. Good luck!
Domain Transfer From Squarespace to Hostinger FAQ
This section answers some of the most frequently asked questions about transferring a domain from Squarespace to Hostinger.
Can I Transfer My Domain to Hostinger if It Is Still Within the Squarespace Free Domain Registration Year?
Yes, you can transfer your free domain to a new host. However, additional charges may apply for future domain services since the free offer doesn’t transfer to Hostinger.
How Long Does It Take to Transfer a Domain From Squarespace?
Transferring a domain from Squarespace typically takes five to seven days. However, there are cases where the domain transfer process can take up to 15 business days, depending on the registrar’s responsiveness. Get in touch with our Customer Success specialists if you need assistance.
Where Can I Find the EPP Code in Squarespace?
Squarespace sends the EPP code to the domain owner’s email address within 48 hours after requesting it. You can submit the request through the Domains panel.

Jordana is a Senior Content Writer with over 5 years of experience in digital marketing and web development. When she’s not busy with work, she dabbles in creative writing and movie reviewing. Follow her on LinkedIn.
