8 Best WooCommerce Payment Gateways in 2025 + How to Pick the Best One for You
Starting an online store requires a platform that supports eCommerce features, allowing you to design the sales process and manage transactions. Integrating your website with a payment gateway is particularly vital for accepting payments, as doing so will help you automate customer purchases, reduce the risk of fraud, and comply with industry standards.
Moreover, if your website runs on WordPress, consider installing the WooCommerce plugin. Besides offering a wide range of features for WordPress websites’ eCommerce needs, it supports various payment gateways through extensions and manual integrations.
In this article, we review the eight best WooCommerce payment gateways, covering their payment models, fees, and key features to ease your decision-making process.

Top 8 WooCommerce Payment Gateways
We picked the following payment gateways by examining their payment methods, integrations, security, and customer experience. See our WooCommerce guide for tips on maximizing the platform’s capabilities, including setting up your payment gateway.
Don’t Have a Website Yet?
Kickstart your online business venture with Hostinger’s WooCommerce or WordPress hosting plan. After securing your hosting, check out our WordPress guide for beginners.
1. WooCommerce Payments
Service Stats:
- Transaction Fee: 2.90% + $0.30 per local transaction for US-issued cards
- Supported Currencies: 135+ currencies
- Supported Regions: 38 countries
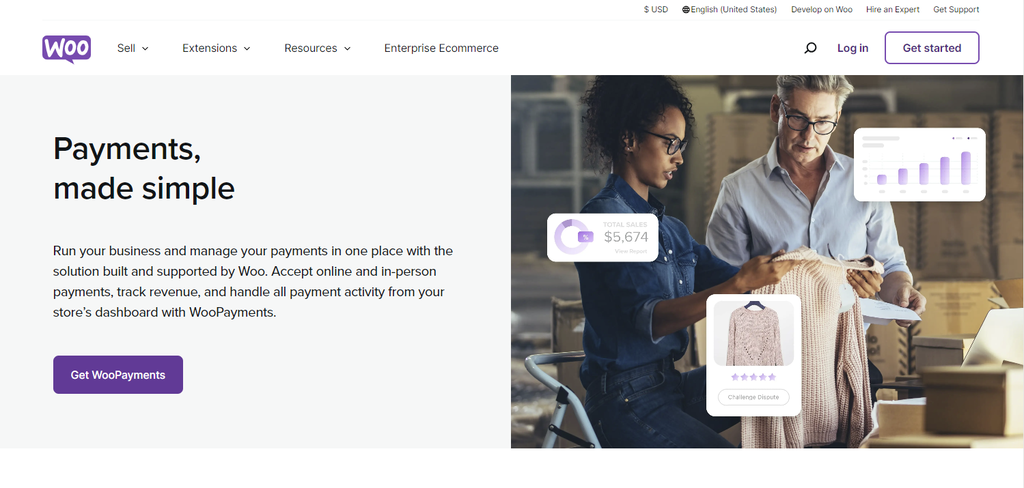
WooCommerce Payments or WooPayments is a built-in payment gateway that accepts major credit and debit cards and local payment methods with no setup or monthly fees. It supports popular payment services like Google Pay and Apple Pay. Buy now, pay later (BNPL) options are also available in selected regions.
As a native payment solution, this WooCommerce payment plugin offers ease of use and seamless integration with your WooCommerce store. You can collect payments, track cash flow, and handle disputes directly from your store’s dashboard. We have a step-by-step guide to set up WooPayments on your WooCommerce store.
Key Features:
- Custom deposit schedule. Transfer funds into your bank account within your desired interval or on demand.
- Tap to Pay payment method. Accept in-person contactless payments on your iPhone or Android device.
- Quick Checkout. Customers can save their credit card info for faster checkouts.
Drawbacks:
- No built-in support for recurring revenue models. To accept recurring payments, you need to buy the Woo Subscriptions extension for $19.92/month.
- Not available internationally. It lacks support for users in Africa, Asia, and most APAC countries.
2. Stripe
Service Stats:
- Transaction Fee: 2.90% + $0.30 per card or digital wallet transaction
- Supported Currencies: 135+ currencies
- Supported Regions: 46 countries
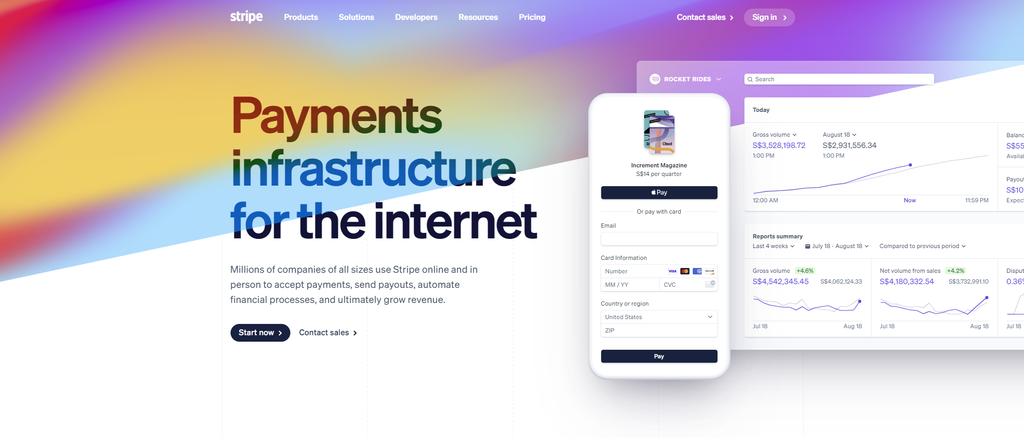
The WooCommerce Stripe payment gateway extension easily integrates with the popular payment processing platform. It lets you accept transactions from major credit and debit cards as well as local payment methods like Alipay, iDEAL, and SEPA Direct Debit.
Like WooPayments, this payment processor uses a pay-as-you-go pricing model and charges no setup fees. With its integrated suite, you can accept one-time and recurring payments, do efficient invoicing, automate tax calculations, and more.
Key Features:
- Payment Links. Customers can save their preferred payment methods to their account and enjoy one-click checkouts.
- Stripe Elements. These building blocks let you collect payment details and streamline checkouts while maintaining PCI compliance.
- Stripe Radar. This fraud prevention feature detects and blocks fraud using machine learning. The dynamic 3D Secure also minimizes the risk of fraud in high-risk transactions.
Drawbacks:
- Complex functionality requires API knowledge. Consider hiring a developer if you can’t configure it yourself.
- Steep fees for extra services. For example, using a custom domain to host your checkout page costs $10/month, while setting up a POS system for mobile transactions costs $249/setup.
3. Square
Service Stats:
- Transaction Fee: 2.90% + $0.30 per transaction for Free and Plus users
- Supported Currencies: based on the supported countries
- Supported Regions: US, Canada, Australia, Japan, the United Kingdom, the Republic of Ireland, France, and Spain
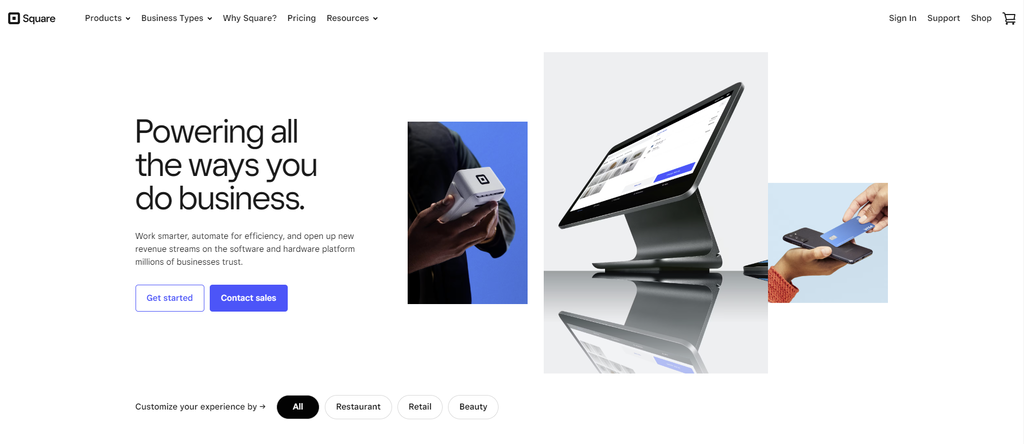
Square is one of the most popular WooCommerce payment gateways for small to medium-sized businesses. Its mobile point-of-sale solution lets merchants accept debit and credit card payments on mobile devices. It also supports multiple payment options for in-person and online transactions.
Square’s international availability isn’t as vast as other payment gateways on this list. However, its curated business plans make it the best payment gateway for restaurants, retail sites, and appointment-based businesses.
Key Features:
- Virtual terminal. The web-based payment processor lets you process debit and credit cards remotely or in person with a computer, saving you hardware costs.
- PCI compliance. Square offers secure, PCI-compliant payment processing with end-to-end encryption and no additional fees.
- No chargeback fees. There are no extra fees for receiving a payment dispute on your Square account.
Drawbacks:
- Limited free tools. Many add-ons charge monthly fees per location, which can become costly over time.
- Subscription-based plans. Vital features like phone support and customer accounts are only available in Plus and Premium plans, which start at $29/month.
4. Authorize.net
Service Stats:
- Transaction Fee: 2.90% + $0.30 per credit card transaction
- Supported Currencies: 12 currencies
- Supported Regions: United States, Canada, United Kingdom, Europe, and Australia
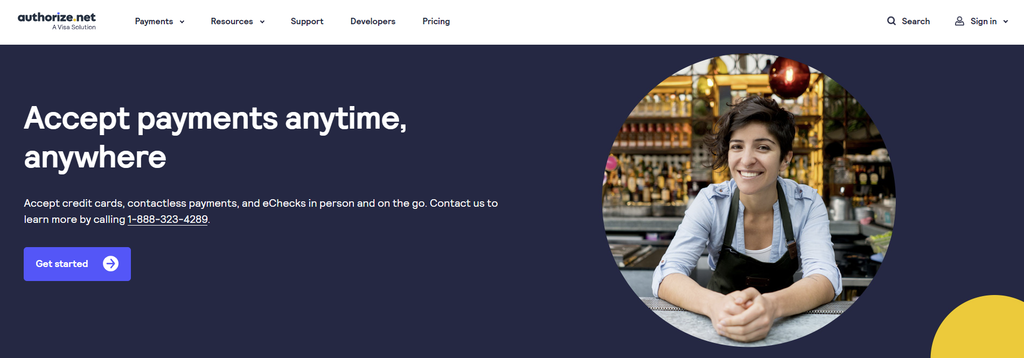
Authorize.net is a robust payment method that accepts payments online at retail locations or via mobile devices. It supports major credit cards, eChecks, and popular payment services like Apple Pay and PayPal. Businesses operating in the supported regions can easily facilitate international transactions.
This WooCommerce payment gateway solution offers All-in-One and Payment Gateway Only plans. The former includes a merchant account setup, allowing you to accept credit card payments, recurring payments, and deposit earnings to your bank account.
Key Features:
- Customer Information Manager. Include multiple payment methods and shipping locations in one profile for higher conversions. Customers can also save their billing, payment, and shipping information for future transactions.
- Advanced Fraud Detection Suite. Prevent fraudulent transactions by configuring fraud filters to set proper minimum transaction thresholds, payment velocity settings, and country limitations.
- eCheck payments. Allow customers to pay using electronic checks. That said, eChecks are billed separately from your monthly gateway fee, 0.75% of the transaction amount.
Drawbacks:
- Monthly gateway fee. While there’s no setup fee, merchants enrolled in both plans must pay a monthly fee of $25. This fee adds to its complex pricing structure, potentially causing costly buildup and confusion for small businesses.
- Limited international availability. As a US-based payment service, most of its tools and integrations cater to domestic businesses.
5. PayPal

Service Stats:
- Transaction Fee: 2.99% + fixed fee per card transaction
- Supported Currencies: 25 currencies
- Supported Regions: 200+ countries
PayPal is the best payment gateway for WooCommerce stores with an international customer base, supporting merchants in over 200 countries. This popular payment gateway lets you accept payments through various methods, including Alternative Payment Methods (APM) and digital wallets.
PayPal doesn’t charge monthly or setup costs. Furthermore, you can apply for discounted rates based on your sales volume. This feature applies to merchants earning over $3,000/ month with a PayPal account older than 90 days.
Key Features:
- PayPal.Me. Request payments without logging into your PayPal account or sharing your bank information. You can also customize the link to reflect your brand.
- PayPal Invoices. Allow customers to make online payments in full or installments without creating a PayPal account.
- Seller Protection. Fraud protection, 24/7 monitoring, and dispute resolution protect merchants from fraudulent claims and chargebacks. Check the payment gateway’s website to review the requirements for this feature.
Drawbacks:
- International transaction fees. PayPal supports international transactions but charges extra fees for receiving funds, including transaction and currency conversion fees. The total cost varies based on the transaction amount and payment method.
- Lack of customization. PayPal’s one-size-fits-all payment solution may not suit every business’s needs. Furthermore, customizing advanced features requires coding knowledge.
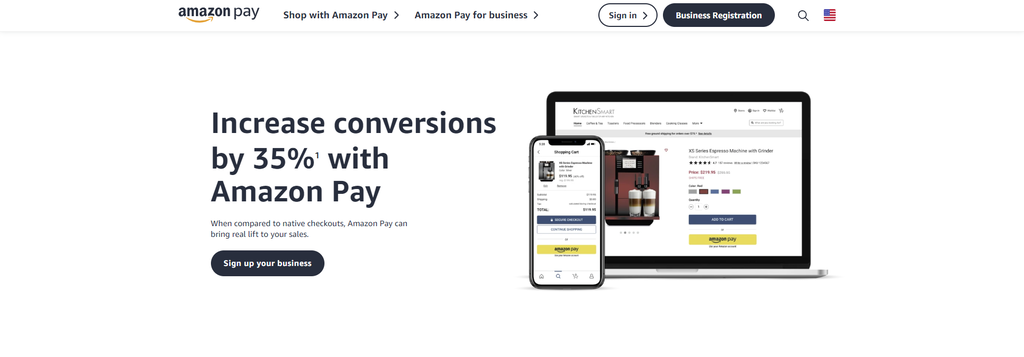
6. Amazon Pay
Service Stats:
- Transaction Fee: 2.90% + $0.30 per domestic transaction
- Supported Currencies: 80+ currencies
- Supported Regions: 18 countries
Amazon Pay simplifies the checkout process by allowing customers to use the address and payment information stored in their Amazon account. Mandatory account creation often deters people from completing their transactions, making this feature especially valuable.
Merchants in countries where Amazon has a strong presence and reputation benefit from this feature. Like other payment gateways on this list, Amazon Pay supports various transactions, including pre-orders and micropayments.
Key Features:
- A-to-Z Guarantee. Fraud detection capabilities, chargeback controls, and risk management processes come at no additional costs. They enhance customer experience by ensuring timely delivery.
- Multi-currency integration. Customers can make purchases using their preferred currency on your online store. Register your Amazon Pay account in the EU or UK to access this feature.
- Buy with Prime. Integration with Prime members’ stored customer data enhances convenience and also attracts new shoppers by offering a familiar payment form.
Drawbacks:
- Strict Acceptable Use Policy. Amazon Pay has specific limitations on the items and services it supports. Check the payment processor’s website to see if your product or service falls within that list.
- Mandatory signup. Customers need an Amazon account to make an online payment with Amazon Pay. Therefore, it’s only ideal for most countries with a strong Amazon presence.
7. Apple Pay
Service Stats:
- Transaction Fee: free for domestic transactions
- Supported Currencies: 80+ currencies
- Supported Regions: 83 countries
If your WooCommerce store has a physical location, integrating Apple Pay can significantly enhance the customer experience. This mobile payment system uses NFC technology to handle online and in-person transactions, benefitting merchants who cater to a mobile-reliant customer base.
Like Amazon Pay, Apple Pay enables customer purchases with a single click. The direct gateway removes the need for a payment form to collect cardholder data.
Key Features:
- Apple Pay Later. Split purchases into four installments over six weeks with no interest or fees.
- Tap to Pay. Enable secure contactless payments by requesting customers to enter a PIN for payment confirmation. Turn your iPhone into a POS terminal and accept payments without an expensive card reader.
- Multi-layered security. Apple Pay protects sensitive information by tokenization and doesn’t share card numbers with merchants. iPhone security measures like Face ID and passcode also protect customers.
Drawbacks:
- Total reliance on Apple devices. Consider other popular payment gateway solutions if your customer base significantly consists of Android users.
- Small user base. Despite recent traction, this payment service only accounts for 9% of global mobile wallet users.
8. Alipay

Service Stats:
- Transaction Fee: 3% per card transaction
- Supported Currencies: 27 currencies
- Supported Regions: 110+ countries
As a top payment service in Chinese marketplaces, Alipay is one of the best WooCommerce payment gateways for merchants targeting the East Asian market.
Alipay supports various types of transactions, including bank transfers and card payments. It mainly uses QR codes for convenient transactions.
Key Features:
- QR code payment. Simplify payments by allowing customers to scan QR codes at participating merchants. Funds are deducted from linked bank accounts, cards, or other payment methods in their Alipay account.
- Scan to Bind. Customers can authorize payments on PCs, game consoles, and smart TVs by scanning the authorization code with their mobile phones.
- User-Presented Mode Payment. Customers can generate a payment code for merchants to scan in case of slow internet.
Drawbacks:
- Not FDIC-insured. Without government insurance, your funds are at risk if the platform fails.
- China-oriented platform. Some features may be limited for international transactions unless you have a Chinese bank account and mobile number.
How to Pick the Best WooCommerce Payment Gateway
The payment industry offers many different solutions to accept online payments and facilitate in-person transactions. Consider which one aligns best with your needs and preferences with these tips.
Understand Your Target Market
To provide a seamless payment experience for customers worldwide, consider a gateway that supports multiple currencies and languages. For instance, PayPal excels in serving the US market, while Alipay dominates the Chinese market with its localized features.
Supporting local payment methods and preferences helps boost customer satisfaction, resulting in higher conversion rates.
Compare the Transaction Fees
As each payment gateway has its fee structure, pick the one that aligns with your business model and revenue stream.
Lower transaction fees are cost-effective for high-volume sales, while a higher-cost payment option without monthly charges may be better for smaller businesses. If your online store handles international transactions, consider the currency conversion fees.
Make Sure the Payment Gateway Is Secure
Your WooCommerce payment gateway’s security makes or breaks your business. A secure gateway protects customer data, builds trust, and maintains your store’s reputation for safety and reliability.
Verify that the gateway adheres to PCI compliance standards for secure card information handling. Look for built-in fraud protection features to safeguard your online store against cyber attacks.
Look for Additional Features
When choosing a WooCommerce payment gateway, consider additional features that can enhance your store’s functionality. Key features include recurring billing for subscription-based models, easy integration with your current setup, mobile transaction support, and abandoned cart recovery options.
These features help you streamline the payment process, offer greater flexibility to your customers, and seamlessly adapt to diverse business models. Consequently, you can enhance the versatility and user-friendliness of your eCommerce platform, boosting its appeal and performance.

Conclusion
Integrating the right payment gateway is crucial in setting up a successful online store with WooCommerce. Luckily, there are plenty of options available.
Among the top payment gateways we reviewed, here are our top choices:
- PayPal. Known for its trusted reputation, providing buyer protection and global reach.
- Stripe. Offers powerful APIs for advanced customizations and excellent support for international payments.
- Square. Ideal for online stores that also have a physical presence, providing seamless integration between online and in-person sales.
With these top choices narrowed down, you are now equipped to confidently choose the WooCommerce payment gateway that suits your business needs.
Discover More Ways to Improve Your Online Store
What Is a WordPress Plugin: A Comprehensive Guide for Beginners
How to Install WordPress Plugins
Best eCommerce WordPress Plugins to Create Your Online Store
Best WordPress Plugins for Any Type of Website
How to Improve WordPress Security
How to Create a Membership Website With WordPress + Best Plugins
Best WordPress Review Plugins
WooCommerce Payment Gateways FAQ
This section answers some of the most common questions about WooCommerce payment gateways.
What Is a Woocommerce Payment Gateway?
A WooCommerce payment gateway is a service that handles different payment types directly on your eCommerce store. It ensures secure transfers of customer payment data, enabling seamless and safe transactions for buyers and merchants. WooCommerce provides various payment plugins to simplify integration with third-party payment gateways.
Does Woocommerce Have Its Own Payment Gateway?
WooCommerce has an in-house payment gateway called WooPayments. This integrated solution lets you securely accept major debit and credit cards and local payment methods without monthly or setup costs. It simplifies payments and manages transactions, cash flow, and disputes from your store’s dashboard.
What Are the Most Popular WooCommerce Payment Gateways?
The most popular WooCommerce payment gateways are PayPal, Stripe, and Square. They’re known for their reliability, easy integration, and support for various payment options and global customers. That said, choose a gateway based on your needs rather than popularity alone.
Why Is It Important to Choose the Right WooCommerce Payment Gateway?
Choosing the right WooCommerce payment gateway is crucial for transaction security, customer trust, and shopping experience. The ideal gateway aligns with customer payment preferences, offers reliable support, and maintains reasonable transaction fees. Ultimately, it can significantly impact your store’s conversion rates and long-term success.

Jordana is a Senior Content Writer at Hostinger with a background in Information Systems. She has over five years of experience in WordPress and is casually dabbling with PHP and MySQL. Her passion for writing and technology drives her to create tutorials for anyone wanting to build their online presence. Follow her on LinkedIn.