How to Add WordPress Background Images: 5 Easy Methods and Best Practices
WordPress is a popular content management system (CMS) that continuously offers intuitive and powerful features to design an engaging website. One of its features is adding custom background images to help make the website more appealing.
Especially if you have a WordPress business website, this feature can improve your branding.
In this article, we will cover five easy methods to add a background image in WordPress. You will also learn several best practices for using WordPress background images.
Download all in one WordPress cheat sheet
What Is a WordPress Background Image?
A WordPress background image is a visual element that typically takes up the entire section or page of your website. It helps engage visitors and draw their attention to the web page.
How to Add a Background Image Using the WordPress Theme Customizer
The WordPress Theme Customizer is a built-in feature that lets you add a custom background image, create menus, and change color schemes. However, this feature is only available for classic free WordPress themes, such as Twenty Twenty, Twenty Fifteen, and Twenty Seventeen.

For this tutorial, we will go over the steps to an image background via this WordPress feature and use the Twenty Fifteen theme, as it comes with custom background support:
- Log in to your WordPress admin page and navigate to Appearance → Customize.

- In the Theme Customizer screen, navigate to the Background Image option.

- Click the Select image button to open the Media Library.

- In the Media Library screen, pick a picture or add a new image and click Choose image.

- Use the image customization options to adjust the background position, preset, and size.

- Save the changes.
How to Add Background Images With the Cover Block
You can also add a background image via the default WordPress editor, also known as Gutenberg. As it provides the tools to create a website using a block-based approach, it is a relatively simple method.
For this tutorial, we will use the Twenty Twenty-Two theme. Follow the steps below to insert an image background using the block editor:
- From the WordPress dashboard, navigate to Pages → All Pages. Open a page by clicking on the title.

- Open the Block Inserter button and add the Cover block.

- To make a full-width background image, select the Cover block and choose Align → Full Width.

- Insert elements you want to your page. For example, we added several WordPress block patterns.
- Group the block patterns with the Cover block. It should look like this:

- Select the Cover block and click Add Media. Then, choose Open Media Library.

- In the WordPress Media Library screen, choose your preferred image. In addition, we recommend adding alt text to your image for better accessibility. Then, click Select.

- Open the block settings panel to customize the Cover block. For example, we set the position to a fixed background and adjusted the overlay opacity to 50.

- Save the changes.
How to Add Background Images With the Group Block
Another method to add a background image in the WordPress site editor is by using the group block. This feature is introduced in WordPress 6.4, and it’s also applicable to row and stack blocks.
Follow the steps below to insert an image background using the group block.
- Navigate to Pages → All Pages and open a page you want to edit in the block editor.
- Open the Block Inserter button and add the Group block.
- Open the Styles tab and find the Background section.
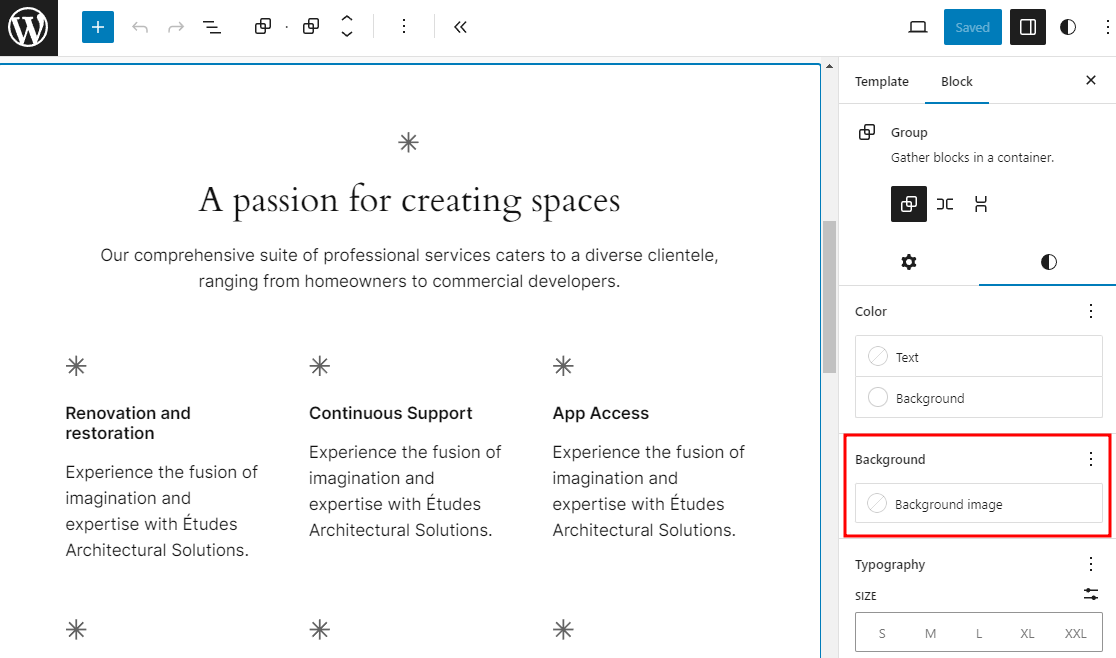
- Click on the Background image button and choose either Open Media Library to select an image from your WordPress Media Library or Upload to upload a new image from your computer.
- The group block now should have the background image you’ve selected. Continue editing the content by adding more blocks inside the Group block.
One of the downsides of using the Group block to use a background image is that there are no opacity control and image repositioning tools. Thus, you have to ensure the image has the right design before uploading it.
How to Add a Custom Background Image Using a Page Builder
Another easy way to add custom backgrounds is by using a WordPress page builder. SeedProd is one of the most popular WordPress page builders that provides powerful yet user-friendly features, like a drag-and-drop editor and advanced element customization options.
In this section, we will cover the steps on how to set a background image with the SeedProd page builder:
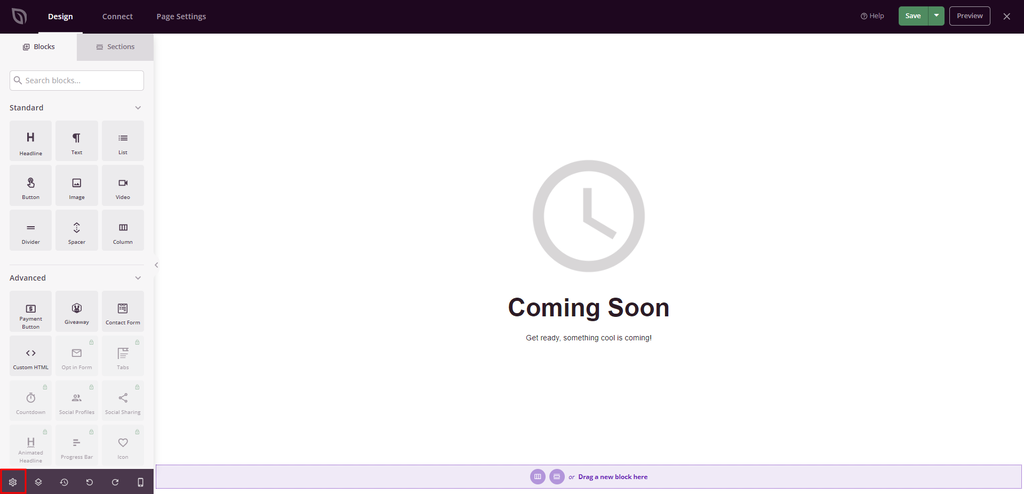
- Create a new page using SeedProd’s editor, or pick one of the builder’s pre-built templates and populate it with elements.
- Go to the editor’s left sidebar and select the gear icon to open Global Settings.
- Expand the Background section and upload your background image. If you want to access SeedProd’s stock image library, upgrade to Pro starting at $31.60/year.
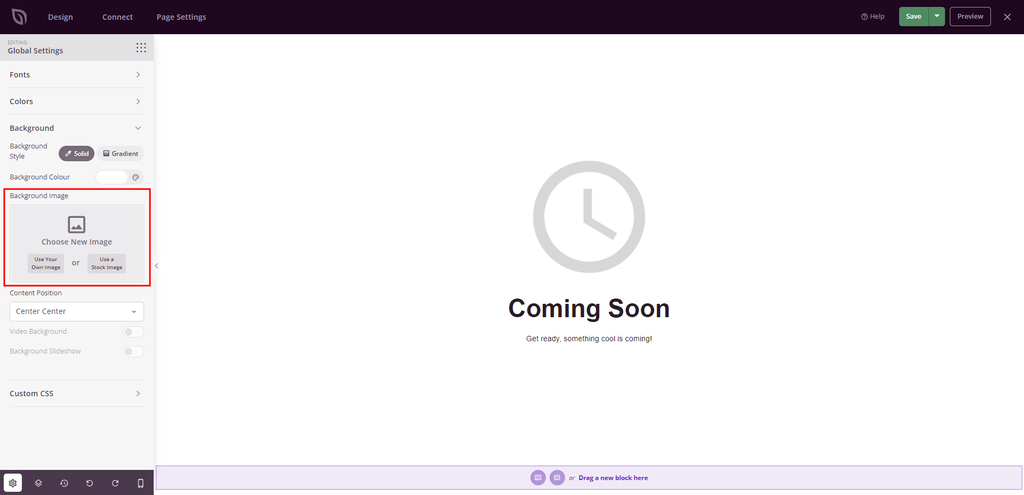
- Configure the background image’s position and style using the settings on the left sidebar.

- Save or publish the page.
How to Add a WordPress Background Image With CSS
It is possible to embed an image as a background using custom Cascading Style Sheets (CSS) code. This way, you can easily set background images to individual pages, posts, and categories.
Let’s go over the steps of adding a background image using Additional CSS, one of the WordPress Theme Customizer features:
- From the WordPress dashboard, navigate to Appearance → Customize.
- In the Theme Customizer screen, click Additional CSS.

- Type the following CSS code in the text editor:
body {
  background-image: url(example.com/wordpress-background-image/);
}
Change the URL within the brackets with your preferred background image URL.
- If the image doesn’t suit your preferences, add the following CSS code:
body {
  background-attachment: fixed;
  background-size: cover;
}
- The output will look like this:

- Save the changes.
Best Practices for Using WordPress Background Images
When customizing your WordPress site using a background image, it is important to implement the best web design practices to get the best possible result:
Optimize Images
Before adding background pictures to your site, optimize the images by compressing them. You can utilize a WordPress plugin, such as Image Optimization by Optimole. It uses a cloud-based system to optimize images and provides lazy loading functionality to speed up the website’s loading time.
Set the Image Size Properly
Pay attention to the WordPress image size when choosing a background picture. The most common size for background images is 1024 x 768 pixels. However, you may use high-resolution images with up to 1920 x 1080 pixels and a 16:9 ratio, so they look great on various device screens.
Also, consider testing it using a local site on multiple devices.
Use a Legal or Royalty Free Image
Another important tip is to utilize royalty-free images to avoid copyright violations. There are many websites that stock royalty-free photos, such as Unsplash, Pexels, Pixabay, and Pixwizard. However, we still recommend including the images’ owners or sources to give them credit for their work.
Conclusion
Adding a WordPress background image is easy since the platform provides the tools for the task.
In this article, we have covered a complete guide for adding WordPress background images using the Theme Customizer, the WordPress block editor, a page builder, and CSS.
Whatever method you choose, remember to optimize the images before using them as the background. Furthermore, use the recommended background image size and ensure that your chosen picture is royalty-free. We hope this article has helped you understand how to design your website by adding background images. Good luck!

Information Technology and web development are Yoga's passions. He loves nothing more than sharing his experience with readers, and helping them to understand the world of IT. In his spare time, Yoga likes to make music and learn to code. He is always looking for new challenges, and enjoys pushing himself to learn new things.


Comments
September 29 2023
Ugh, I think it's so difficult now to change the background as they deleted the option now to easily change it in the customizer... At least the CSS worked, thank you!
October 27 2023
Hi there! Glad the CSS solution worked for you! If you have any more questions or need further assistance, feel free to ask. ??