How to grant MySQL remote connection in 2025 using hPanel and MySQL server
A remote MySQL server helps you work more efficiently and keeps your data secure. It enhances accessibility, letting you and your team access the database from anywhere, which is perfect for remote working.
This setup improves MySQL database performance by not utilizing computer resources from the same local machine, resulting in faster and smoother operations. A remote server also includes security measures provided by the virtual server host, typically unavailable on a local server.
The MySQL server is also set to listen for local connections by default, disabling remote access to this database server.
To help you get started, this article will provide a step-by-step guide on establishing a remote connection to MySQL and conducting MySQL remote access setup on an Ubuntu server via hPanel.
Download ultimate SSH commands cheat sheet
How to allow MySQL remote connection in hPanel
Before starting with this guide, ensure that you have access to the following:
- A command-line interface (CLI) or terminal window to execute commands.
- Your remote MySQL server’s IP address or hostname, port, and credentials.
- The required privileges as a root user on the MySQL server to create and manage databases.
Hostinger makes connecting to MySQL server remotely hassle-free with our graphical interface. Follow these steps to enable a remote database connection:
- Navigate to Databases → Remote MySQL from hPanel.
- Enter the local IP address of a remote user that will connect to the server into the IP (IPv4 or IPv6) field. Alternatively, check the Any Host option to allow connection from any IP address.
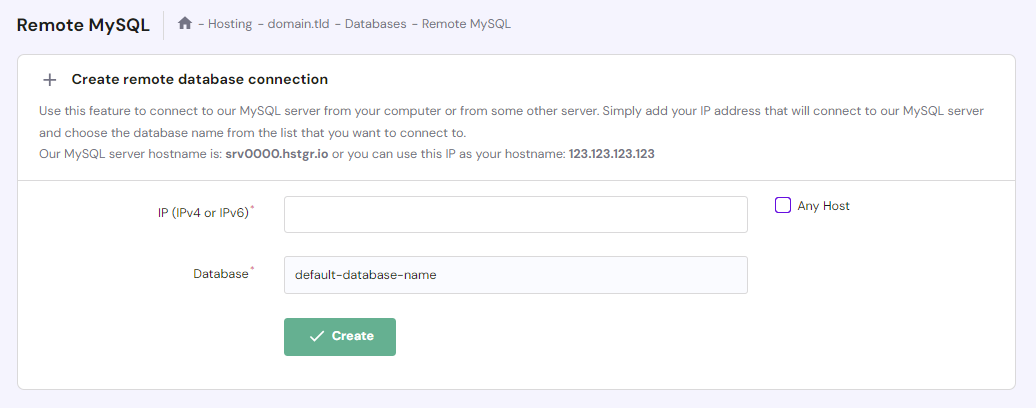
- Once done, click Create.
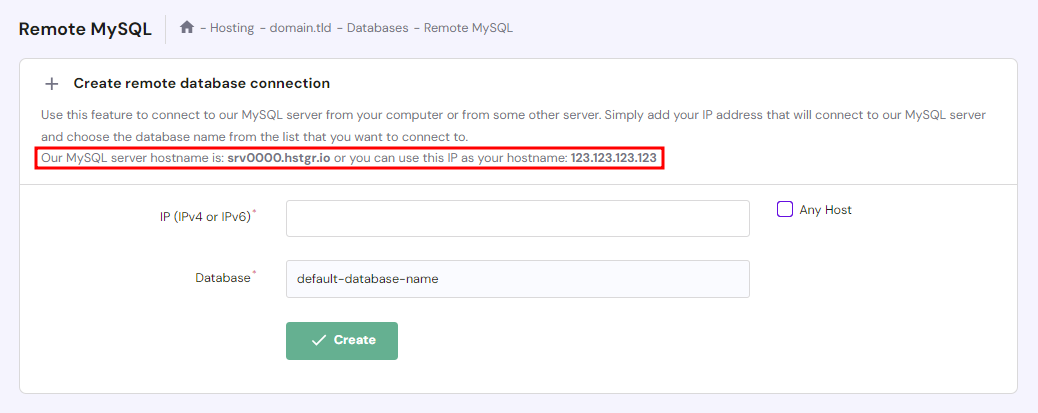
- Retrieve our MySQL host name and IP address from the top of the same page.
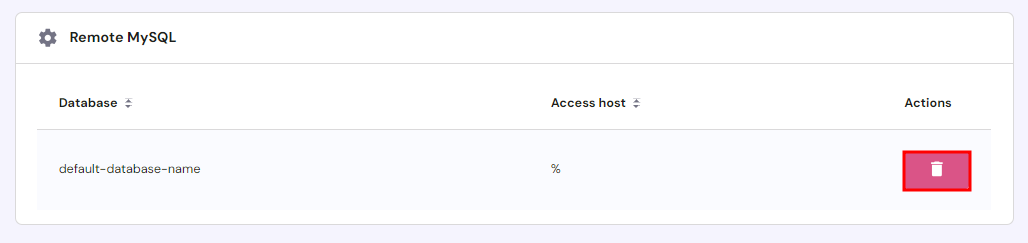
- Your remote MySQL connections are listed under the Remote MySQL section. Hit Delete to remove a MySQL instance if needed.

How to grant remote connection to a MySQL database server
For security reasons, you need a Secure Shell (SSH) connection to enable remote connections to your MySQL database server. SSH is a secure network protocol that encrypts remote server access.
While it’s not the only method to secure a remote MySQL database connection, SSH ensures a high level of security, making it a preferred choice for protecting data during transmission. This approach is critical when handling sensitive data or connecting on unsecured or public networks.
Windows users can use PuTTY, a popular SSH client, to create an SSH tunnel. Meanwhile, Linux and macOS users have built-in terminal applications that support SSH. In all these cases, you’ll be using a MySQL client to interact with your database server remotely.
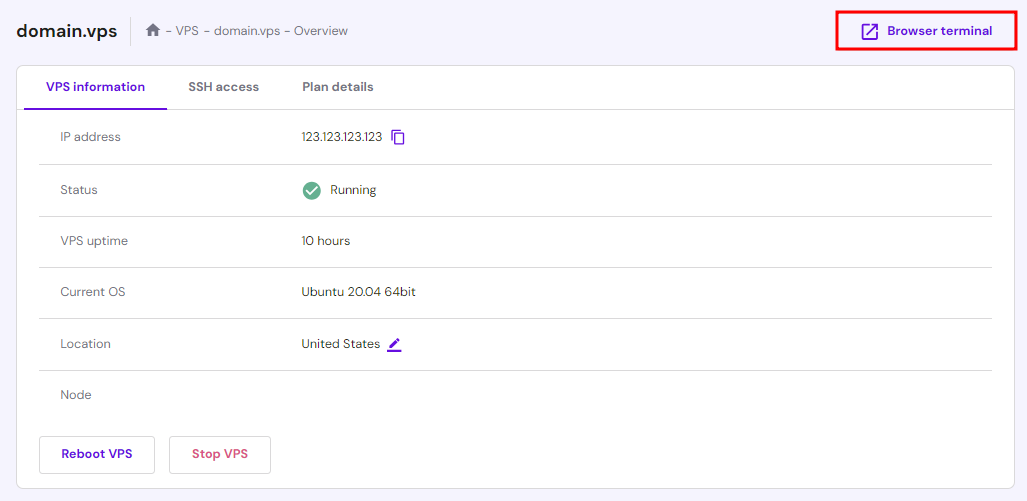
If you are an existing or new user of Hostinger’s VPS service, find the server’s login credentials under hPanel’s VPS → SSH access tab or use the integrated Browser terminal.

1. Edit the MySQL configuration file for remote access
The first step is to make the remote MySQL server listen for external connections by adding an extra option to the configuration file.
To do this, log in to your server as a root MySQL user and connect to the MySQL command line. Run the following command to determine the location of the MySQL configuration file:
mysql --help | grep "Default options" -A 1
The output should look like this:

Next, open and edit the MySQL config file using nano, a text editor for Unix-like systems with a command-line interface:
nano /etc/my.cnf
Once the file opens, locate the line that contains the [mysqld] label and add the following code:
bind-address=server_IP
Replace server_ip with the remote server IP address to limit connections. Avoid setting the bind-address value to 0.0.0.0, as it enables any IPv4 address to access the MySQL servers, increasing the risk of unauthorized access.
If the MySQL config file has a line containing skip-networking, remove it or mark it as a comment by adding # at the beginning of the line. This directive, when active, makes the MySQL server not listen for TCP/IP connections, effectively disabling remote access.
After editing the file, save it by pressing CTRL+X. To apply the changes, restart the MySQL service using the following command:
sudo systemctl restart mysql
2. Open the required MySQL port
The default MySQL port for external connections is port 3306. If you have a firewall configured on your MySQL server, you’ll need to allow traffic through this specific port to enable access from remote machines.
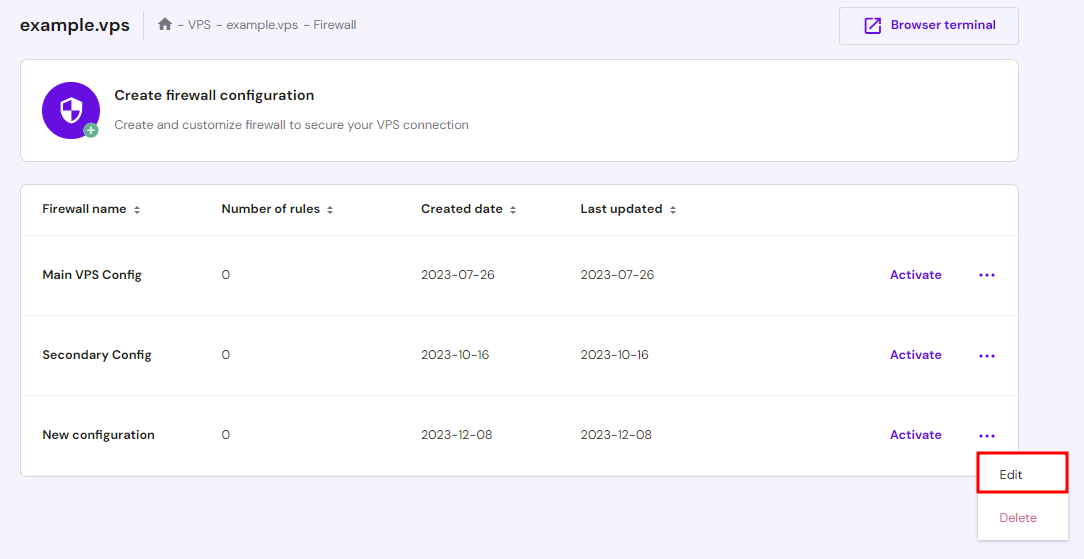
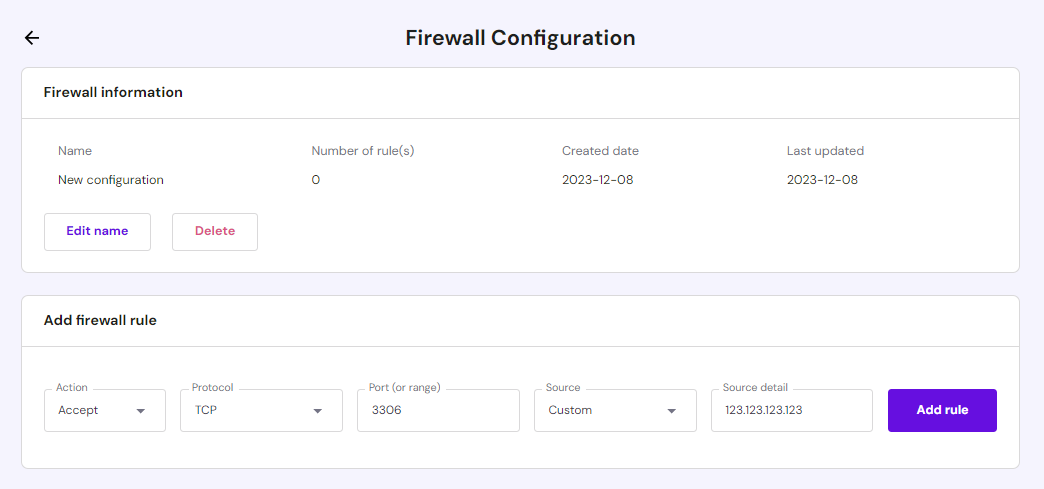
Hostinger users on KVM VPS plans can add new firewall rules directly from hPanel by navigating to Security → Firewall. Select Create firewall configuration, name it, and click Edit to configure it.
This tutorial uses the Transmission Control Protocol (TCP) and port number 3306. The source is set to Custom, allowing incoming traffic only from a specific IP address. Once you’re done setting up the remote database connection configuration, click Add rule.
Alternatively, open hPanel’s Browser terminal and use the following command to restrict access to a specific remote IP address using iptables, a widely used firewall tool by the Linux kernel. Proceed with securing remote access by replacing remote_IP_address with the actual IP address of the remote MySQL host:
iptables -A INPUT -i eth0 -s remote_IP_address -p tcp --dport 3306 -j ACCEPT
Omitting -s remote_IP_address from the syntax opens port 3306 for unrestricted traffic. Be careful with this setting, as it increases the risk of unauthorized access.
Save the iptables configuration by entering:
iptables-save > /etc/sysconfig/iptables
3. Connect to the remote MySQL server
After configuring your MySQL server to allow remote connections, users from the specified IP address can set up a new connection from a remote machine. To do so, enter the following command in your terminal:
mysql -u username -h mysql_server_ip -p
Replace username with your MySQL username and mysql_server_ip with your MySQL server’s IP address or hostname. The -p parameter enables password authentication, prompting you to enter the password for the specified user account.
Next, enter the password value for the MySQL user account. If the connection is successful, you will enter the MySQL command-line interface, indicated by a mysql> prompt. Once connected, you can specify the database name you wish to work with using the command below:
USE database_name;
You can then start executing commands and interacting with the MySQL database remotely.
Run a simple query to test the MySQL database interaction. For example, this basic command lists all databases available to your user account:
SHOW DATABASES;
Exit the MySQL command-line interface by typing:
exit
Troubleshooting MySQL remote connection issues
Follow these steps if you’re having trouble establishing a remote MySQL link:
- Check the MySQL server status ‒ use the command sudo service mysql status to check if the MySQL server is running.
- Verify network connectivity ‒ ping your server’s IP address using the command ping mysql_server_ip to check for network issues.
- Confirm remote MySQL user privileges ‒ use the command SHOW GRANTS FOR ‘username’@’localhost’; to check whether the MySQL user you’re using has the correct authorization. Check out our article on creating MySQL users and granting privileges for more information.
- Check firewall settings ‒ if you are setting up an SSH tunnel for your MySQL connection, add your hosting provider’s dedicated SSH port to the firewall rules.
- Verify MySQL server hostname and credentials ‒ double-check the server’s IP address or hostname, username, and password for typos.
- Seek assistance ‒ if you’re still stuck, Hostinger’s Kodee AI assistant and 24/7 Customer Success team are ready to help.
Conclusion
Setting up a remote connection to a MySQL database lets you access and manage your MySQL databases from anywhere, enhancing remote teams’ efficiency. It also improves your database’s performance and keeps it safe from unauthorized access and network attacks.
Hostinger simplifies enabling MySQL remote access through hPanel with a user-friendly firewall configuration tool and an integrated Browser terminal for ease of use.
Here’s a quick recap of the steps to allow remote connection to MySQL if you’re not using Hostinger’s built-in tools:
- Change the MySQL server configuration file for remote access.
- Ensure the standard MySQL port 3306 is open for connections.
- Connect to the MySQL server and test the connection.
We hope this article helped your understanding of remote MySQL connection and how to leverage it for a better workflow. Leave a comment below if you have any questions.

Jordana is a Senior Content Writer at Hostinger with a background in Information Systems. She has over five years of experience in WordPress and is casually dabbling with PHP and MySQL. Her passion for writing and technology drives her to create tutorials for anyone wanting to build their online presence. Follow her on LinkedIn.


Comments
September 19 2021
After setting up the remote MySQL in hostinger, what is the connection string that would be used to connect to the database using MySQL in C#? For the remoteMySQL.com service the following connection string worked, but does not work for Hostinger string connectionString = "SERVER=" + serverAddress + ";DATABASE=******;ConnectionTimeout=600;DefaultCommandTimeout=600;" + "UID=********;" + "PASSWORD=*********;";
September 21 2021
Hi Jonathan, it looks like a regular string like this should do the job:
Server=myServerName\myInstanceName;Database=myDataBase;User Id=myUsername;Password=myPassword;;You can also find the appropriate string for your project here.October 11 2021
Good article, however, now-a-day, with security always a question, I think remote db connection should always be in ssh tunnel and/or under certificate authentication instead of normal user/password. A new write up with these features may be desirable
October 12 2021
Hi, thanks for pointing that out - our team is already reviewing your suggestion :)
April 29 2022
Hi, How to connect jdbc to remote mysql. I'm always getting com.mysql.cj.jdbc.exceptions.CommunicationsException: Communications link failure Error! I'm on paid plans. Thank you.
May 12 2022
Hi there! I've looked up your error and it looks like this reply on StackOverflow should be helpful in your case :) Let me know how it goes!
May 10 2022
Thanks for information
March 25 2025
Hi, How to connect jdbc to remote mysql. I'm always getting com.mysql.cj.jdbc.exceptions.CommunicationsException: Communications link failure Error! I'm on paid plans
March 28 2025
Hey! JDBC isn’t supported on shared hosting plans. I’d suggest upgrading to a VPS - it’ll give you more control over your database connections and solve that issue :)