How to Use the chown Command to Change the Owner of a File in Linux + Free Linux Cheat sheet
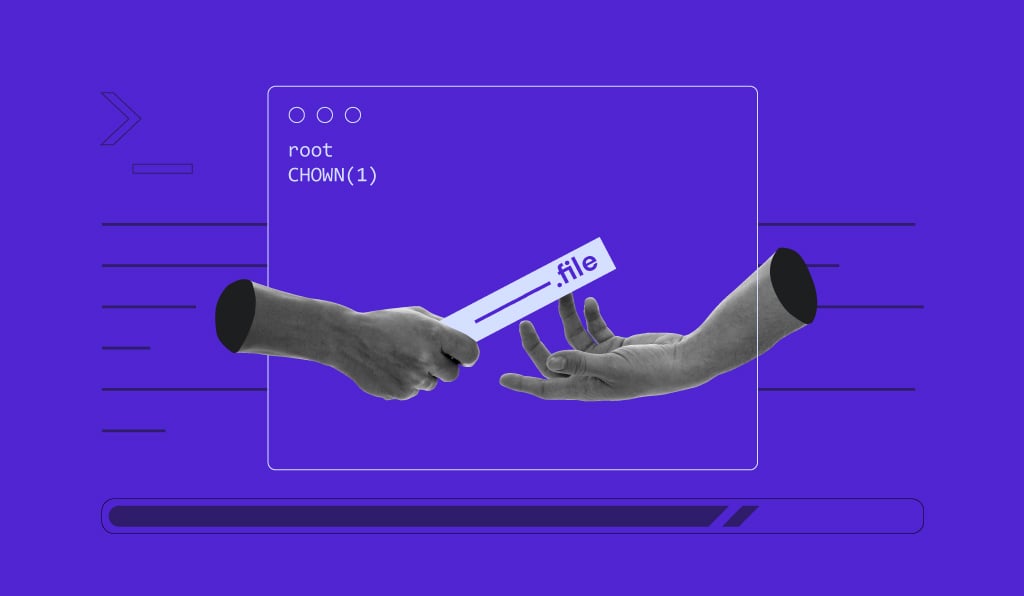
Managing file and directory ownership is essential when working with Linux operating systems on a virtual private server. The correct use of the chown command can prevent unwanted users from making changes to your files and help secure them from outsiders.
This tutorial will contain a complete overview of the chown command and discuss how to use it with your VPS host.

chown Command Syntax
Linux comes with a unique permission system divided into three parts: user, group, and other permissions. Check out the comparison below:
- User (owner) – either people accounts or accounts created for specific applications. If a user changes an ownership, the changes will reflect only for that particular user.
- Group – each member of a group has the same permissions. For example, if a user is added to the administrator group, they will be able to perform the same actions as the group owner. It’s worth noting that each user must be part of a group, and groups can have multiple users. If a group user performs any ownership changes, they will reflect for all users.
- Others – represents permissions for everyone that is not the owner or in the group.
These three groups have their permissions indicated by the rwx logic like, as shown below:

r stands for read, w for write, and x for execute. In the example above, the owner has read, write, and execute permissions. The group can read and execute, while others can only execute.
Pro Tip
Users can easily change ownership and permissions on a VPS with the help of the command line.
The main command for changing ownership is chown. It allows users to change user and group ownership both for files and for directories. We’ll go over the chown syntax below:
chown [OPTION] OWNER[:GROUP] FILE(s)
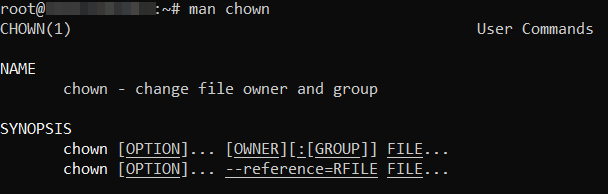
- [OPTION] – represents the flags that a user can pass along with the command. A full list of flags can be found with the help of the man command. This command will also provide the syntax, description, and, in some cases, examples for a particular command.
- OWNER[:GROUP] – gives an option to change ownership for a user, a group, or both at the same time. OWNER is a user name or the user ID of the new owner, while [:GROUP] is the new group. Pay extra attention to the colon between owner and group.
- FILE(s) – here users can list the files or directories that they want to change ownership for.
You can check an account’s ID and whether it belongs to a group by listing all users using Linux commands. If they don’t belong to any group, both identification numbers will be identical.

How to Use the chown Command in Linux
Let’s go over the main chown command examples.
How to Use chown to Check the Current File Ownership
Before using the chown command, confirm user and group permissions. For that, log in to your VPS using SSH and switch to the required directory with the cd command.
For instance, if the file is in /home/Hostinger, go there by using the following command:
cd /home/Hostinger
Then, list the files within the directory:
ls -l
For this tutorial, we have created a file called chownSample.txt. The output of the ls command is:
-rw-r--r-- 1 Hostinger root 0 May 23 06:58 chownSample.txt
The first -rw-r–r– part represents the file permissions for user, group, and others. The user Hostinger is indicated as the file owner, while the group ownership is set to root.
How to Use chown to Change the Owner of a File
To change the file owner, the basic syntax of the command is:
chown user FILE(s)
We’ll change the ownership of chownSample.txt from Hostinger to another user named newowner. A sample of this command is shown below:
chown newowner chownSample.txt
To verify the change of ownership, use the ls -l command again. This will produce the following output:
-rw-r--r-- 1 newowner root 0 May 23 06:58 chownSample.txt
How to Use chown to Edit Group Ownership
The chown command can also be used to change the group. The basic format to change the ownership and group is as follows:
chown OWNER[:group] FILE(s)
For example, set the owner as newowner and group as newownergroup for the same chownSample.txt file with this command:
chown newowner:newownergroup chownSample.txt
To verify the change of ownership and group, use ls -l.
-rw-r--r-- 1 newowner newownergroup 0 May 23 07:00 chownSample.txt
If you only need to change the group, the ownership part can be skipped. For example, the full command to change only the group to newownergroup would look like this:
chown :newownergroup chownSample.txt
How to Use chown to Change Directory Ownership
Important! Changing the permissions for a directory does not apply the same permissions to the directories and files inside of it. If you need to change the permissions for all sub-folders and files, skip to the recursive chown section of this tutorial.
Chown can also be applied to directories. In this example, we’ll work with a directory named TestPermissions. First, let’s use the ls -l command to view its permissions.
drwxr-xr-x 2 Hostinger root 4096 May 23 07:41 TestPermissions
The first drwxr-xr-x part represents the user, group, and other folder permissions. The user Hostinger is the directory owner, while the group ownership is set to root.
Similar to files, the owner and group can be easily changed for directories. For example, this command will set the user newowner as the owner of the TestPermissions directory:
chown newowner /TestPermissions
To change the group alone, use:
chown :newownergroup /TestPermissions
To change the owner and group of the directory, use:
chown newowner:newownergroup /TestPermissions
The same command can also set the permissions for multiple files or directories. The syntax for such a command would look like this:
chown [OPTIONS] [OWNER][:GROUP] file1 file2
Here’s how to set newowner as the owner and newownergroup as the group for the TestPermissions directory along with the chownSample.txt file inside:
chown newowner:newownergroup /home/TestPermissions/ /home/TestPermissions/chownSample.txt
How to Use Recursive Chown
Recursive chown is useful if you want to change the permissions for all the sub-directories and files inside a directory.
For a recursive operation, use the -R flag. Here’s an example:
chown -R [USER][:GROUP] Directory
We’ll take the same TestPermissions directory and set newowner as its owner recursively:
chown -R newowner /home/TestPermissions/
Now, every file and folder inside the TestPermissions directory will be owned by the user newowner.
How to Use chown to Edit the Owner of a Symbolic Link
Symlink or symbolic link is a reference to an existing physical file. It can also be considered an advanced shortcut, like the ones used on Windows.
The chown command can be used to change the owner and group of symbolic links. First, create a symbolic link for the file chownSample.txt.
ln -s chownSample.txt mysymlink
To verify the ownership and group information, use the ls -l command. This will produce the following output:
-rw-r--r-- 1 root newownergroup 0 May 24 07:00 chownSample.txtlrwxr-xr-x 1 root newownergroup 0 May 24 07:00 mysymlink -> chownSample.txt
There are two entries available – one for the physical file, and the other for the symbolic link. Now, try changing the owner to newowner for the newly created symlink:
chown newowner mysymlink
The above command will change the ownership for the file chownSample.txt. Now, this will be the ls -l command’s output:
rw-r--r-- 1 newowner newownergroup 0 May 24 07:00 chownSample.txtlrwxr-xr-x 1 root newownergroup 0 May 24 07:00 mysymlink -> chownSample.txt
If you want to change the symbolic link’s ownership, use the -h flag:
chown -h newowner mysymlink
Using the ls -l command now will produce the following output:
-rw-r–r– 1 newowner newownergroup 0 May 24 07:00 chownSample.txtlrwxr-xr-x 1 newowner newownergroup 0 May 24 07:00 mysymlink -> chownSample.txt
As can be seen, the ownership of the symbolic link has been updated.
Conclusion
If you want to manage the ownership of your Linux files or directories, use the chown command. It will allow you to assign different owners and specify the groups for various files and directories.
In this tutorial, we’ve covered the syntax of the chown command and learned how to:
- Check the current file owner.
- Change the ownership of a file.
- Change group ownership.
- Edit directory ownership.
- Use recursive chown and change the ownership of files and directories recursively.
- Edit symbolic link ownership.
We’ve also provided some examples that you can use when trying out the chown command. If you have any questions or comments, let us know below.

Ignas takes great satisfaction in helping people tackle even the most complex technical issues. His current goal is to write easy-to-follow articles so that these issues will not happen at all. During his free time, Ignas likes to play video games and fix up things around his house.