How to Install Moodle™: 4 Methods
Moodle™ is one of the most popular learning management systems (LMS), with more than 272 million users worldwide.
It provides a personalized online learning experience and relevant services, all integrated into a single system for its users – mostly school administrators, educators, and students.
There are a few ways of installing Moodle™ on a web server. In this article, we’ll explain four different approaches – automatically, on a VPS, manually, and locally. Depending on your technical knowledge, these methods to install Moodle™ can be suitable for IT professionals and beginners.
Let’s begin.

How to Install Moodle™ Automatically
For automatic installation, users can utilize the installer provided in the control panel of their web hosting provider. With Hostinger, installing the Moodle™ platform is simple using the intuitive one-click installer on hPanel.

To use hPanel’s one-click installer for Moodle™, follow these steps:
- Log in to hPanel.
- Click Hosting on the navigation bar, find your domain name, and click the Manage button.
- Scroll down to the Website section and click on Auto Installer.
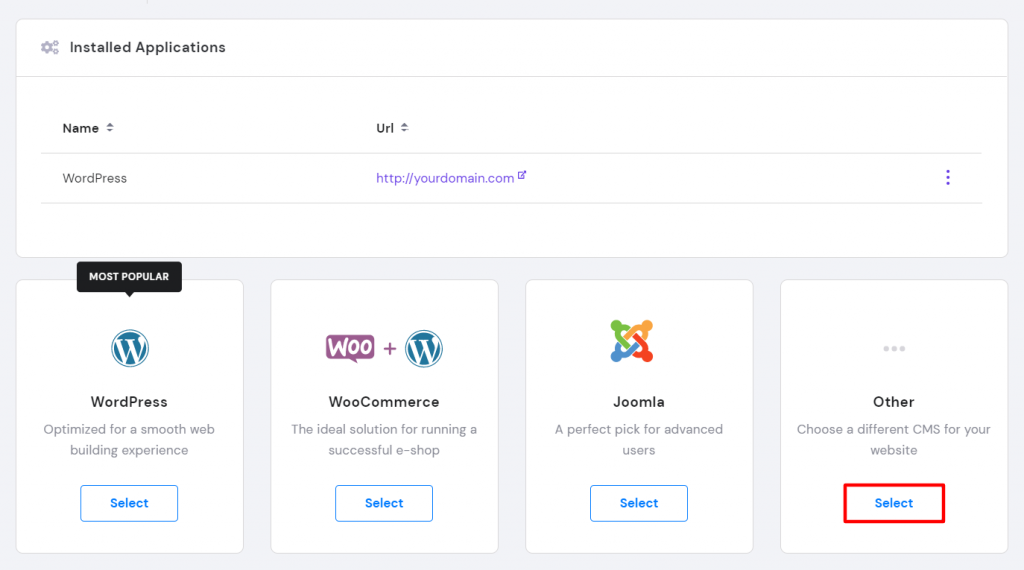
- When choosing the CMS to install, click the Select button for Other.
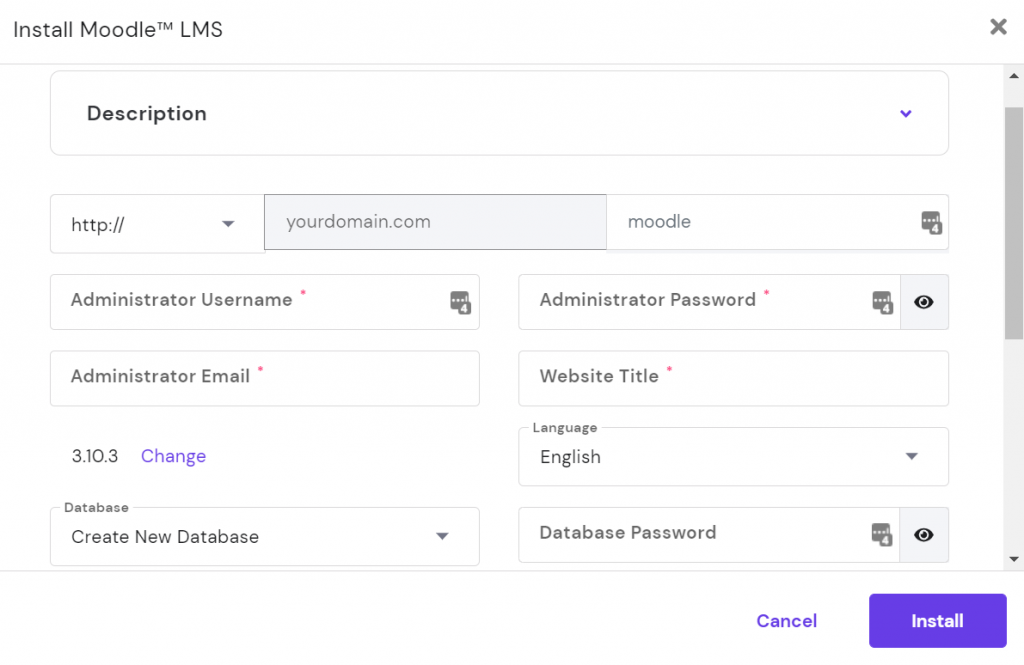
- Pick Moodle™ LMS from the drop-down menu and hit Select.
- After filling in the required fields, click Install.
When the installation process is complete, Moodle™ will appear under the List of Installed Applications.
To visit your Moodle™ site, simply click on the URL provided and log in to the site administration page using your admin username and password.
How to Install Moodle™ on a VPS
Installing Moodle™ on a virtual private server (VPS) offers enhanced performance, security, and customization. This method is particularly recommended for those seeking an efficient and scalable Moodle deployment.
Fortunately, Hostinger’s VPS hosting plans offer an Ubuntu 24.04 64bit with Moodle™ operating system template. You can find more details on our VPS hosting for Moodle™ page. This template simplifies the installation process, enabling a seamless one-click setup of Moodle™ for our customers.

Here’s how you can install the Moodle™ template on your VPS:
- Log in to your Hostinger account and navigate to the VPS section.
- Select the server you wish to use for the Moodle™ installation.
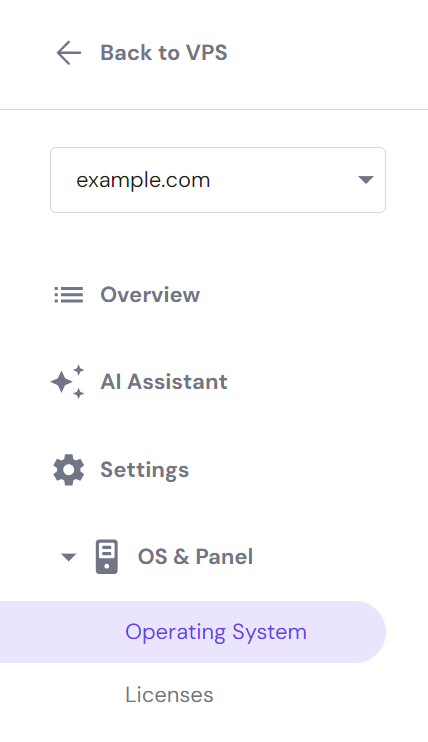
- In the OS & Panel section, click on Operating System.
- Under the Applications category, find and select the Ubuntu 24.04 64bit with Moodle™ template.
- After choosing the template, a description will appear. Click on Change OS to apply this template to your VPS.
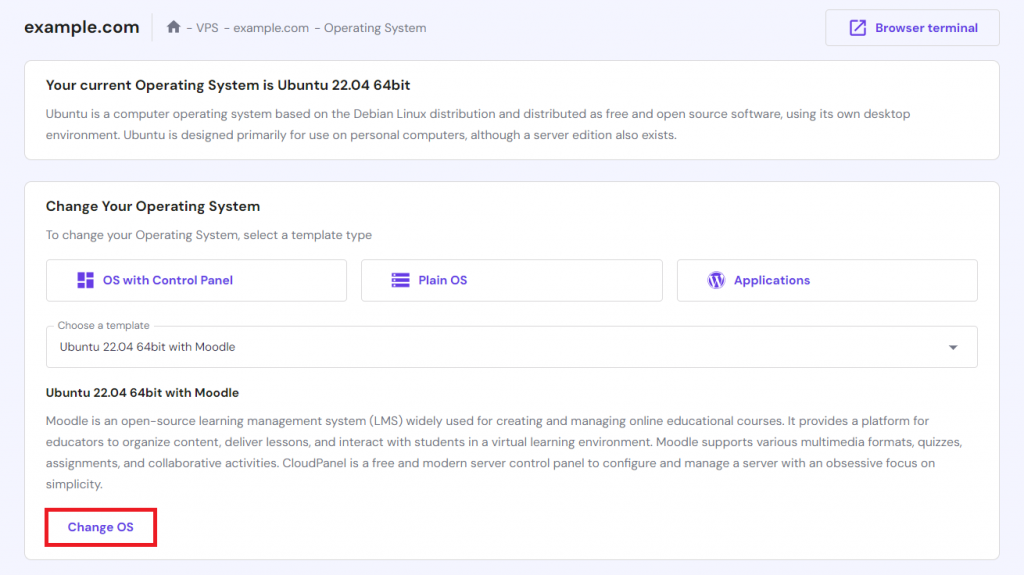
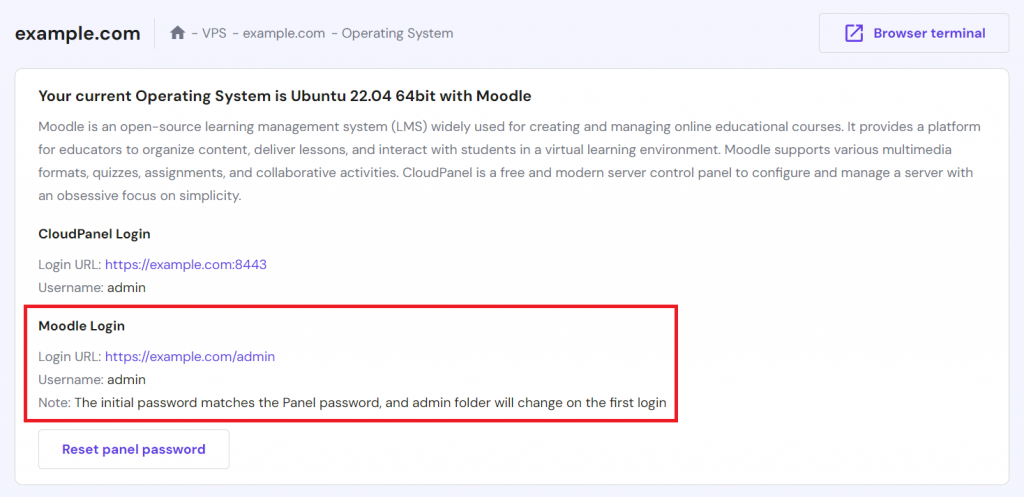
Once the installation is complete, you will find login details to access Moodle™.
How to Install Moodle™ Manually
If your web hosting provider doesn’t have an auto-installer for Moodle™, follow this step-by-step guide on installing it manually.
1. Prepare for the Moodle™ Installation
Before proceeding with the manual installation process, don’t forget to take care of these aspects:
- Download the latest Moodle™ package from its official website.
- Upload the file to your website using the File Manager or an FTP client like FileZilla. In this tutorial, we’ll use the File Manager. Log in hPanel, click Hosting from the navigation bar, find your domain name, and click Manage.
- On the Hosting Account page, scroll down to the Files section and click File Manager.
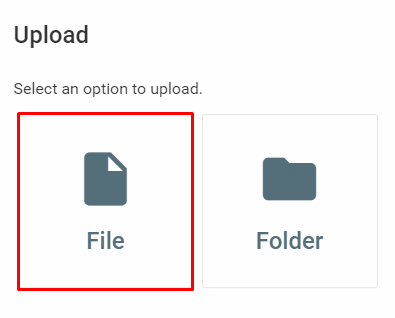
- Click on public_html -> Upload Files icon from the menu bar and choose File from the pop-up window.
Important! Please note that the choice of upload location will matter. For example, if you wish to install Moodle™ on your main domain name (www.yourdomain.com), you will need to upload the files directly to your public_html folder.
- Click Select Files, select the Moodle™ installation package you downloaded, and click the Upload button.
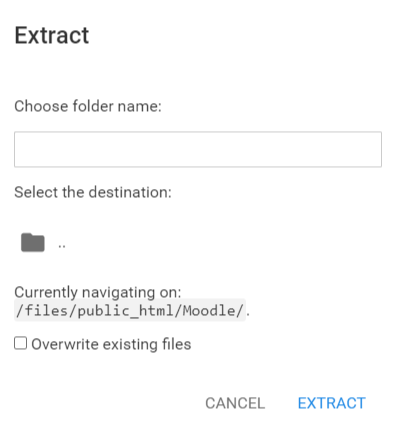
- Right-click on the uploaded Moodle™ file and select Extract. Enter the folder name for the extraction and click the Extract button.
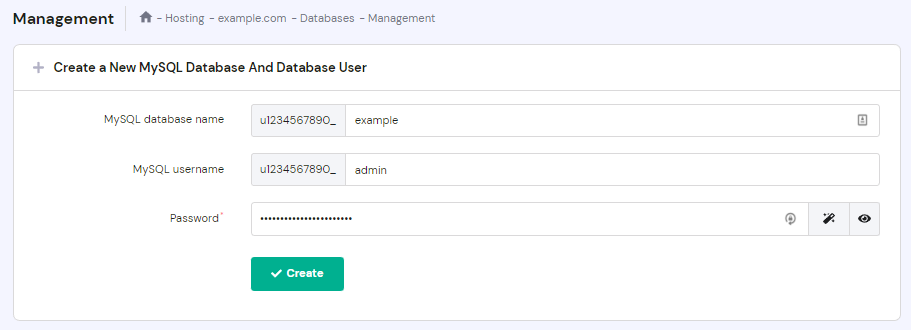
- Create the MySQL database for your Moodle™ site. Return to hPanel’s Hosting Account, scroll down to the Databases section, and click MySQL Databases.
- Fill in the database name, username, and password. Copy the information for later and click Create.
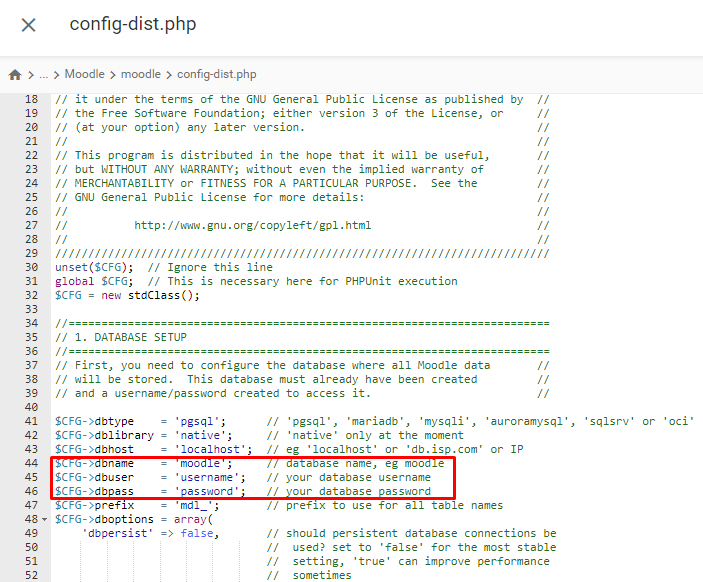
- Return to the File Manager, click public_html and locate config-dist.php. Create a copy of the file and edit the database information. Make sure to include the string of numbers in front of your database name and username.
2. Install Moodle™
Now that you’ve uploaded all the files on a MySQL database server, let’s install Moodle™.
- Access the URL of the Moodle™ files in your domain. If they are located in the public_html folder, access it as it is: www.yourdomain.com. If they are installed on a subfolder named moodle, for example, type: www.yourdomain.com/moodle.
- Select a language and click Next.
- Make sure the correct Web address and Moodle directory are displayed. Leave the Data directory as it is, or change the location.
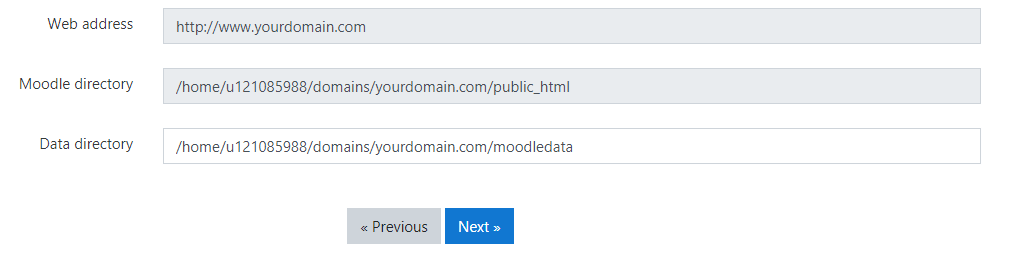
- Return to your File Manager and open the copy of config-dist.php you’ve made earlier. Scroll down to find Web Site Location and Data Files Location. Edit the wwwroot and dataroot values with your Web address and the Moodle Data directory.

- Save and Rename the file to config.php. Return to the Moodle™ setup page and select Next.
- Select either Improved MySQL or MariaDB as your database type. For this tutorial, we’ll use the second option.
- Enter the information of your MySQL database that was previously created in the required fields and click Next.
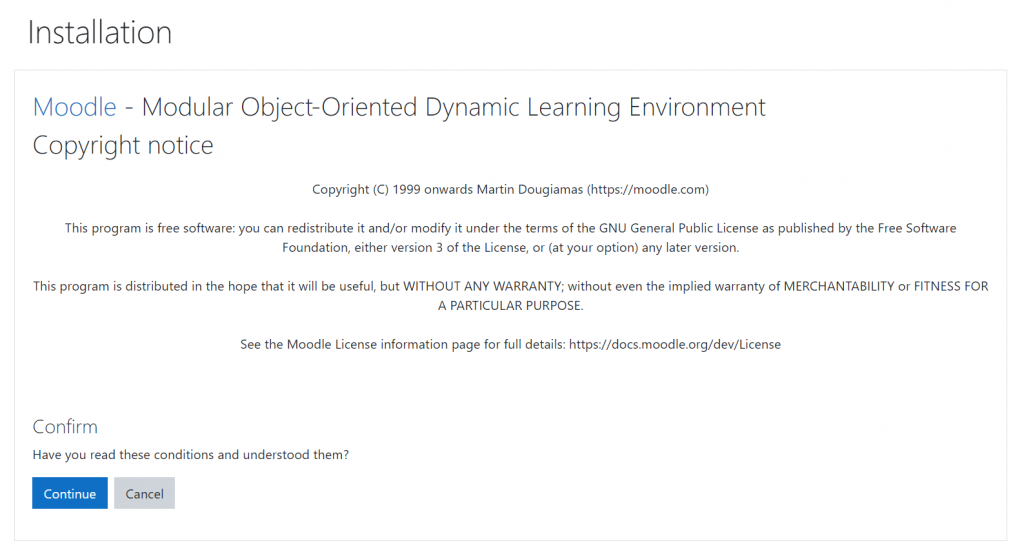
- If the configuration file is set correctly, a copyright agreement will appear. Click Continue. The installation will start by checking if all the required settings, such as storage capacity, are available and enabled properly on your hosting.
- Click Continue during the checks until you arrive at the administrator setup page. Fill in the required information and click Update Profile.

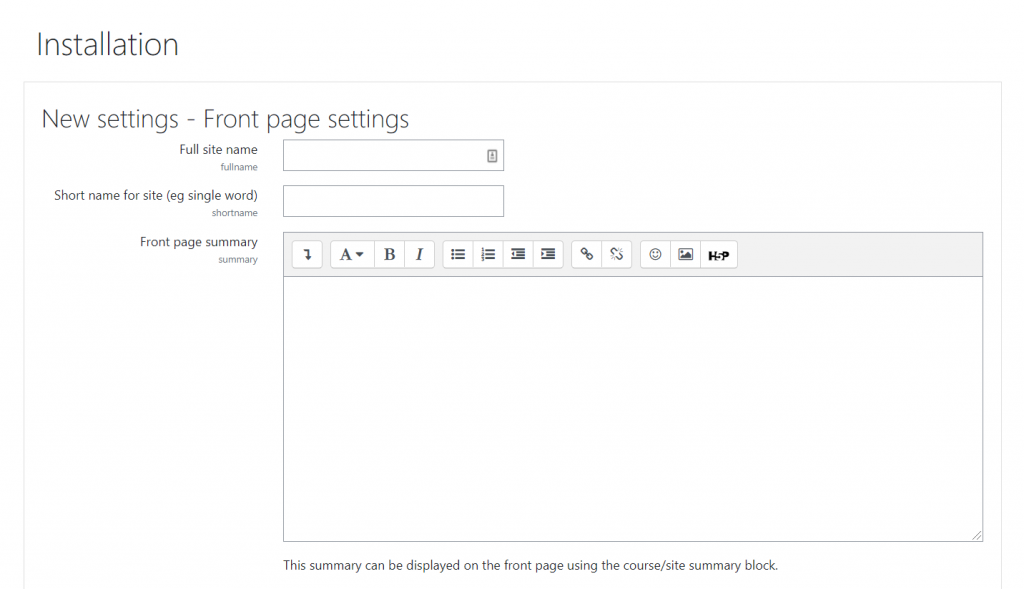
- Add the Front Page information, where you set the full name of your Moodle site, the summary, timezone, and disable or enable user self-registration.
The installation process is now complete. Continue to make necessary changes in the admin area to get your Moodle™ site up and running.
How to Install Moodle™ on Localhost
Installing Moodle™ on localhost is useful for trying out its interface and features before performing production installations.
To install the Moodle™ platform on localhost, follow the instructions below:
1. Check the Moodle™ System Requirements
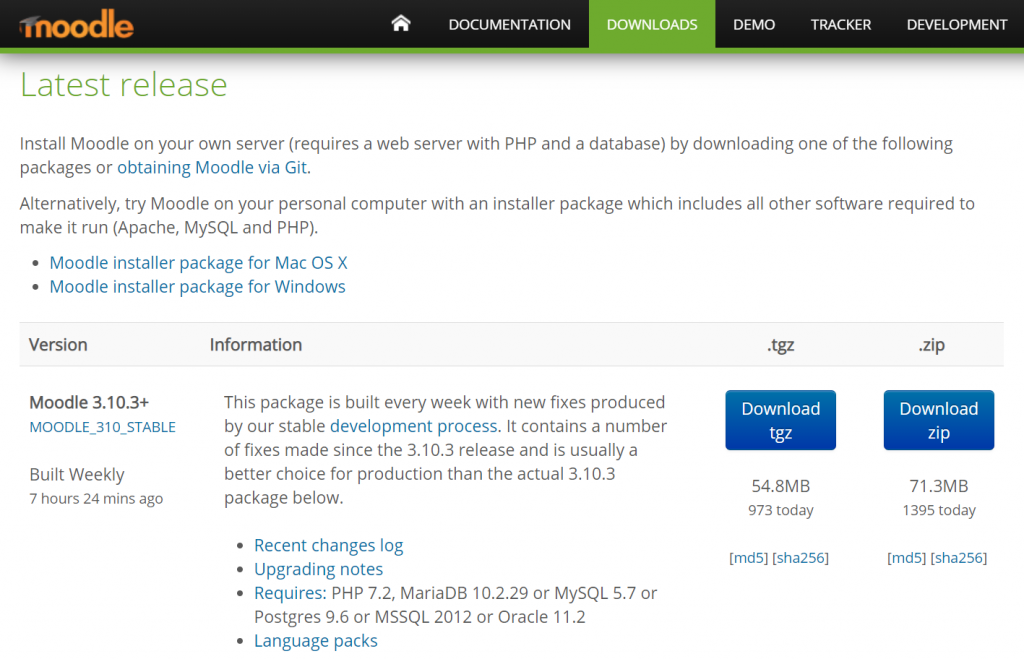
Go to the official Moodle™ site and click on Downloads on the navigation bar. Find the latest version of Moodle™, choose your preferred file format, and click on the corresponding download button.
In this tutorial, we’ll download Moodle 3.10.3+ in .zip format.
You also need software stacks such as XAMPP or WAMP. In this tutorial, we’ll use XAMPP.
2. Use XAMPP
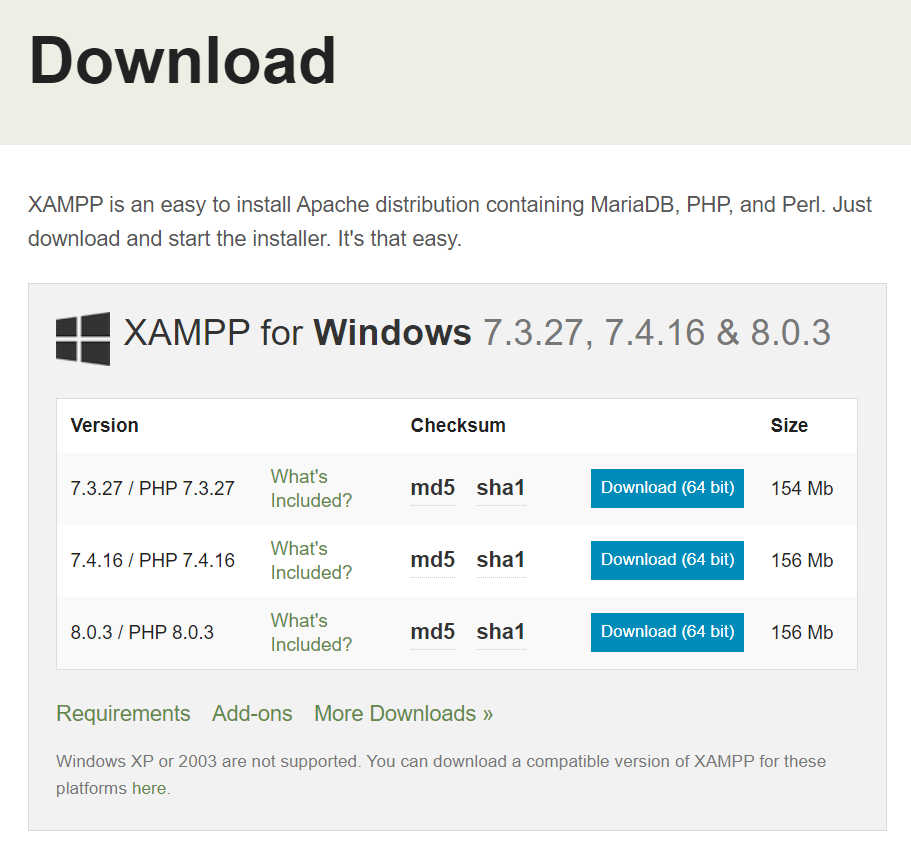
Access the Apache Friends website and click on the XAMPP download link that corresponds to your operating system. Click on Click here for other versions to download other versions of XAMPP.

Make sure the XAMPP version you choose to download is compatible with the version of Moodle™ you downloaded.
For example, Moodle 3.10.3+ is not compatible with PHP 8.0.3 since it requires PHP 7.2. Download the XAMPP version that meets this requirement, such as XAMPP 7.3.27.
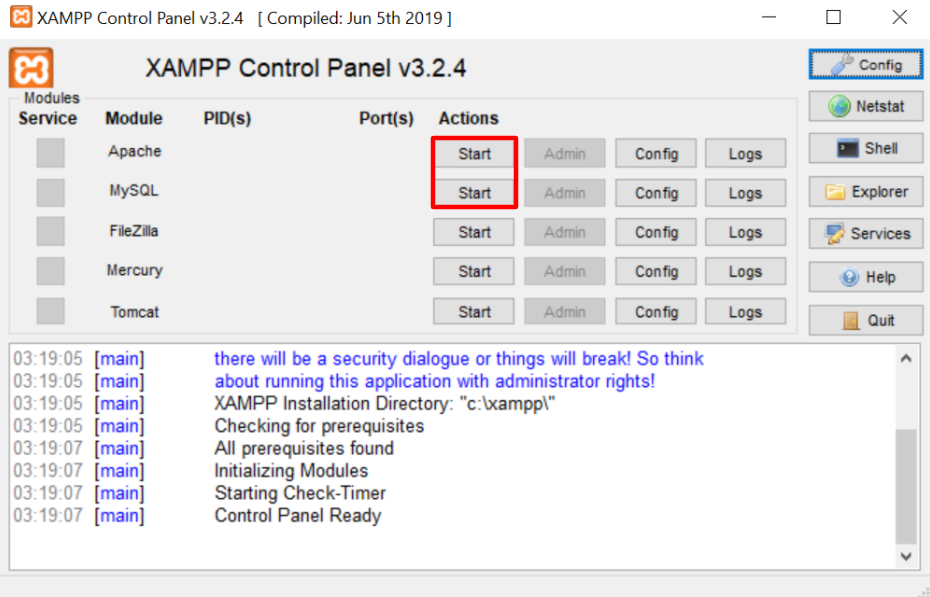
Launch XAMPP to access the XAMPP control panel. Click Start for both Apache and MySQL.
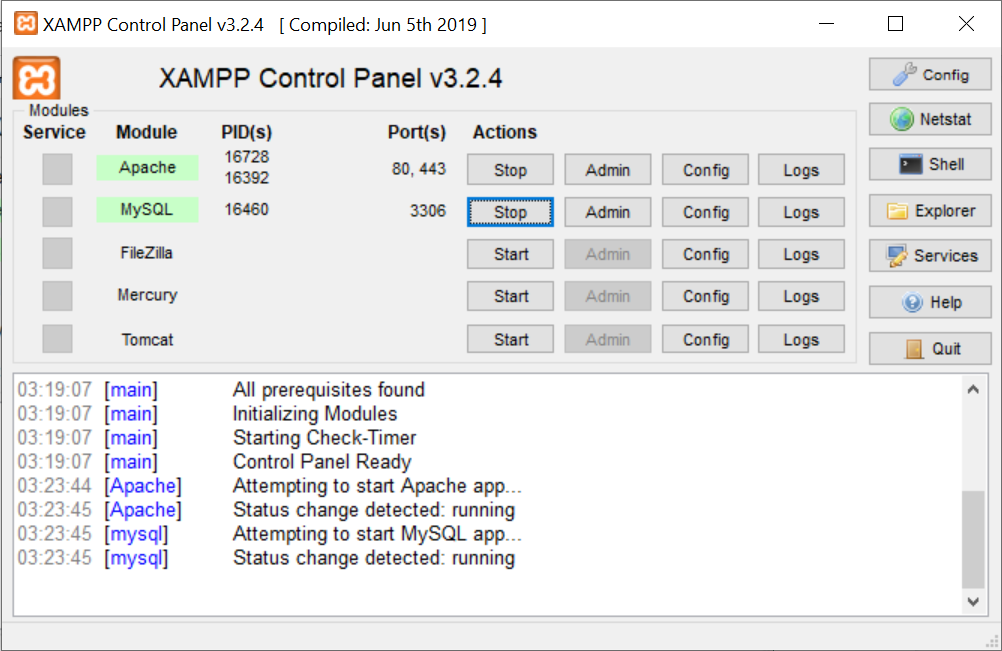
Once done, the control panel should look like this:
3. Create a Database
If you are using the version of Moodle™ that comes after Moodle 3.x, creating a database is no longer mandatory.
However, you can still create an empty database to sync when Moodle™ requests database information during the installation process.
In this tutorial, we’ll access phpMyAdmin via XAMPP.
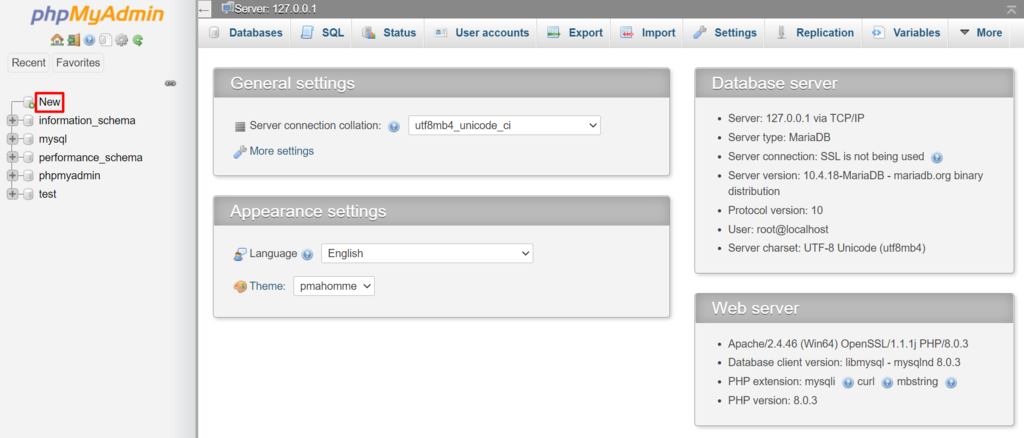
Type localhost/phpmyadmin/ into your web browser’s address bar. Click New from the left sidebar menu.
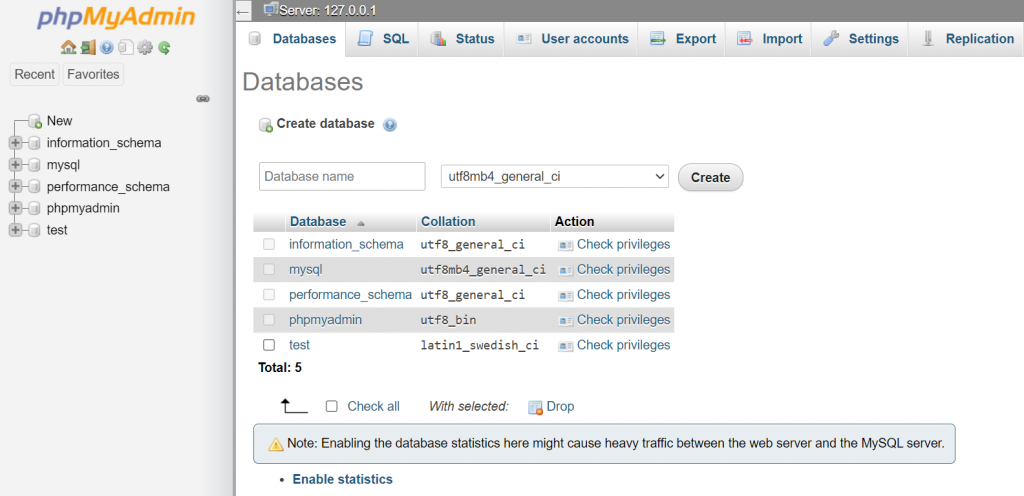
Fill in the Database name field and leave everything else as it is. Click Create to finish the database creation process. The database you have created should appear on the left sidebar menu.
4. Extract the Moodle™ Files
Find the Moodle™ .zip file you downloaded on your computer. Right-click on the .zip file, find the option to extract the files, and select the XAMPP’s htdocs folder as the destination for the extraction.
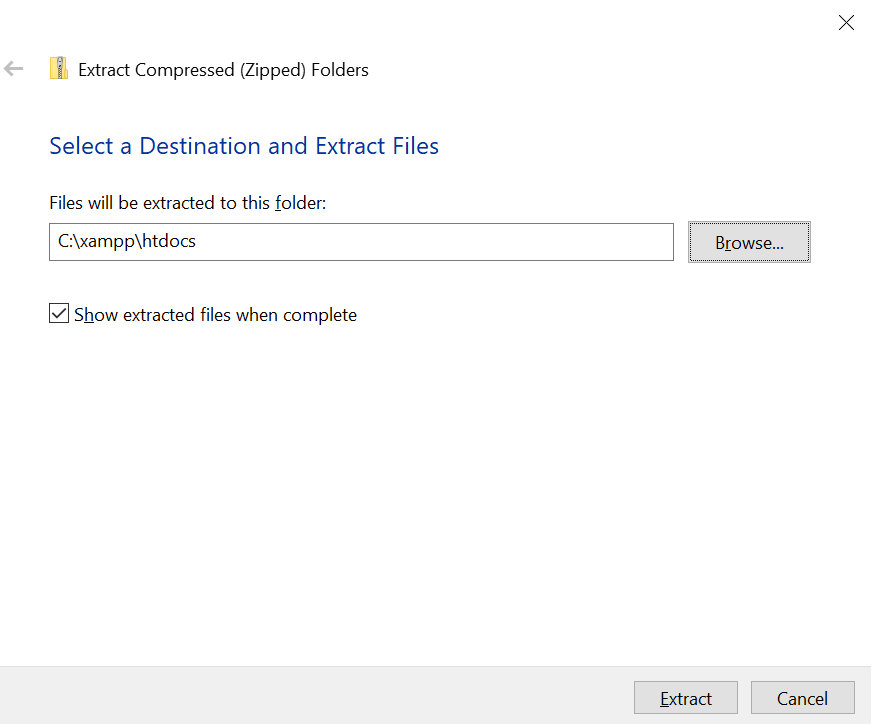
When the extraction process is complete, you will see that a folder named moodle has been created in XAMPP’s htdocs folder. This folder contains all of Moodle’s files.
5. Proceed With the Moodle™ Installation
After preparing all the necessary components, follow these steps to begin the installation:
- Type localhost/moodle/ into the web browser’s address bar and wait until the installation page appears. Choose your preferred language and click Next.
- On the Paths page, type in the Moodle data directory you want in the Data directory field or leave it as it is. The values in the Web address and Moodle directory fields are not modifiable. Click Next when you are done.

- Select MariaDB from the drop-down menu and click Next.
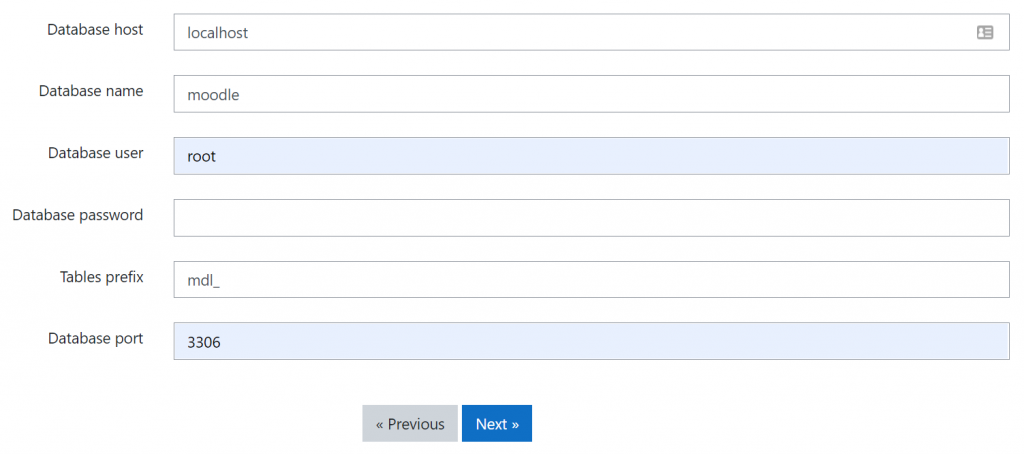
- Fill in the Database user field with root. Write the MySQL port number on the XAMPP control panel in the Database port field. Leave the Database password field blank for local installation, but you must set a password for production installations. Click Next.
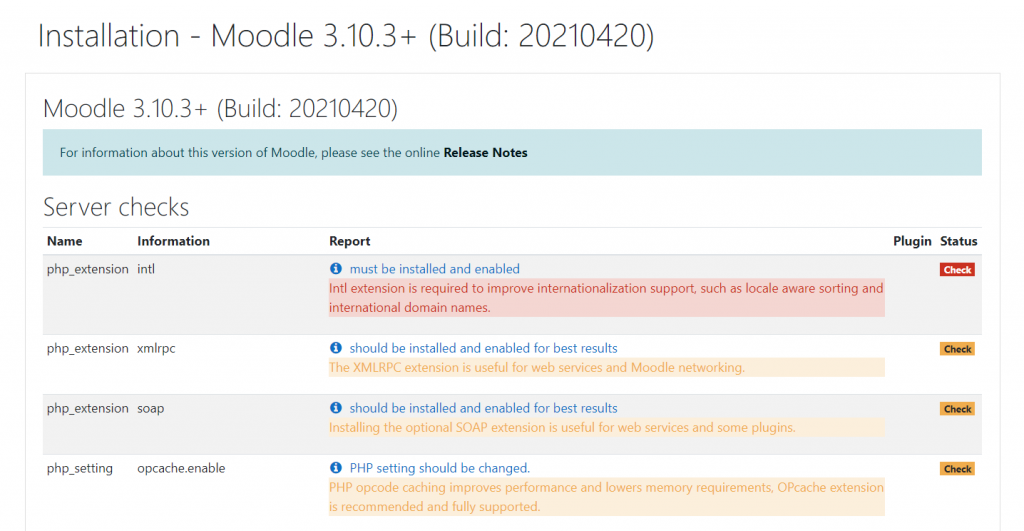
- Read the copyright notice and click the Continue button to proceed to the server check.
- During the server check, you may run into an error message asking you to enable Intl PHP Extension, such as the screenshot below.
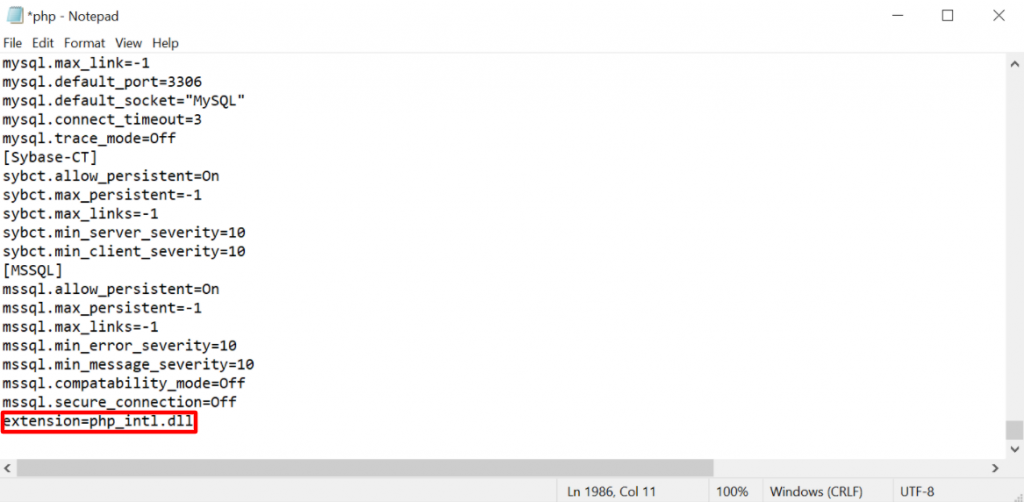
- To enable Intl PHP Extension, find the php.ini file in the XAMPP folder on your computer. Using a plain text editor, scroll down and add the following command line to the file: extension=php_intl.dll
extension=php_intl.dll
- Find the intl.default_locale and intl.error_level directives in the php.ini file and enter the following values:
[intl]
intl.default_locale = en_utf8
intl.error_level = E_WARNING

- Locate extension=intl, extension=openssl, extension=soap, and extension=xmlrpc in the php.ini file. Make sure there are no semicolons coming before them. If they are, simply delete them. Afterward, save changes and close the plain text editor.

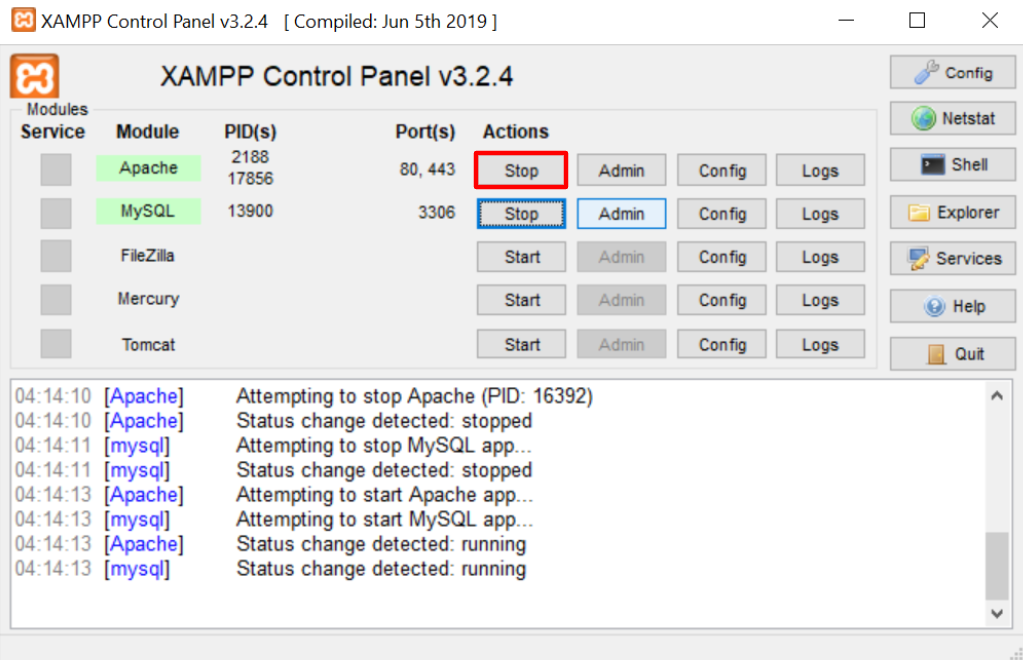
- Go to the XAMPP control panel and restart Apache. Press the Stop button beside Apache. When it turns to a Start button, press it again.
- Return to the installation page, scroll down and click Reload.
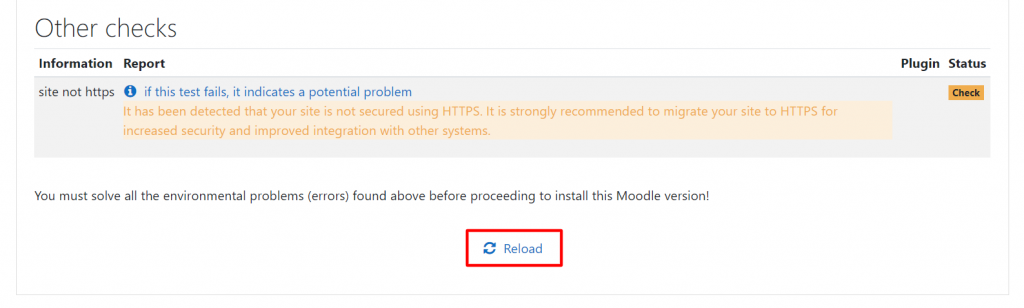
- If the error is fixed, the error message should disappear. The Continue button should appear at the bottom of the page. Click on it to proceed to the installation page.

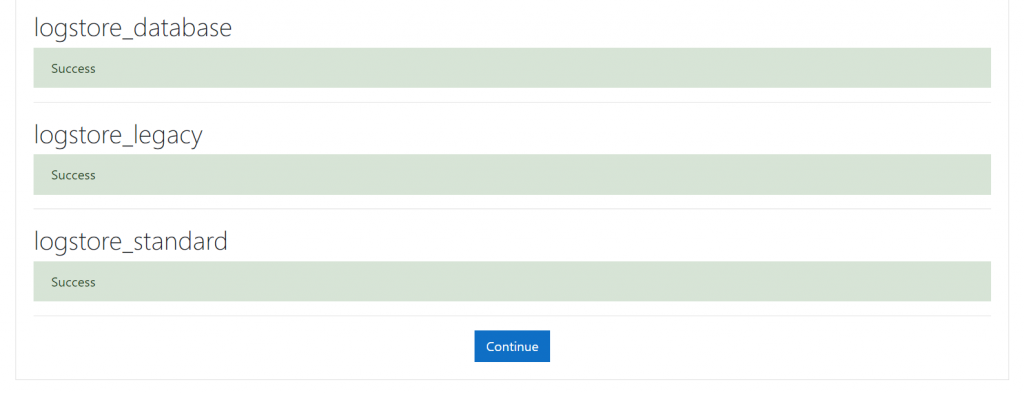
- The installation should start automatically. After the process is complete, click the Continue button at the bottom of the page.
- After creating your main admin account by filling in the required fields, click the Update profile button.
- Configure the Front page settings, such as the site name, front page summary, location settings, authentication system, and outgoing mail configuration.
Conclusion
Moodle™ is a versatile learning management system catering to a wide range of users, from students to educators. There are four different ways to install the Moodle™ platform on your web server – automatically, on a VPS, manually, and locally.
Each method caters to different needs, whether you prefer the simplicity of automatic installation, the robustness of a VPS, the control of manual installation, or the convenience of a local environment.
We hope this comprehensive guide assists you in your educational journey. For further inquiries, feel free to comment below!
Learn More About Website Building
15 Best CMS Platforms to Start a Website
Do I Need a Website for My Small Business?
Website Launch Checklist
How to Make a Website From Scratch
30+ Most Successful Website Ideas to Make Money
How to Build an eLearning Site in 5 Steps

Tomas provides top-notch technical advice on a daily basis to our valued customers. He also likes to create websites and do various coding side projects.

Tashia is passionate about all things website development, digital marketing, and eCommerce. She strives to spread her knowledge and help people navigate the online world through her words, one article at a time.


Comments
February 02 2018
THANK YOU! THANK YOU! THANK YOU! I have been struggling for 2 days trying to figure out how to install moodle. With your tutorial, I had it installed and ready to go in 30 minutes.
February 15 2018
Amazing! I am glad to hear you found our tutorial useful! :)
March 22 2019
Thank you for putting this together.
August 05 2019
how many user can use this account?
September 17 2020
Is a shared hosting plan(Business) eligible to install moodle?
November 11 2020
Hey there Manoj. Yes, the Business plan can install moodle.
November 30 2020
Hi, I am facing these two errors on installation page, 1. Your database has tables using Antelope as the file format. Full UTF-8 support in MySQL and MariaDB requires the Barracuda file format. Please convert the tables to the Barracuda file format 2. For full support of UTF-8 both MySQL and MariaDB require you to change your MySQL setting 'innodb_large_prefix' to 'ON' How do I resolve these?
February 09 2021
Hi there! To see how to update your tables to Barracuda format and resolve the unicode issues, check over here :)
August 07 2021
How do i update my moodle to the latest version
September 17 2021
Hi there :) You can find an official guide from Moodle on upgrade here.
September 09 2021
Can we install moodle on "Hostinger Single Web Hosting plan"?
September 20 2021
Hi there, you should be able to install Moodle on the Single plan, however it's likely that you'll run into resource limits quite quickly (recommended memory for Moodle is 1GB). So I'd suggest to look at our Cloud plans instead :)
May 26 2022
Hello, thank you for the tutorial. I would like to proceed with the 1st option (installation through hpanel) but it is not clear how I can modify the link to access to moodle : if for example I want to access it in a subdomain such as "lms.mysite.com" how can I do that? thank you
May 31 2022
Hi there! First, make sure to create a subdomain like so (this will be to make sure the site lms.mysite.tld will be accessible); then when you're installing Moodle, make sure to choose that subdomain from the dropdown. If you ever get stuck, feel free to reach out to our awesome 24/7 Customer Success!
June 10 2022
Thankx for this clear instructions , but is there an article to describe how I can upgrade moodle ? Thank you
July 08 2022
Hey there! At the moment we do not have an article about upgrading Moodle, however you can check the official documentation from their website!?